AI Studio Getting Started Tutorial
Last updated May 31, 2024
1. An Introduction to tracks in the AI Studio
a. Scene track
The length of a scene determines the overall duration of the video. You can adjust the length of a scene by dragging it. This will also modify the corresponding script content (TTS track) for the scene and Avatar.
b. Element track
The element track is located above the scene track and includes all non-avatar items on the canvas. To display multiple elements, click on the 'expand' button. Elements cannot span across scenes.
c. Avatar track
Located above the scene track, the avatar track displays avatars that have been added to the respective scene. Currently, only one avatar can be added to a scene, and avatar elements cannot span across scenes.
d. Text-to-script (TTS) track
The TTS track is located below the scene track. Here you can input a script or upload an audio file for your avatar to speak.
2. How to upload audio to TTS track
Method 1: Add audio using the timeline.
Method 2: Add audio using the script panel.

3. How to add pause in TTS
a. Pauses between script paragraphs.
- Method 1: Add pauses using the timeline.

- Method 2: Add pauses using the script panel.

b.Pauses within the script.
- Click on the ‘clock icon’ to insert a pause
4.How to use ‘auto link’ to match your video clips to the length of your script
When this toggle is on, the length of the scene will automatically adjust to correspond with the length of the script. You will need to press ‘play’ to update changes.

Please note, if you add a new script or delete an existing one, the duration of the corresponding scene will not change (as shown in the following animations).
a. Add a new script

b. Deleting a script
5. Why do I receive a warning popup when submitting?
You may see up to three types of alerts when attempting to submit your video for processing:
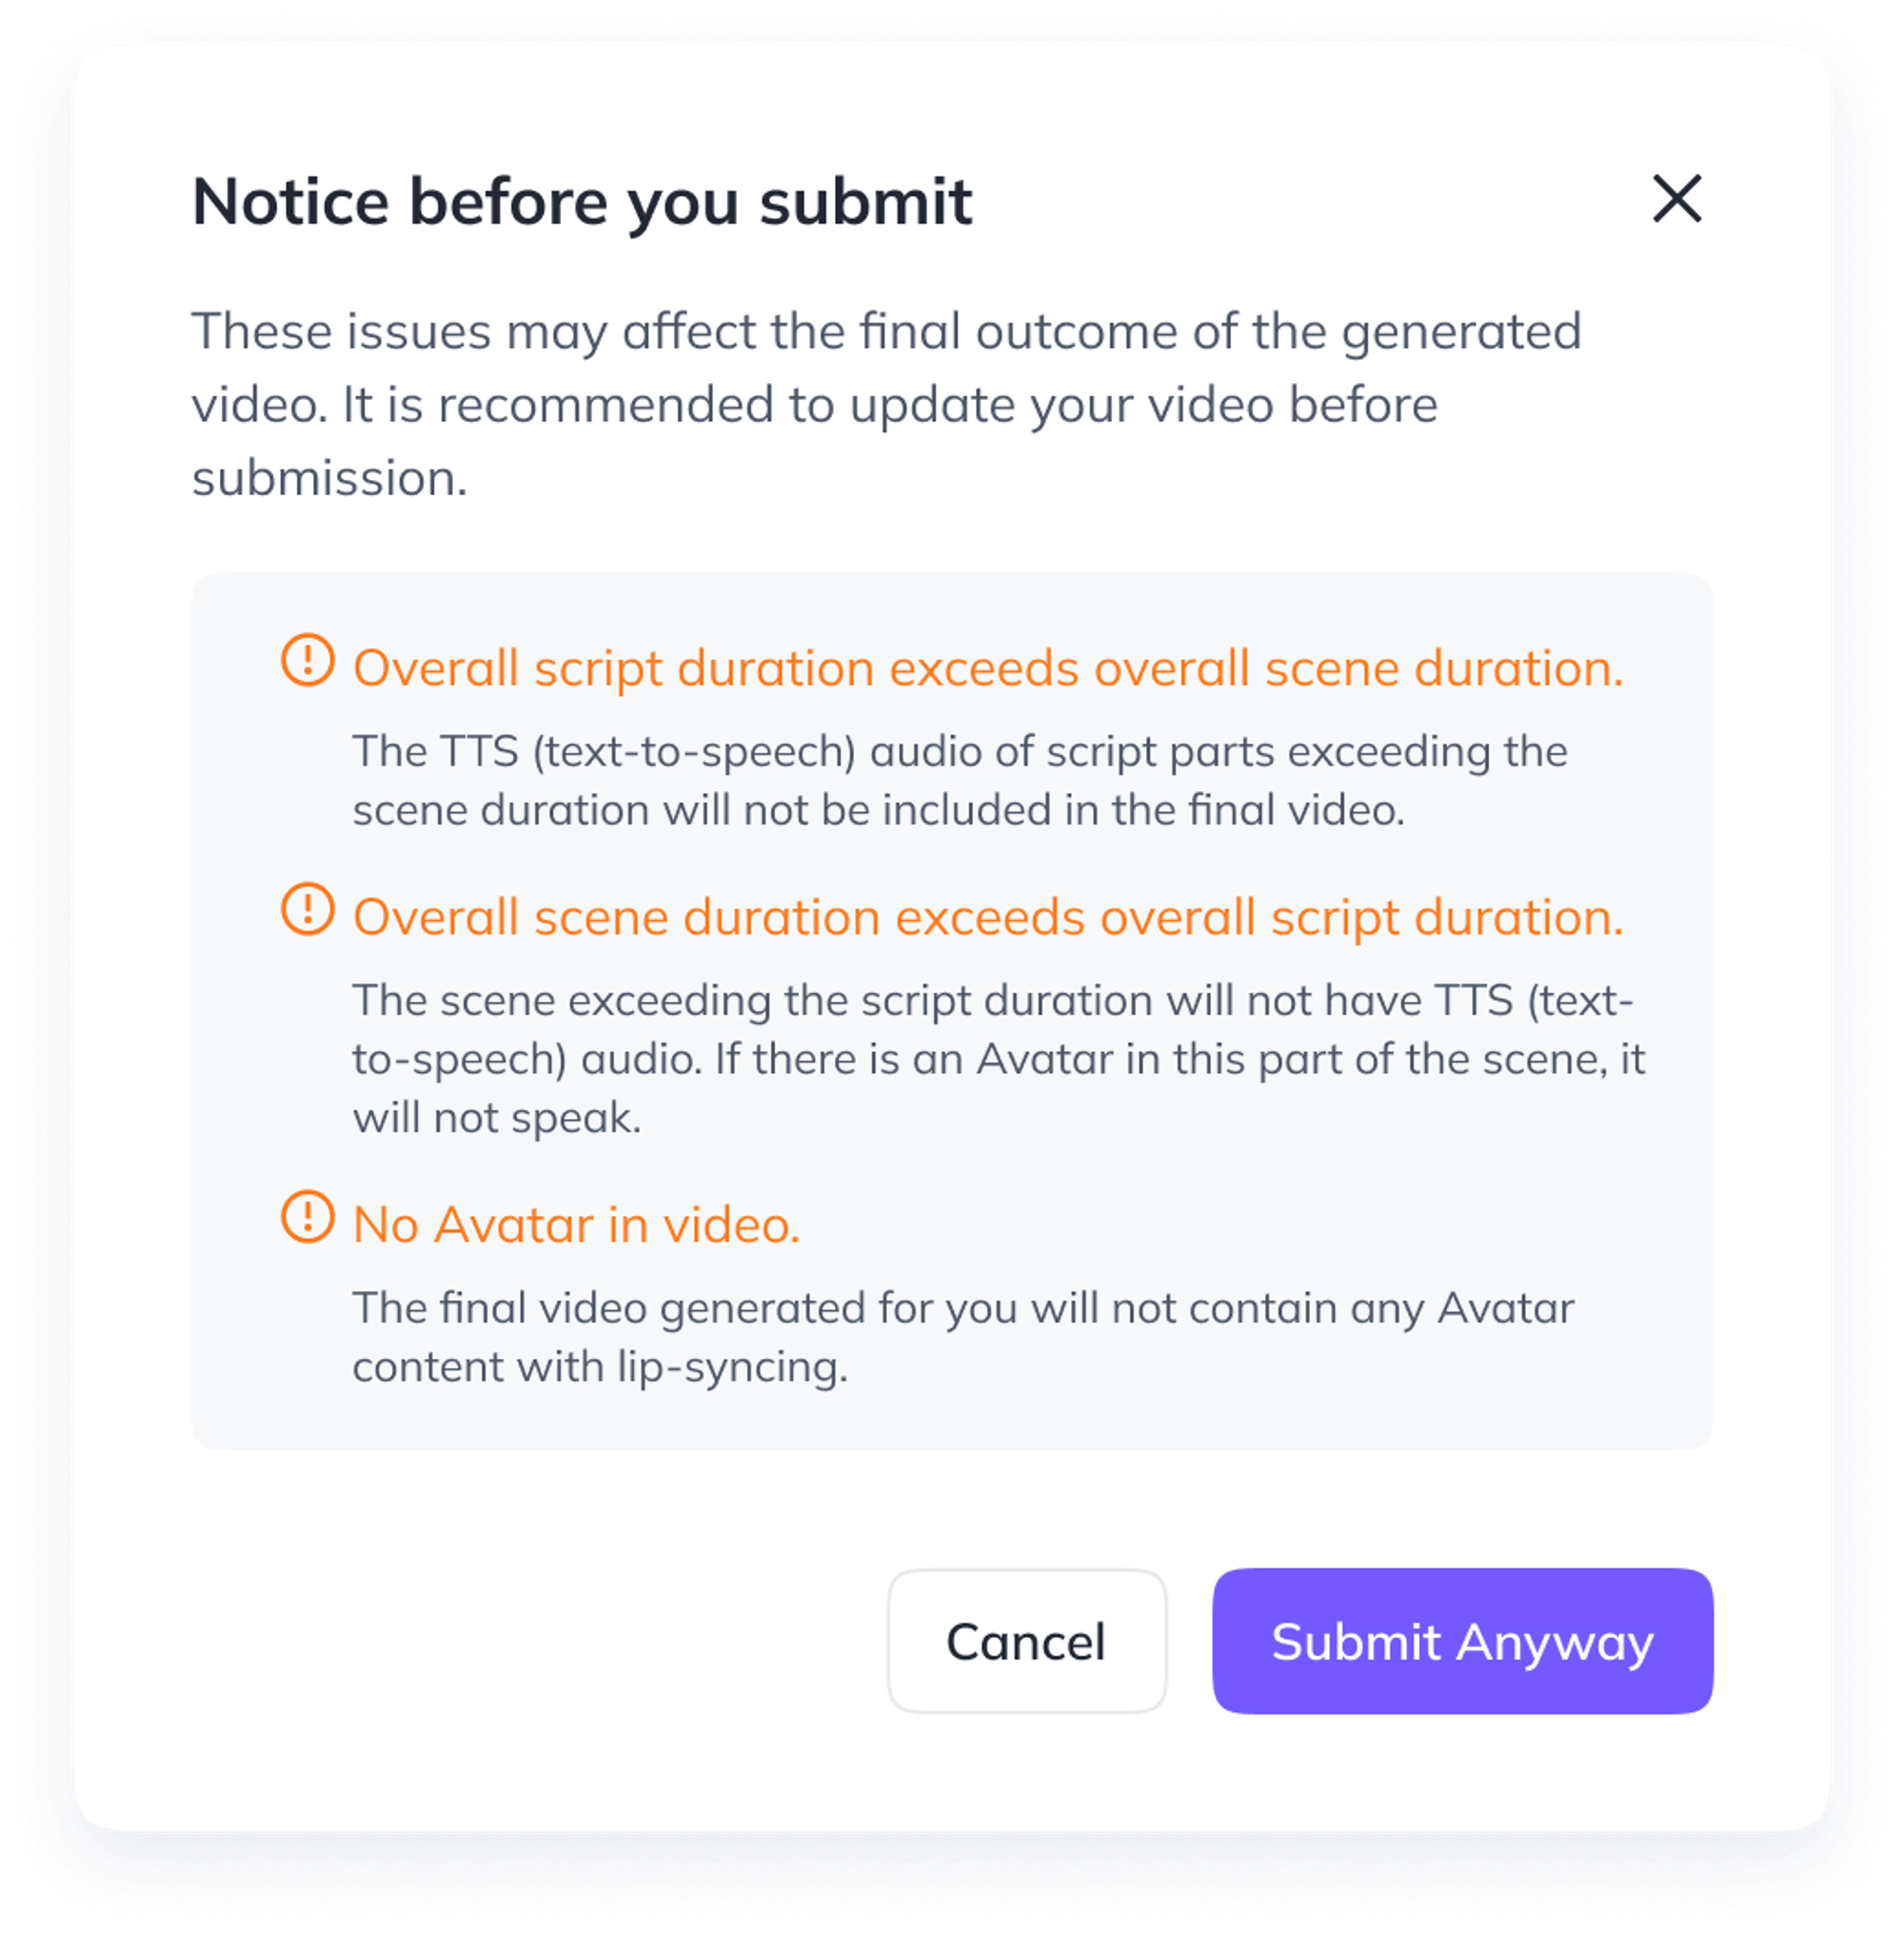
Alert 1: Overall script duration exceeds overall scene duration.
The text-to-speech (TTS) script exceeds the scene duration. This text will not be included in the final video. To include it, you can add additional scenes or extend current ones.
Example
- Video content: The part outlined in red indicates the portion of the script that exceeds the duration of the scene.
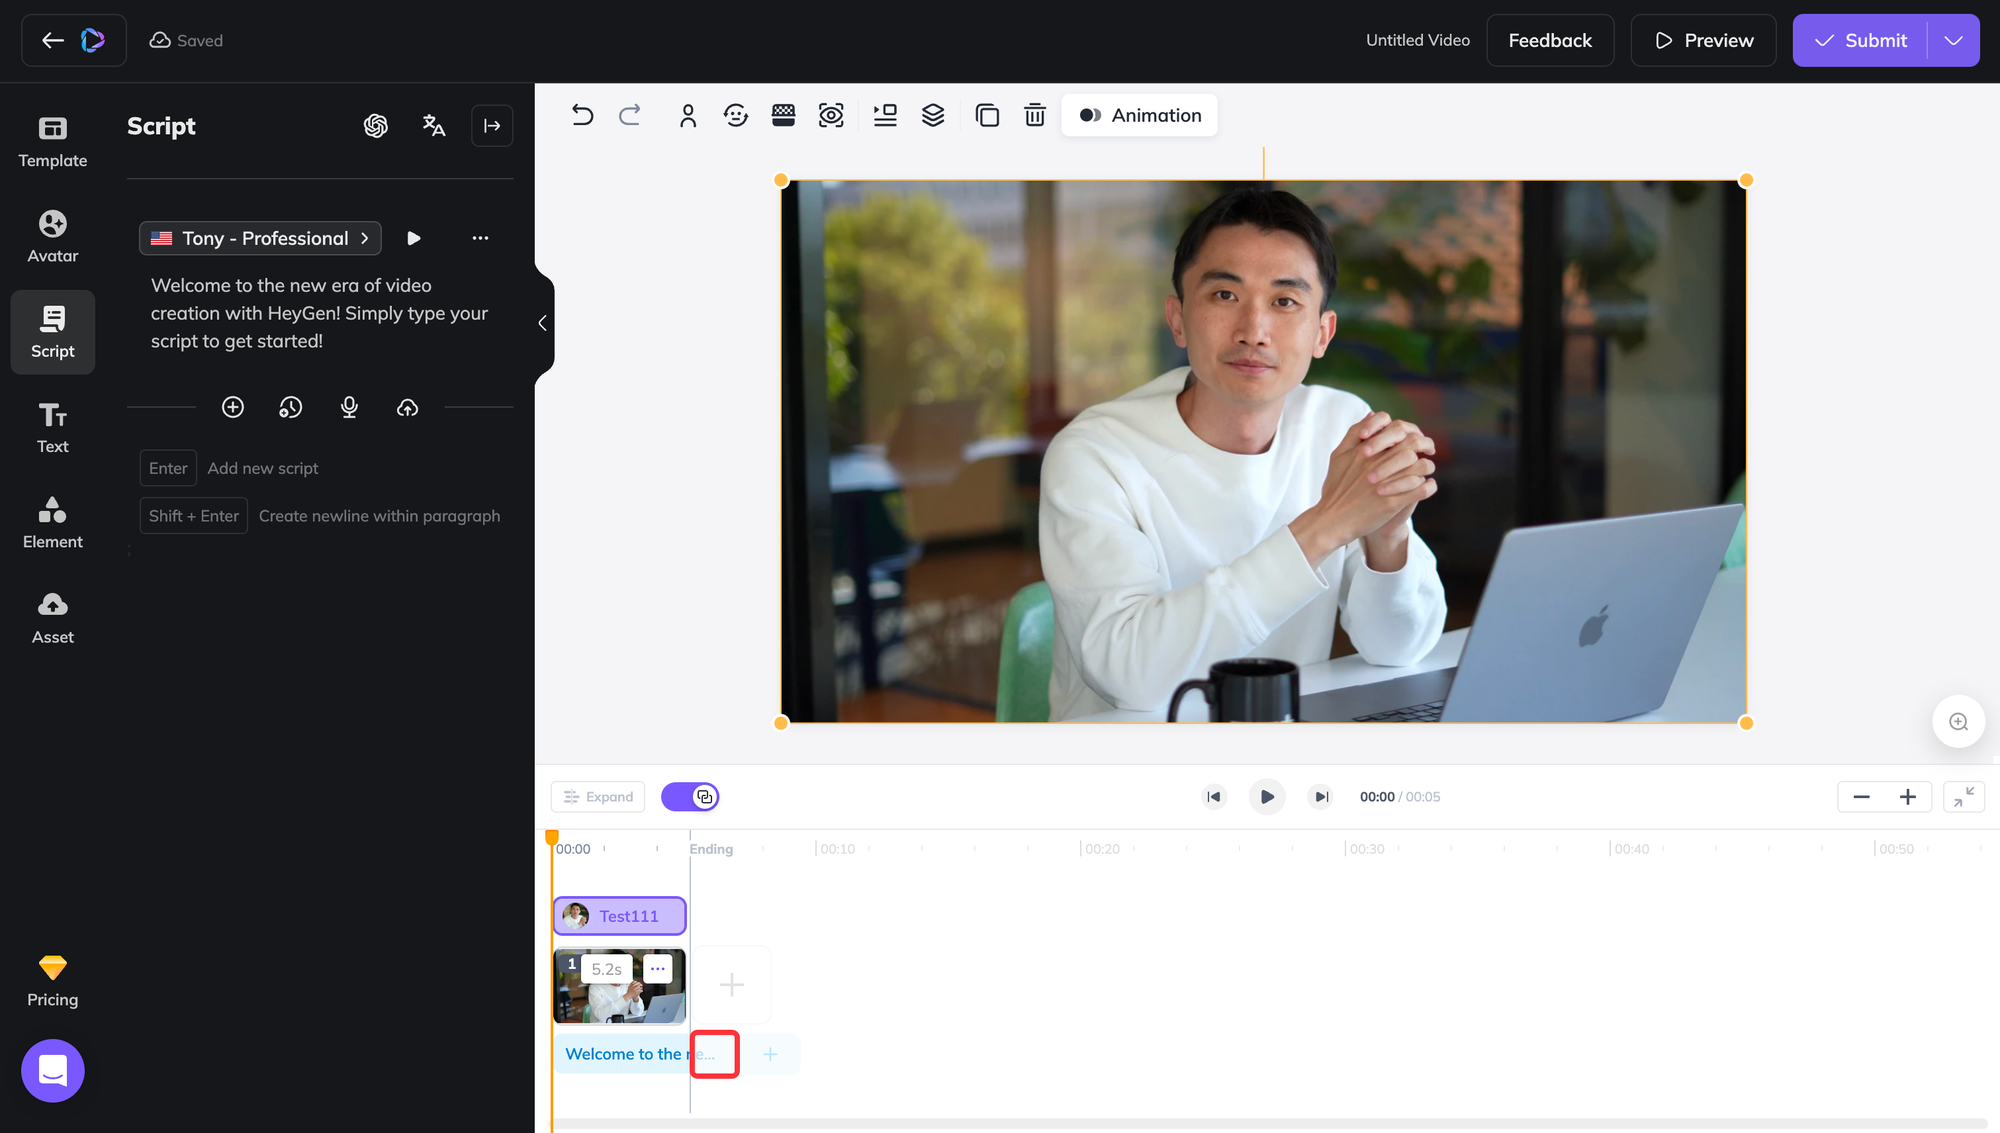
- Generated video: The part of the script in the red outline was not rendered. Alert 1 - Generated video.mp4
Alert 2: Overall scene duration exceeds overall script duration
The scene exceeding the script duration will not have text-to-speech (TTS) audio. If there is an Avatar in this part of the scene, it will not speak.
Example
- Video content: The part outlined in red indicates the portion of the scene that exceeds the duration of the script.
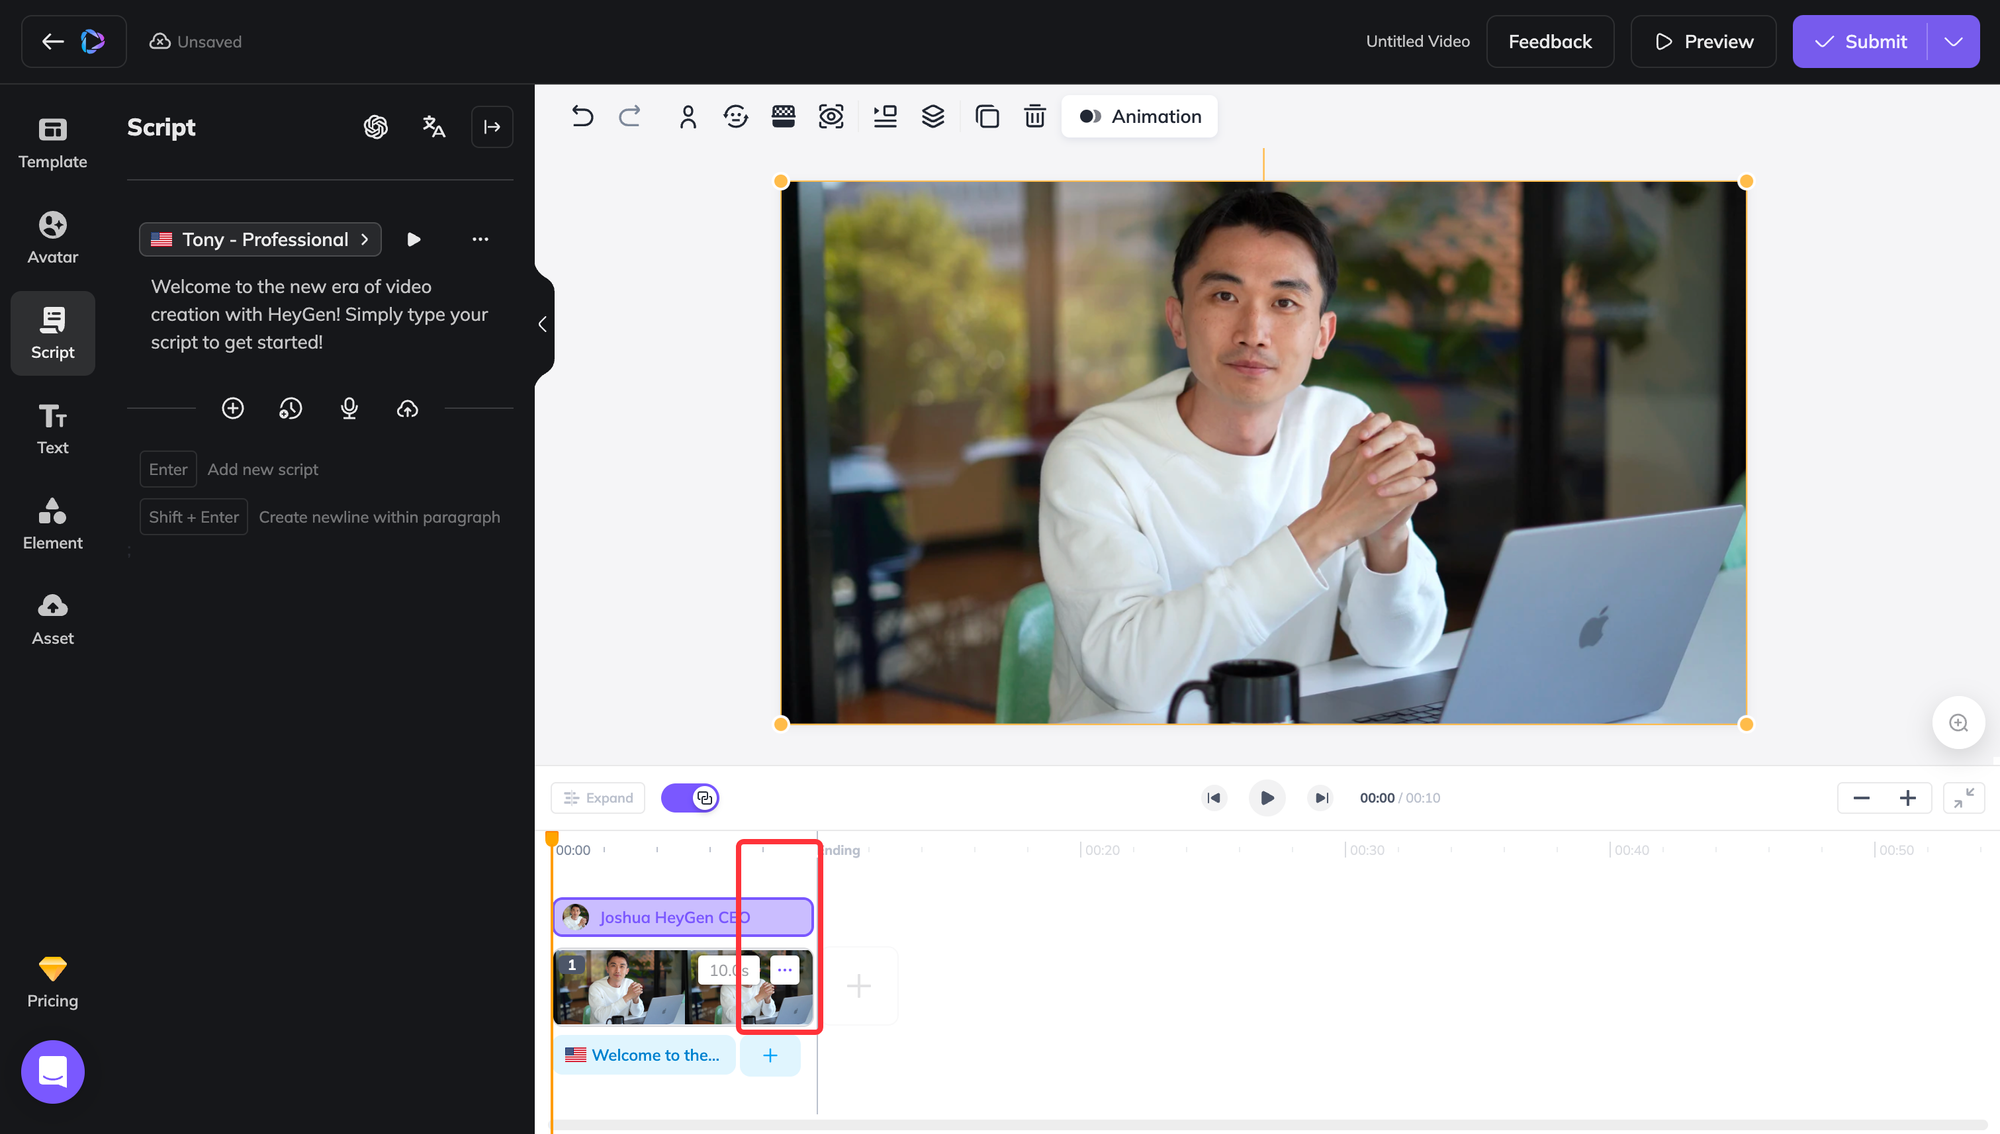
- Generated video: The part within the red outline is where the Avatar does not speak. Alert 2 - Generated video.mp4
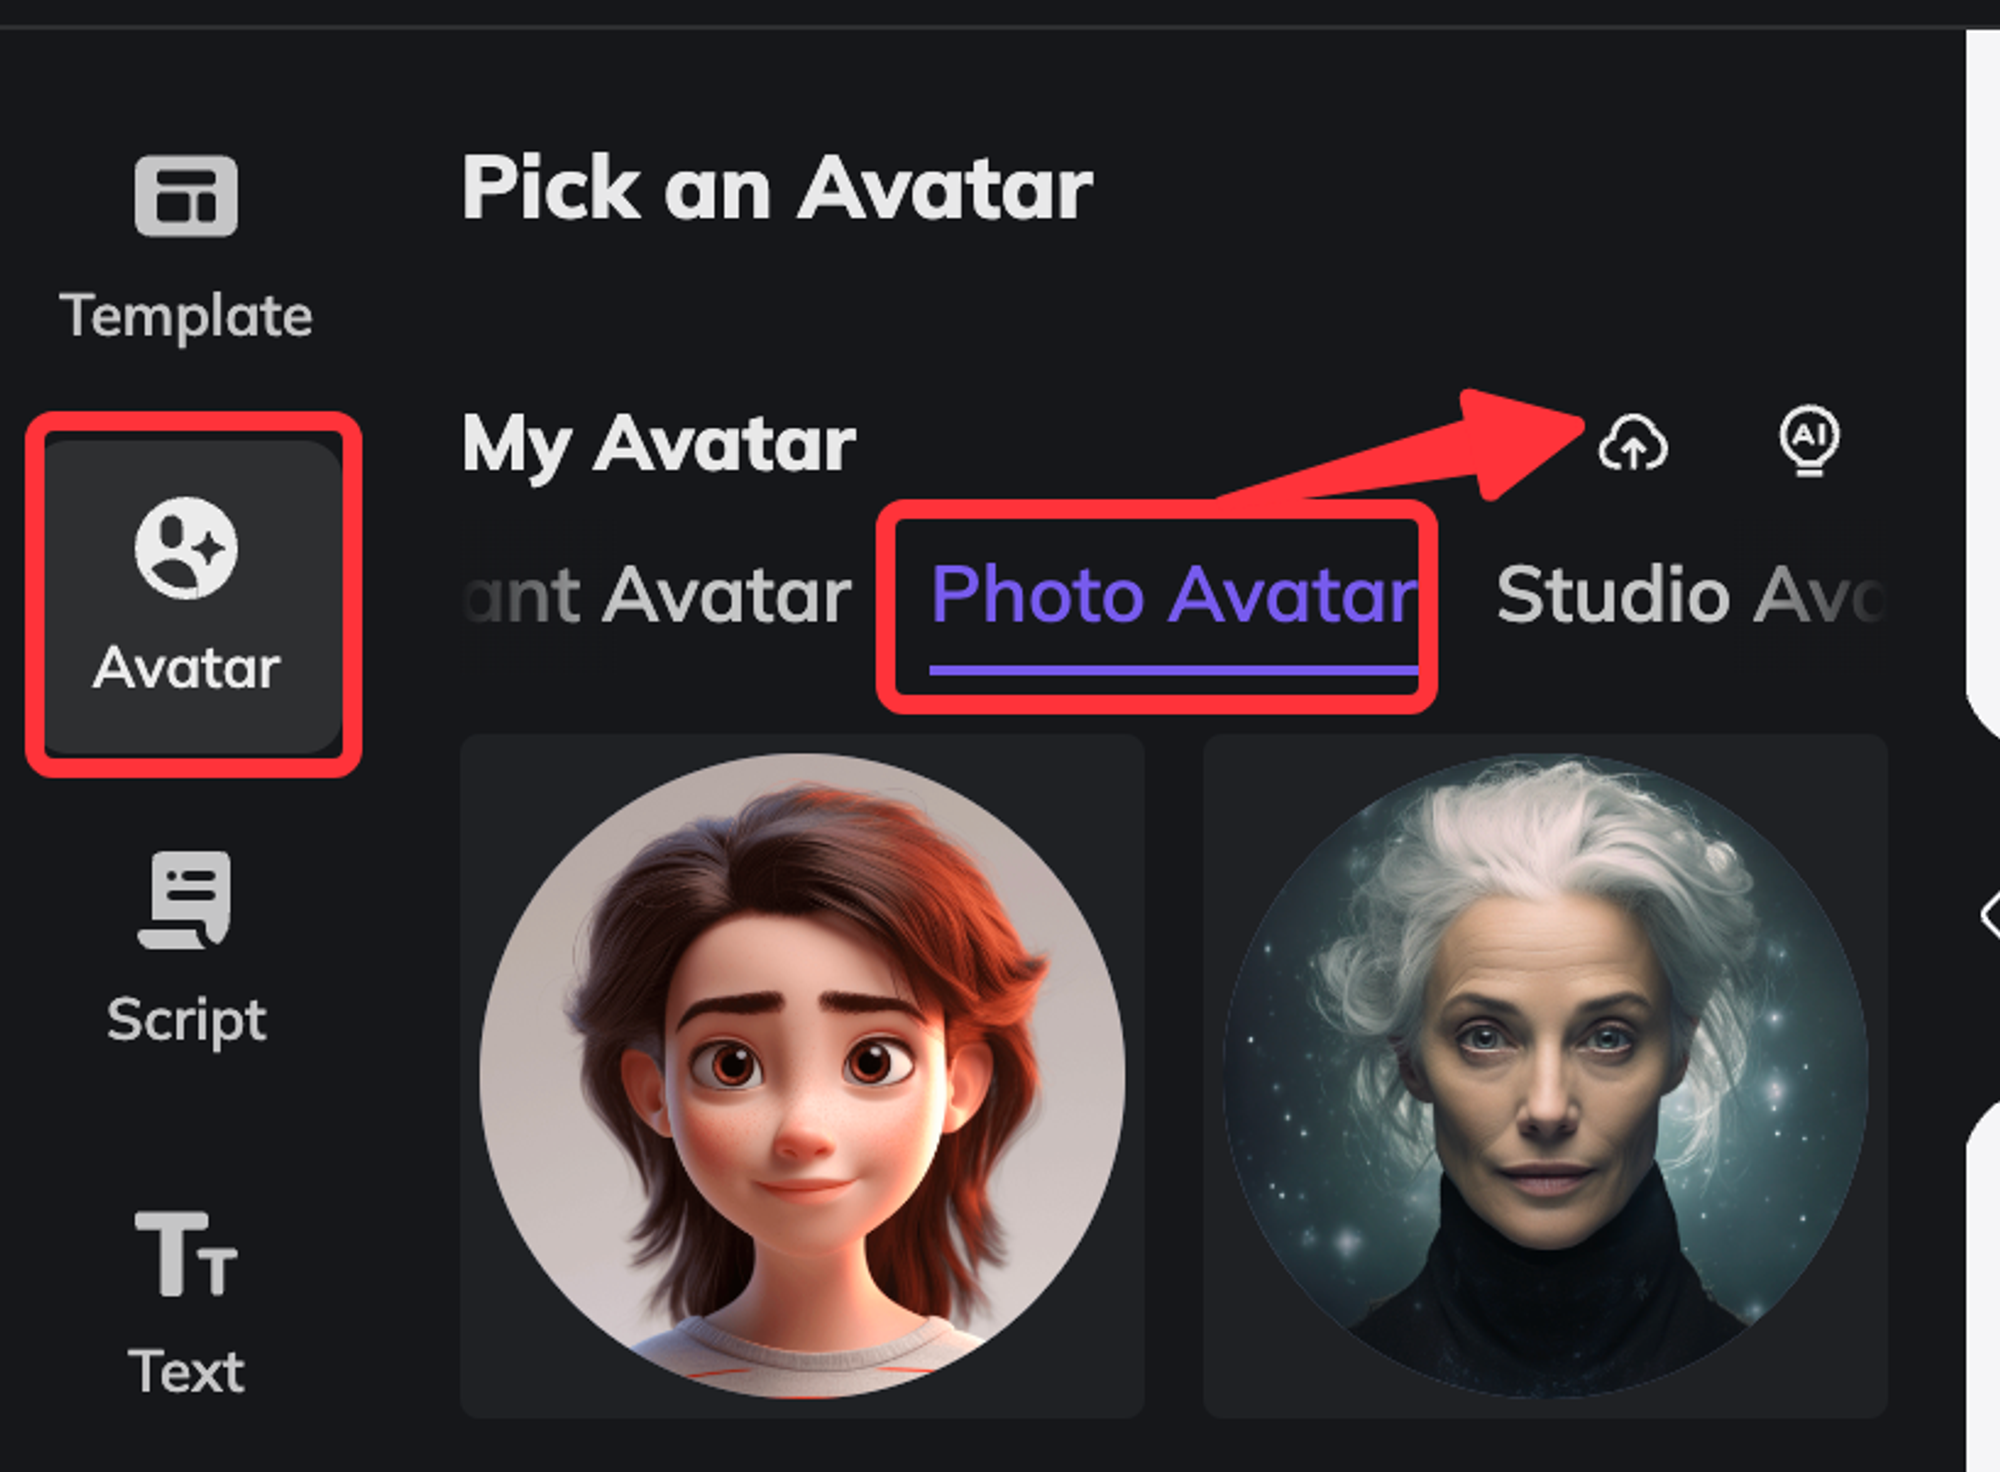
Alert 3: No Avatar in video
The final video generated will not include an Avatar speaking the script.
Note: when using Photo Avatar to create a video, please make sure to upload your photo to the Avatar section. If you upload your photo to the Assets section and add it to the canvas instead, your final video will not contain a lip-syncing Avatar.
These alerts are designed to help with the video creation process. If you intended to create a video without an Avatar or with varying scene and script lengths, feel free to submit your video for processing!
If you encounter any issues while using the studio, please contact support@heygen.com for assistance. Thanks!