Guide
Last updated March 5, 2025
Events let you trigger emails when something happens in an external platform.
About events
Events represent a payload of data that can be used to trigger emails. They can be sent to Loops with the API or via an integration .
Events are used to trigger emails in a loop and can contain personalized data for each email.
Creating events
Events can be created automatically or manually in several ways. As well as specifying a name, you can also create event properties with each of these methods.
Automatically by sending an event
You can create an event by sending an event with a new event name.
For example, creditWarning here is a new event. This request will create a new event in your account.
{ "email": "chris@loops.so",
  "eventName": "creditWarning",
  "eventProperties": {
    "creditsPurchased": 1000,
    "creditsUsed": 903,
    "accountName": "Loops"
  }
}
Manually from the Events page
Navigate to the Events page to create an event manually.

Manually from an Event trigger node
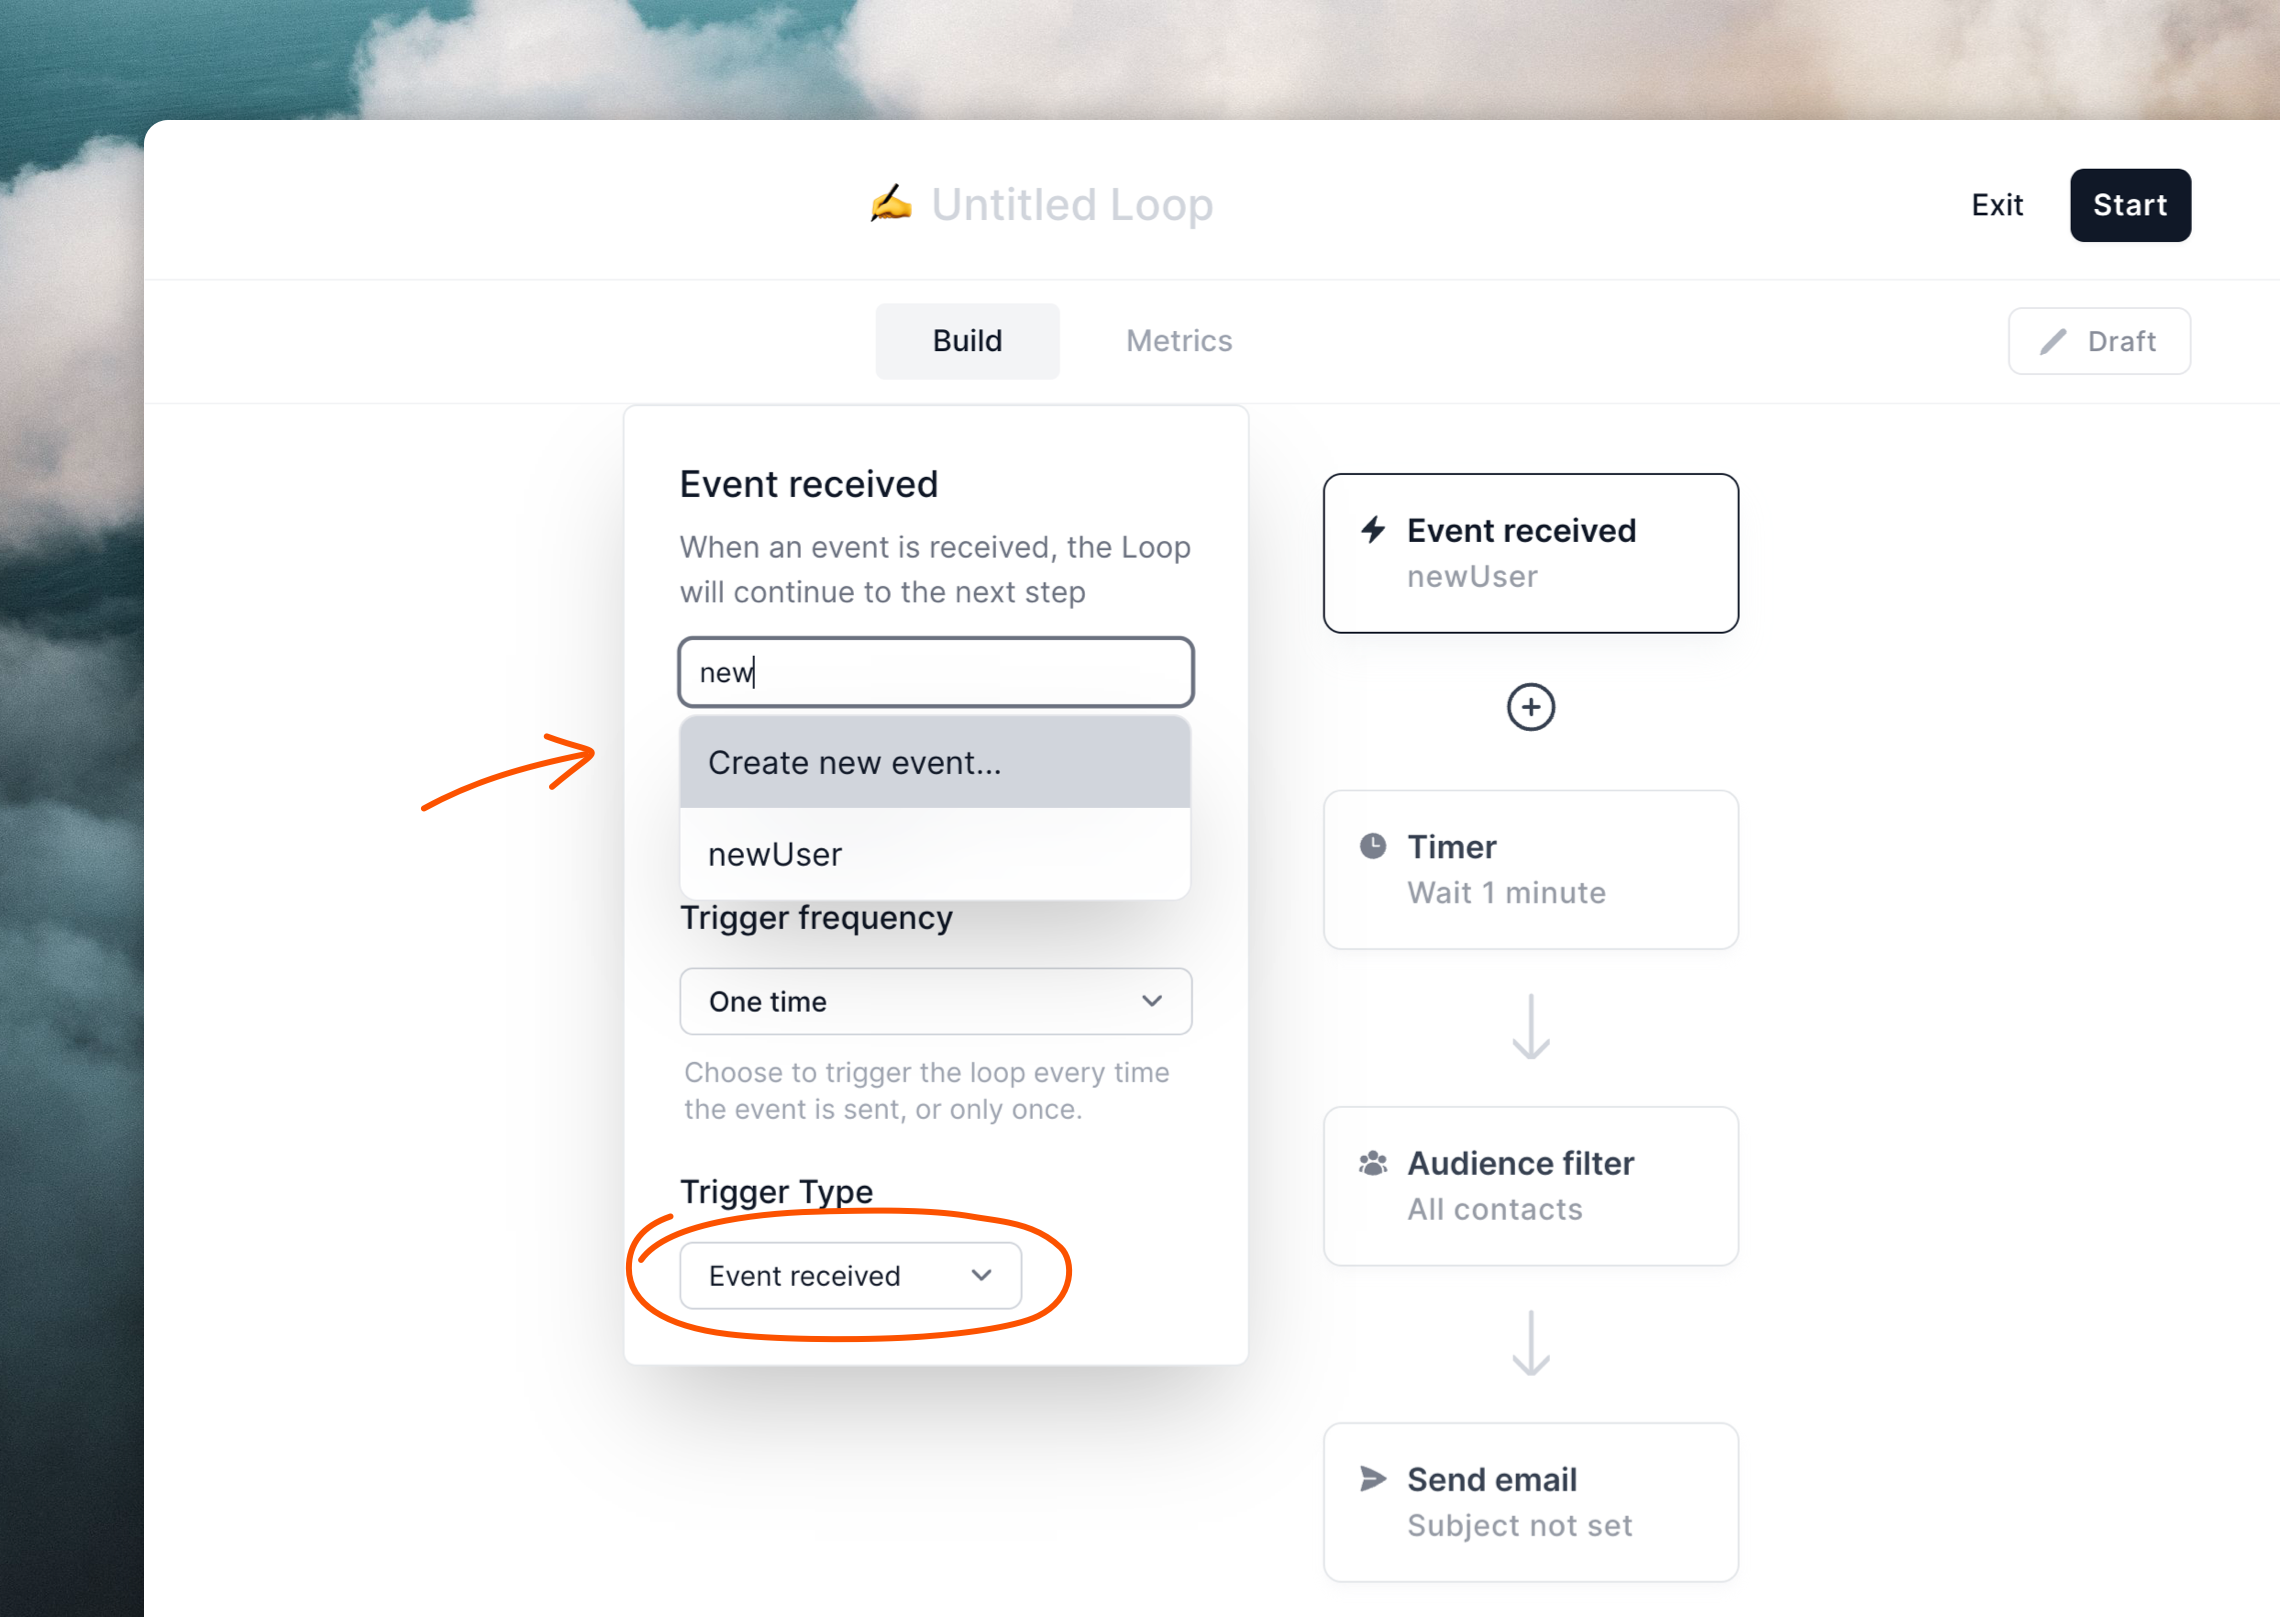
When building a loop , use the Event received trigger node to create an event (see below).
Specifying an event for a Loop
You can use events to trigger email sending within loops.
When creating or editing a loop, select Event received in the "Trigger Type" dropdown.
Type in the name of a new event or start typing the name of an existing event, then select from the dropdown.
Sending events
Now you have events set up in your Loops account, you can start sending events using the API or integrations.
Sending events with the API
Using the API, send events to the Send event endpoint :
POST https://app.loops.so/api/v1/events/send
All that's required is an email or userId to identify the contact, plus the eventName.
{ "email": "sam@loops.so",
  "eventName": "planUpgrade"
}
The eventName can either be an existing event in your account or a new event name.
If a contact is not found with the provided email or userId, a new contact will be created.
You can include contact properties in the request, which will be saved onto the contact. These contact properties can be used in emails to your contacts or for filtering and segmenting your audience .
{ "email": "sam@loops.so",
  "eventName": "planUpgrade",
  "firstName": "Sam",
  "favoriteColor": "red"
}
To provide your emails with event-specific data, include event properties in the request. Read more about event properties
{ "email": "sam@loops.so",
  "eventName": "planUpgrade",
  "firstName": "Sam",
  "favoriteColor": "red",
  "eventProperties": {
    "newPlan": "Pro",
    "oldPlan": "Basic",
    "planPrice": 29,
    "isLifetime": false,
    "updateDate": "2024-03-07T10:09:23Z"
  }
}
Sending events via an integration
Many of our integrations also support sending events, giving you options to send events without building with our API.
Viewing and editing events
In your Loops Settings the Events page shows the list of your different events, including how many times they've been sent. Counts are updated hourly.
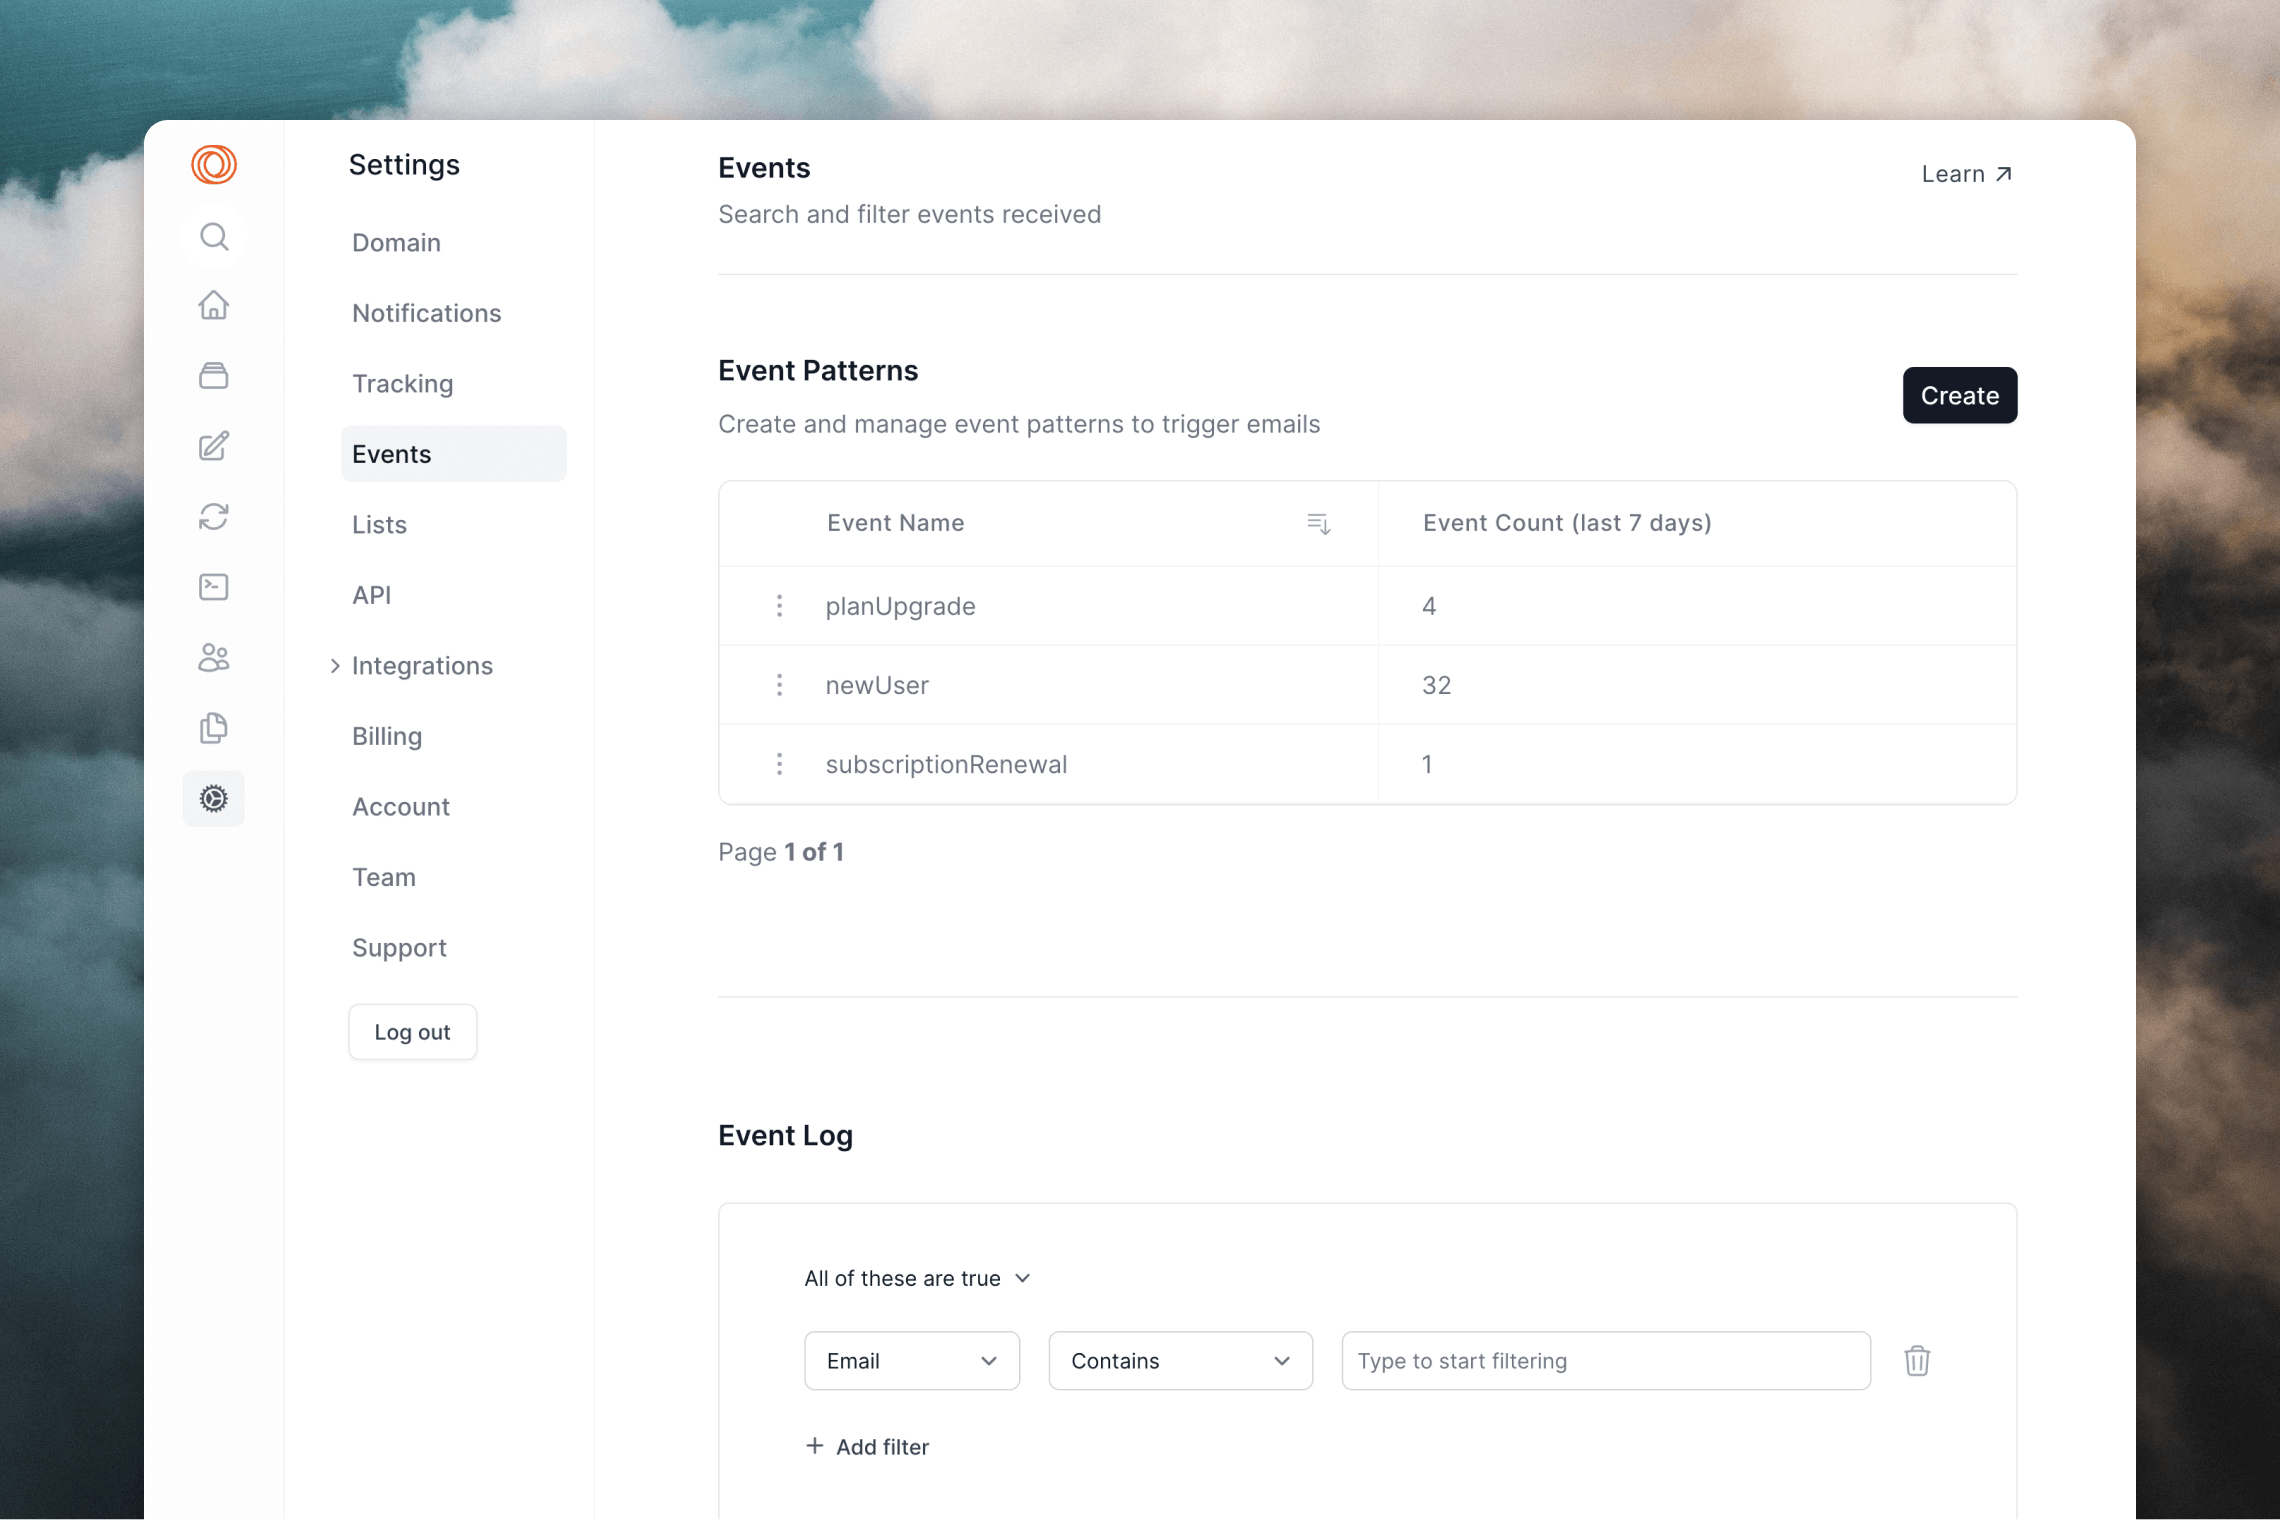
To edit event properties, click on an event. (You can also edit events by selecting "Edit properties" in the Loop builder's event trigger popup.)

Events cannot be deleted.
Below the list of events, you can see the event stream for your account. This includes events sent to us via the API and any of our integrations .
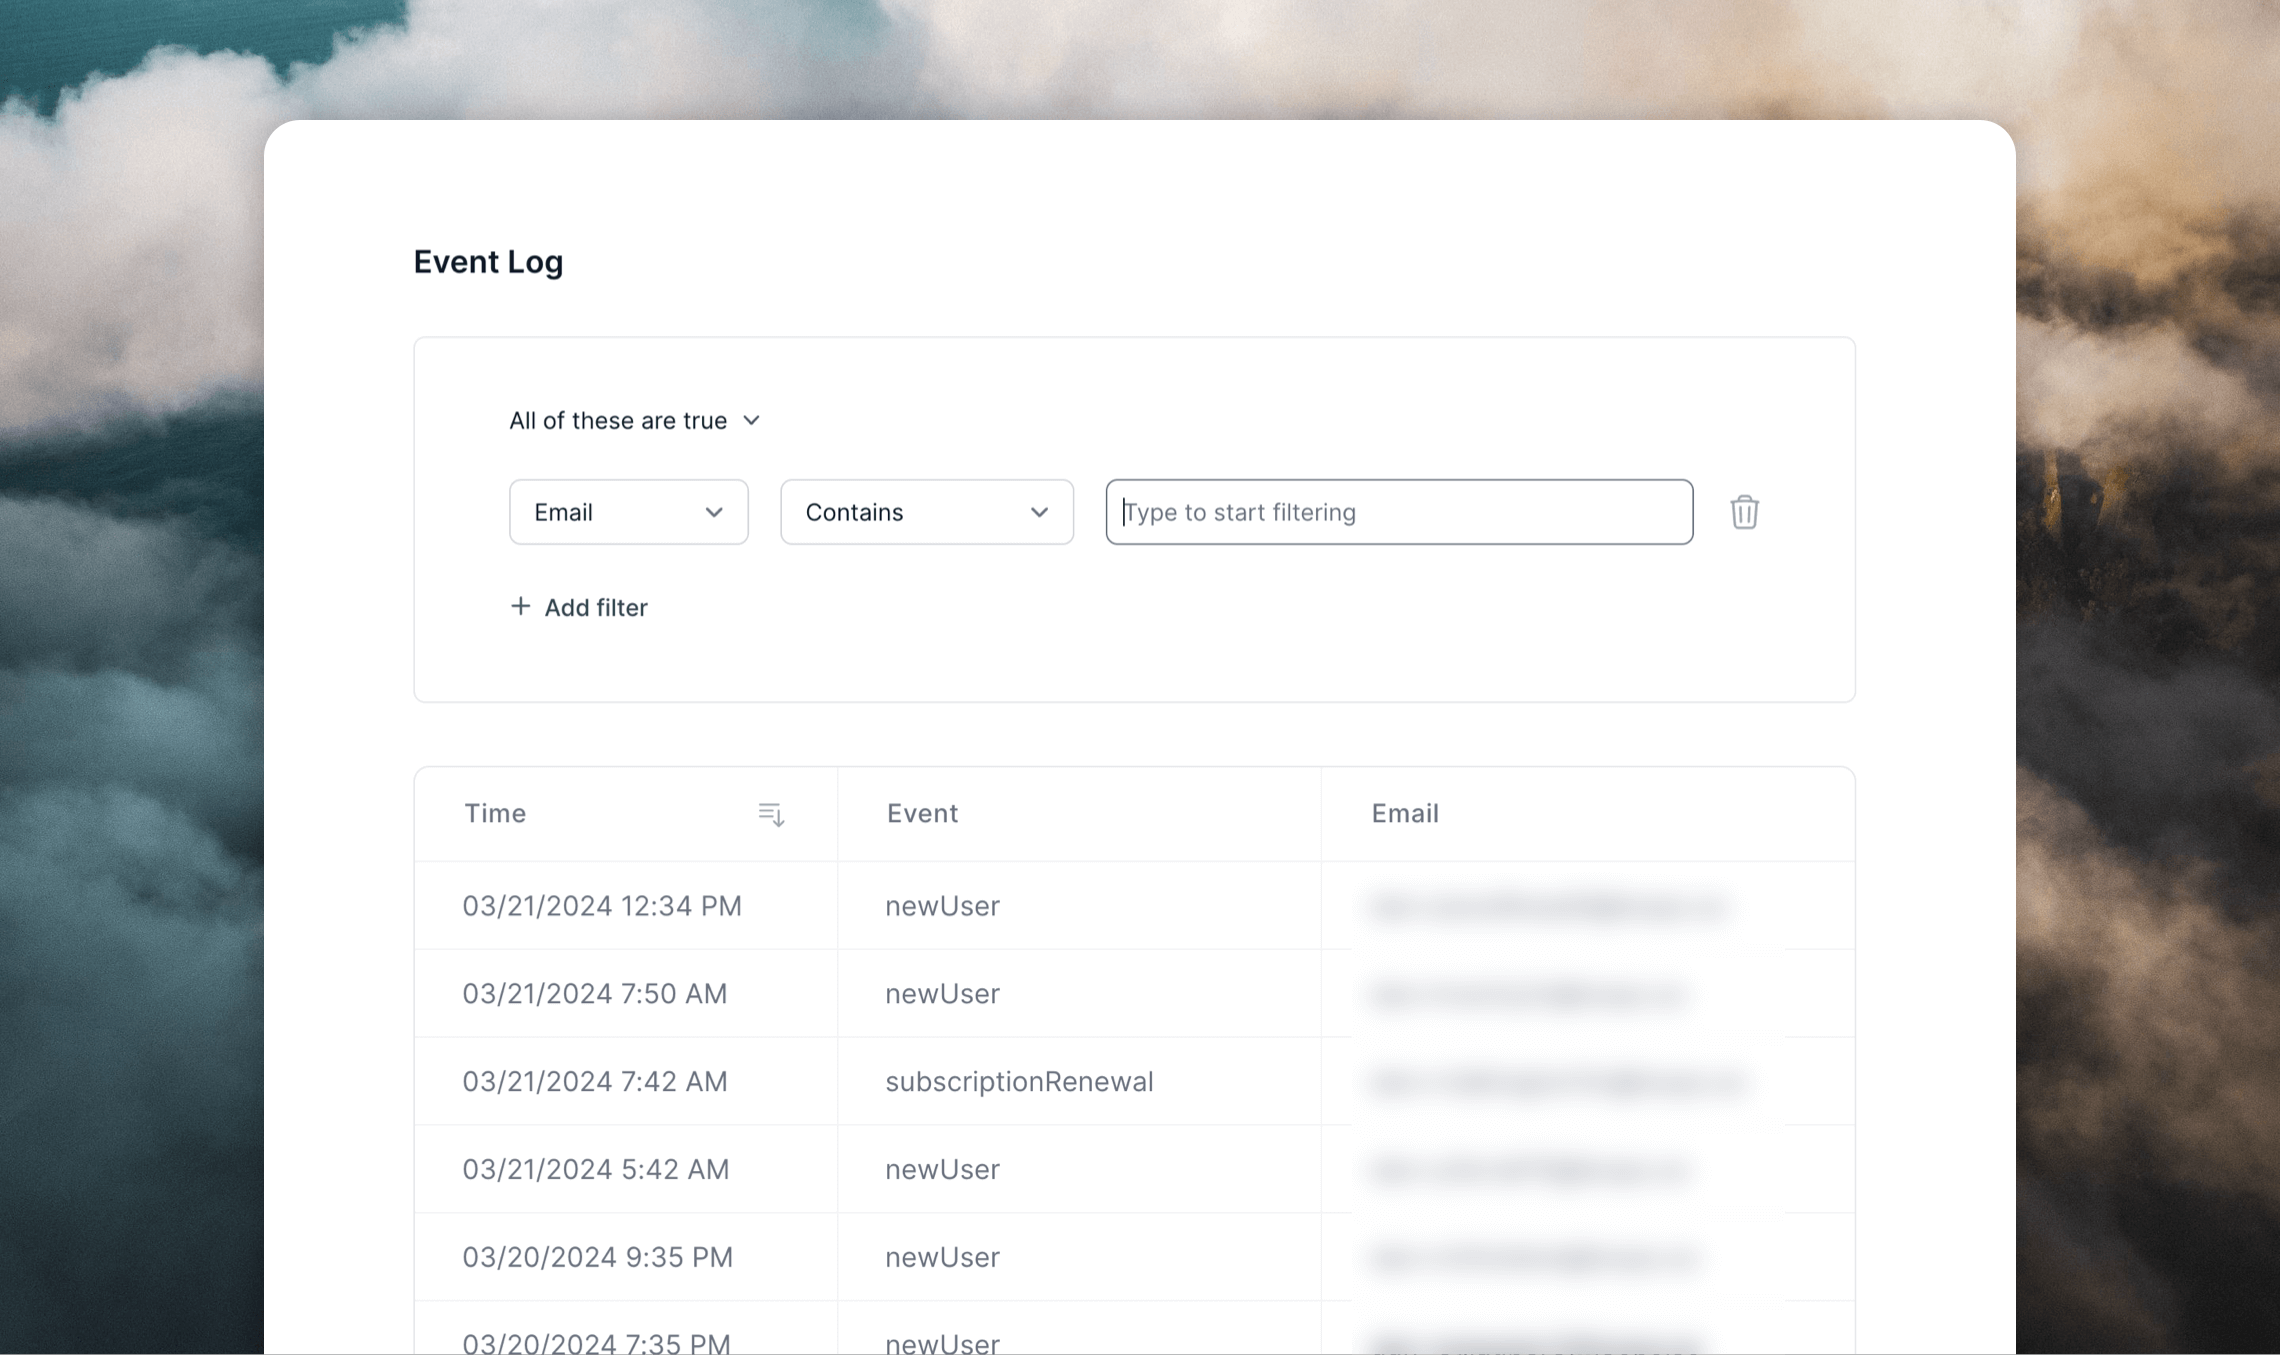
You can sort your events either by email, period of time or event name. You can even create complex segments to view events through a period of time by a single user.
Testing events
You can test events by sending to email addresses with @example.com and @test.com domains (for example user1@example.com and user2@example.com).
Events will fire as normal but emails will not be sent to @example.com or @test.com email addresses, making this a good way to test how events are working in your account without affecting your sending domain’s reputation.