Report Submission
Last updated April 9, 2026
Delegate Reporting Submission in Readily brings teams together by centralizing all reporting in one shared space, eliminating the confusion of scattered emails and disconnected threads. It streamlines the submission process, making it easier to manage the natural back-and-forth that comes with completing reports collaboratively. With a single source of truth, everyone stays aligned on what needs to be submitted and when. Automated notifications further support the team by reducing missed reports and keeping work moving forward smoothly.
1. Accept Your Invite to Readily
You will receive an email invitation from Readily.
Steps:
- Open the email invitation
- Click Accept Invite
- Create your account (or log in if already registered)
- You will be redirected into the Readily platform
2. View Report Submissions
Once logged in, you will land on your dashboard.
- Navigate to Report Submissions
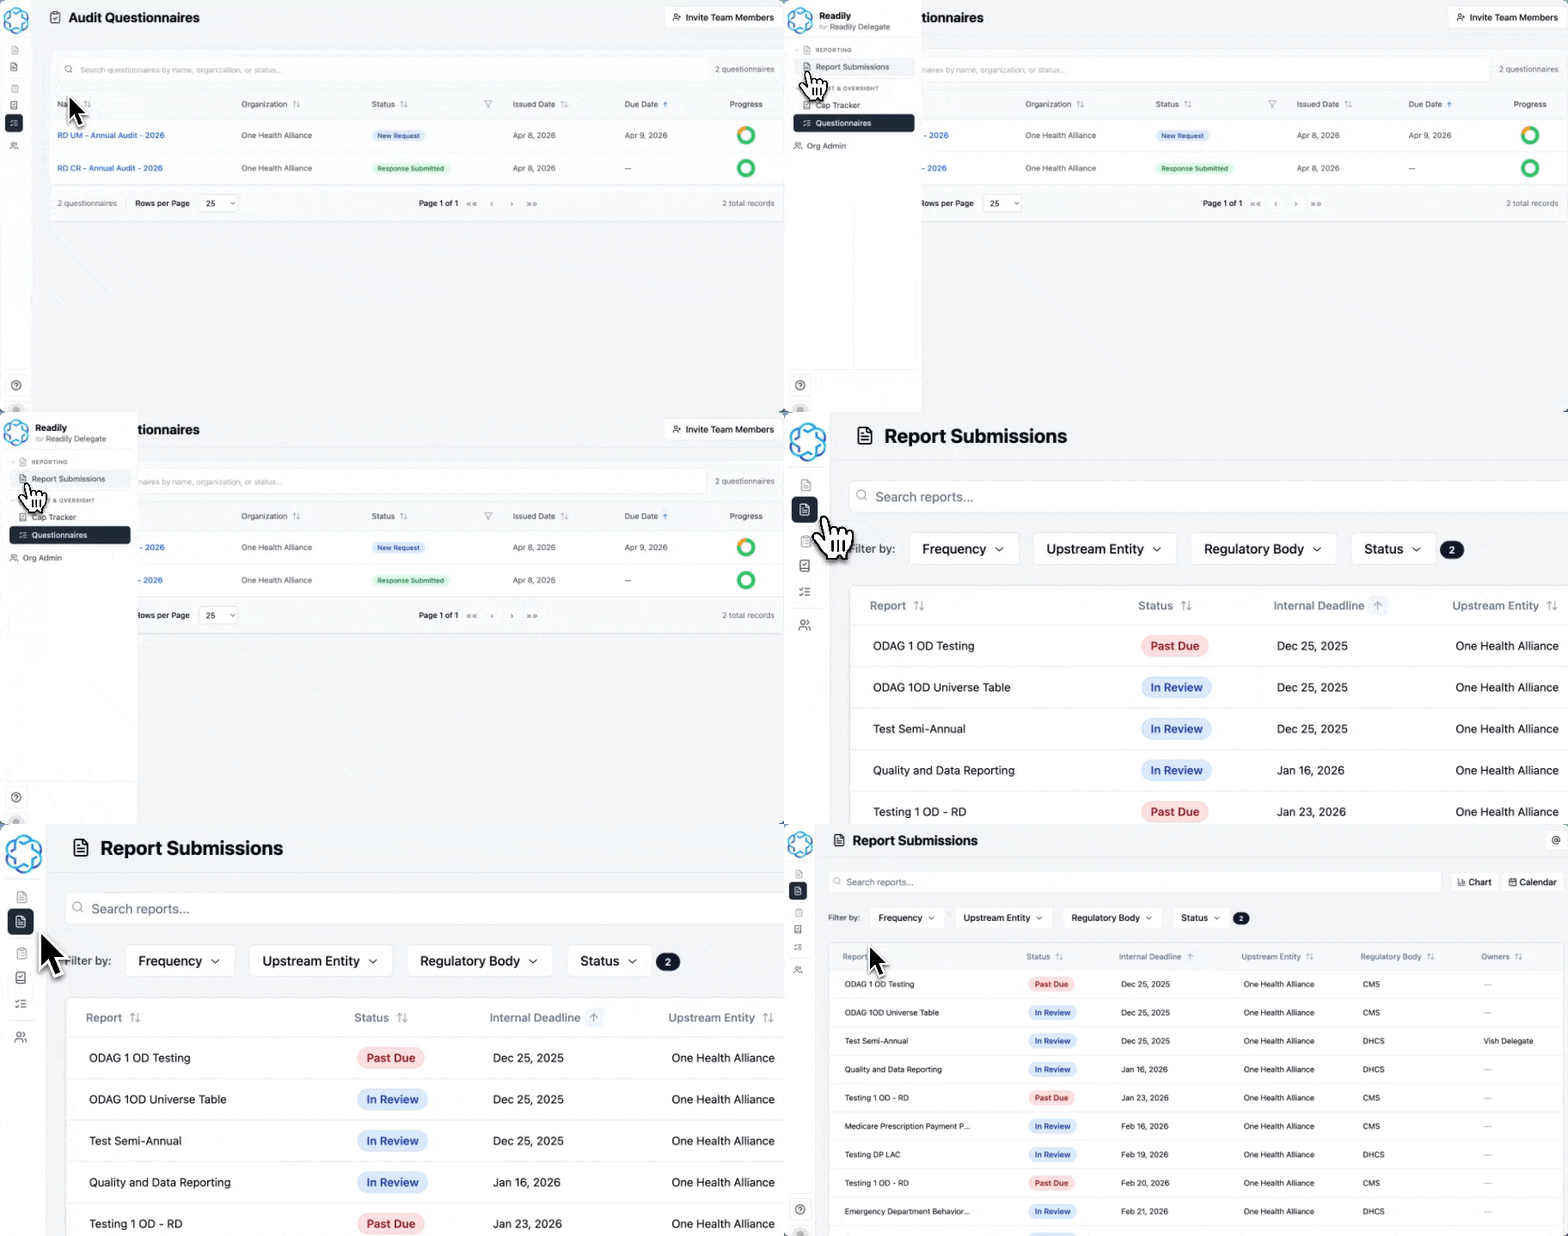
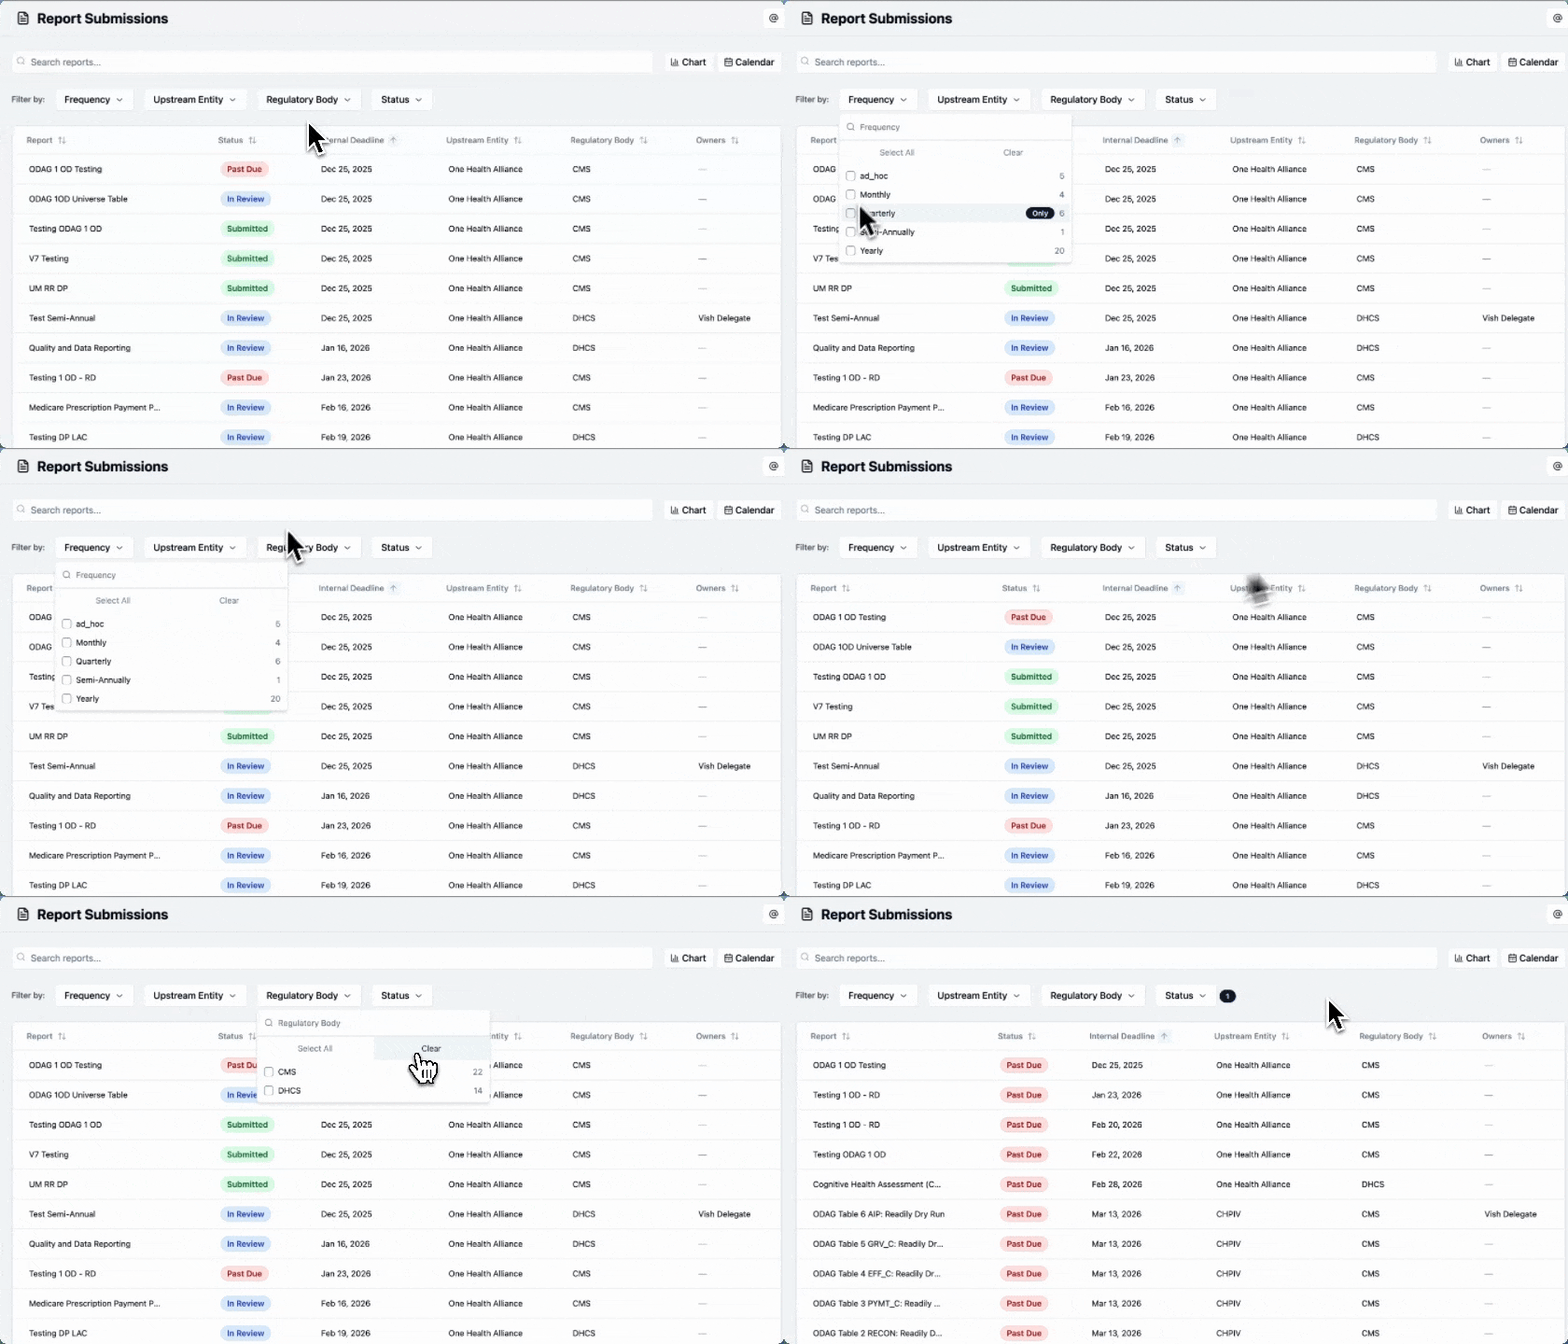
- Use the search bar or filters to bring up the reports that are most relevant:
- Frequency
- Upstream Entity
- Regulatory Body
- Status
- When looking for something specific (Such as an Attestation), typing "Attestation" in the search bar is one of the quickest tips
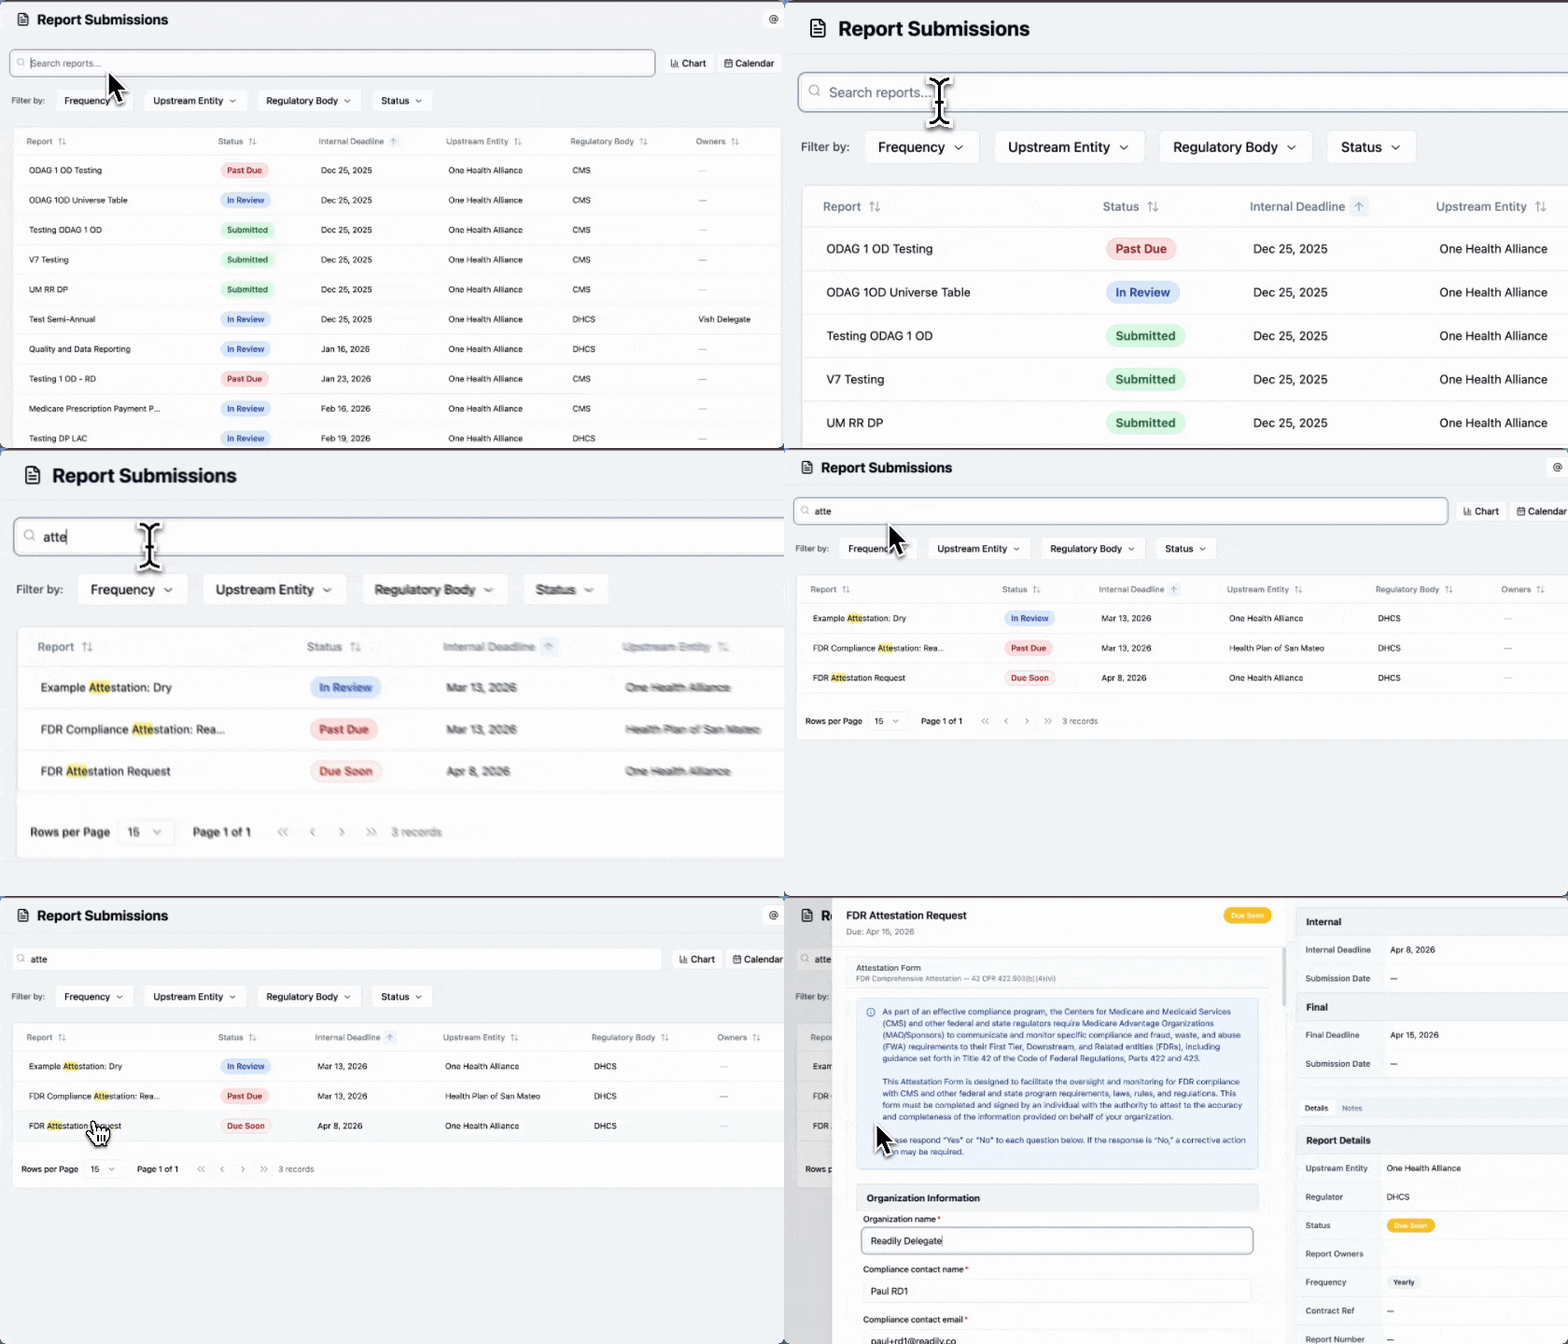
3. Open and Review an Attestation
Steps:
- Click on the report name
- The attestation form will open
- Review:
- Instructions and regulatory context
- Due date
- Internal and final deadlines (right panel)
- Report details (entity, regulator, frequency)
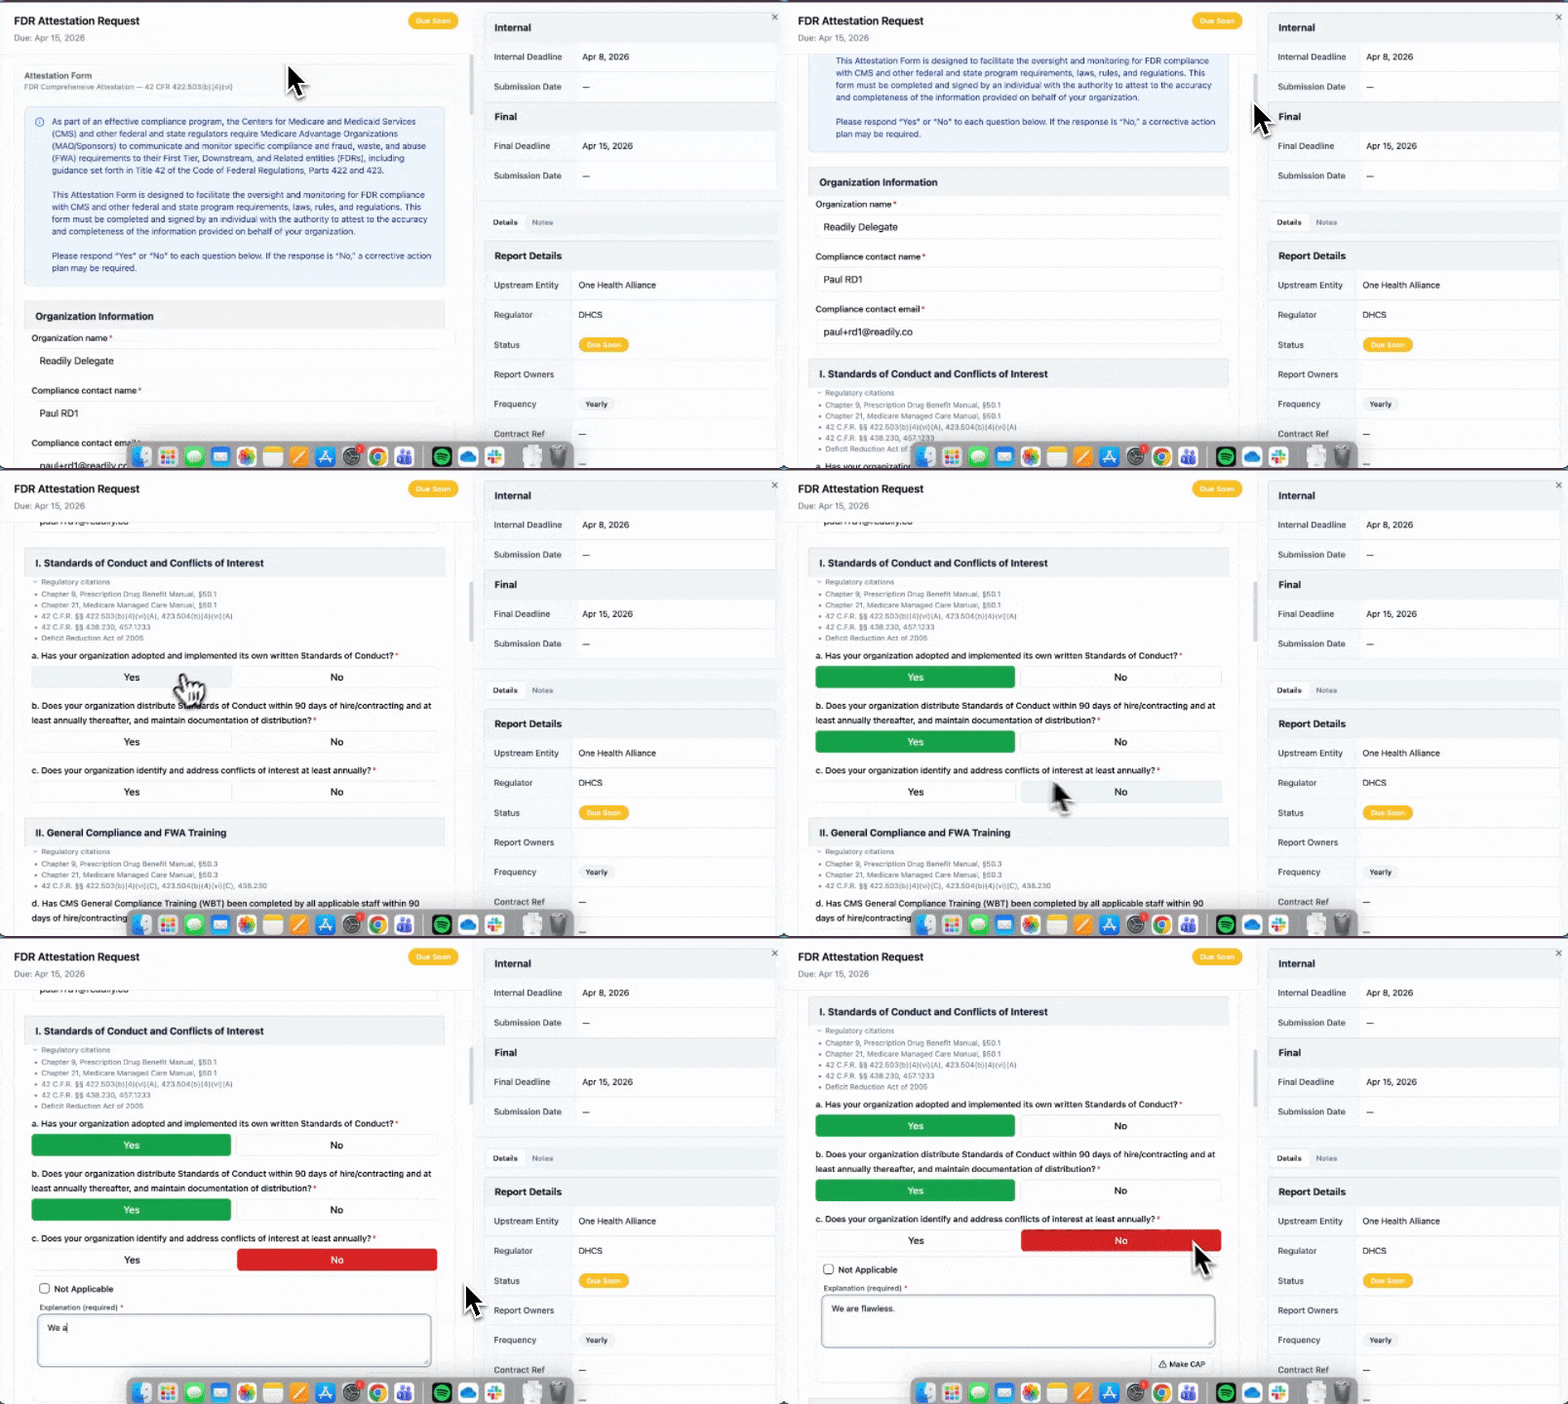
4. Complete the Attestation (Yes / No Responses)
Steps:
- Scroll through the attestation questions
- Review the questions and attest “Yes” or “No” for each requirement
If you select “No”:
- You are required to provide an explanation
- Include clear details on:
- Why the requirement is not met
- Any corrective actions (if applicable)
Best practice:
- Be specific and as complete as possible to reduce follow-up requests
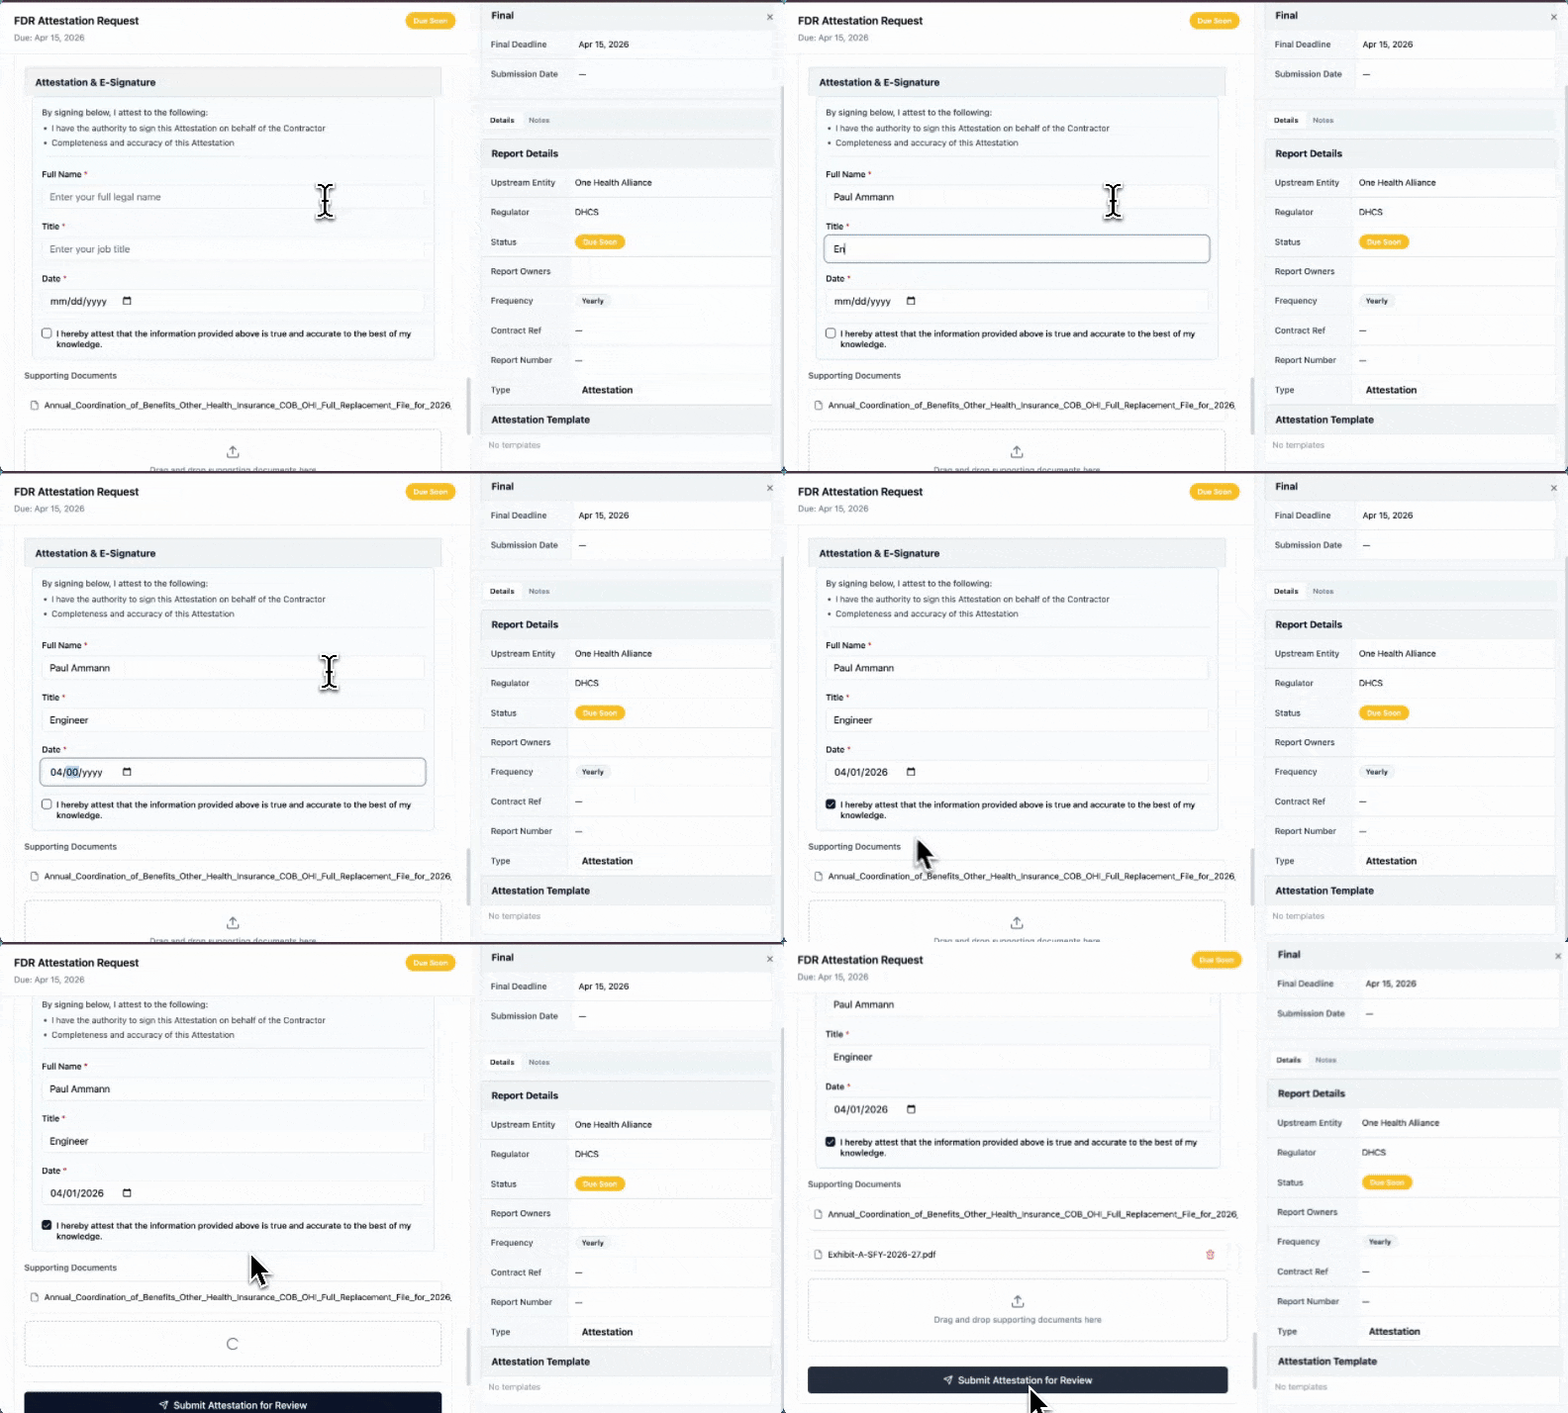
5. Attest, E-Sign, and Submit
(Scroll down through the attestation questions to access this section)
Steps:
- Complete the Attestation & E-Signature section:
- Full Name
- Title
- Date
- Check the certification box confirming accuracy
- Upload any supporting documents (if required)
- Click Submit
After Submission
- Status will update to Submitted or In Review
- Your upstream organization may follow up if clarification is needed
Tips for Success
- Monitor Due Soon and Past Due items regularly
- Complete all required fields before submitting
- Provide clear explanations for any “No” responses
- Submit before the Final Deadline to avoid compliance issues