HeyGen SSO Tutorial (Azure)
Last updated May 31, 2024
Function Introduction
Single Sign On (SSO) allows users to log in once and access all mutually trusted application systems in a multi-application environment. Once users enable this feature and complete the configuration in the management backend, they can choose to directly log in to Heygen using SSO
Setup Instruction
Step 1 - Create A New App in Azure
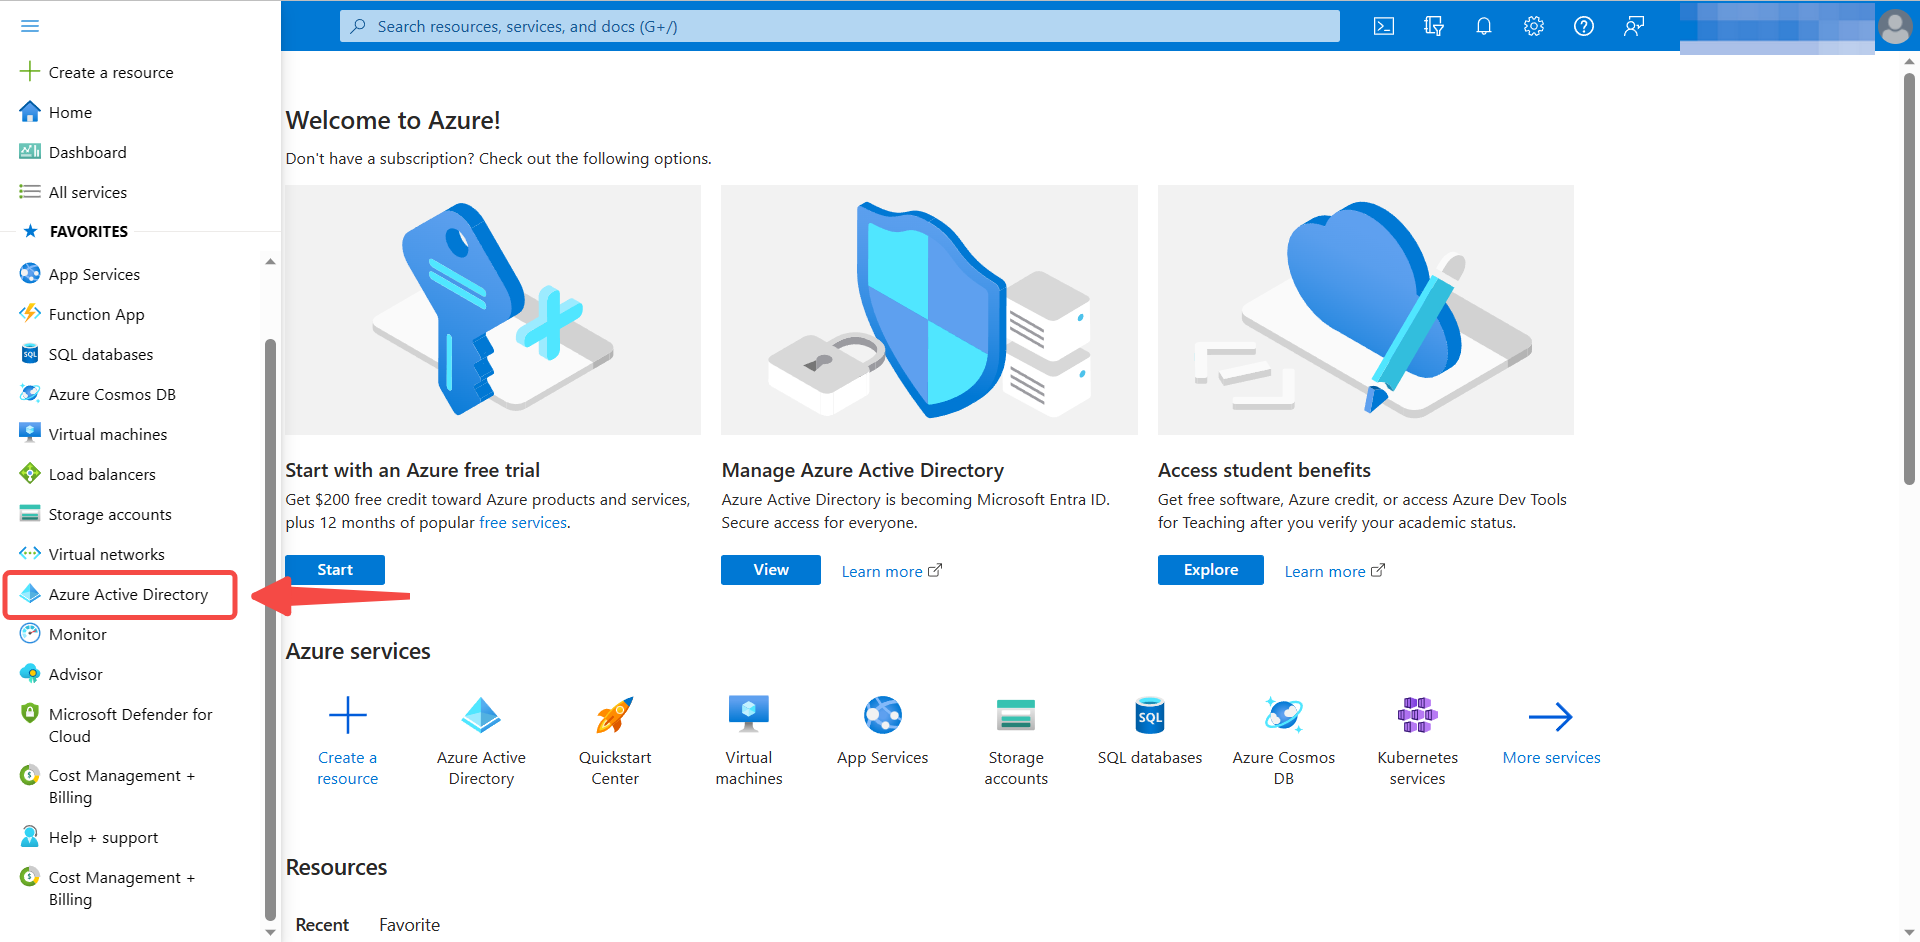
Click Azure Active Directory in Azure
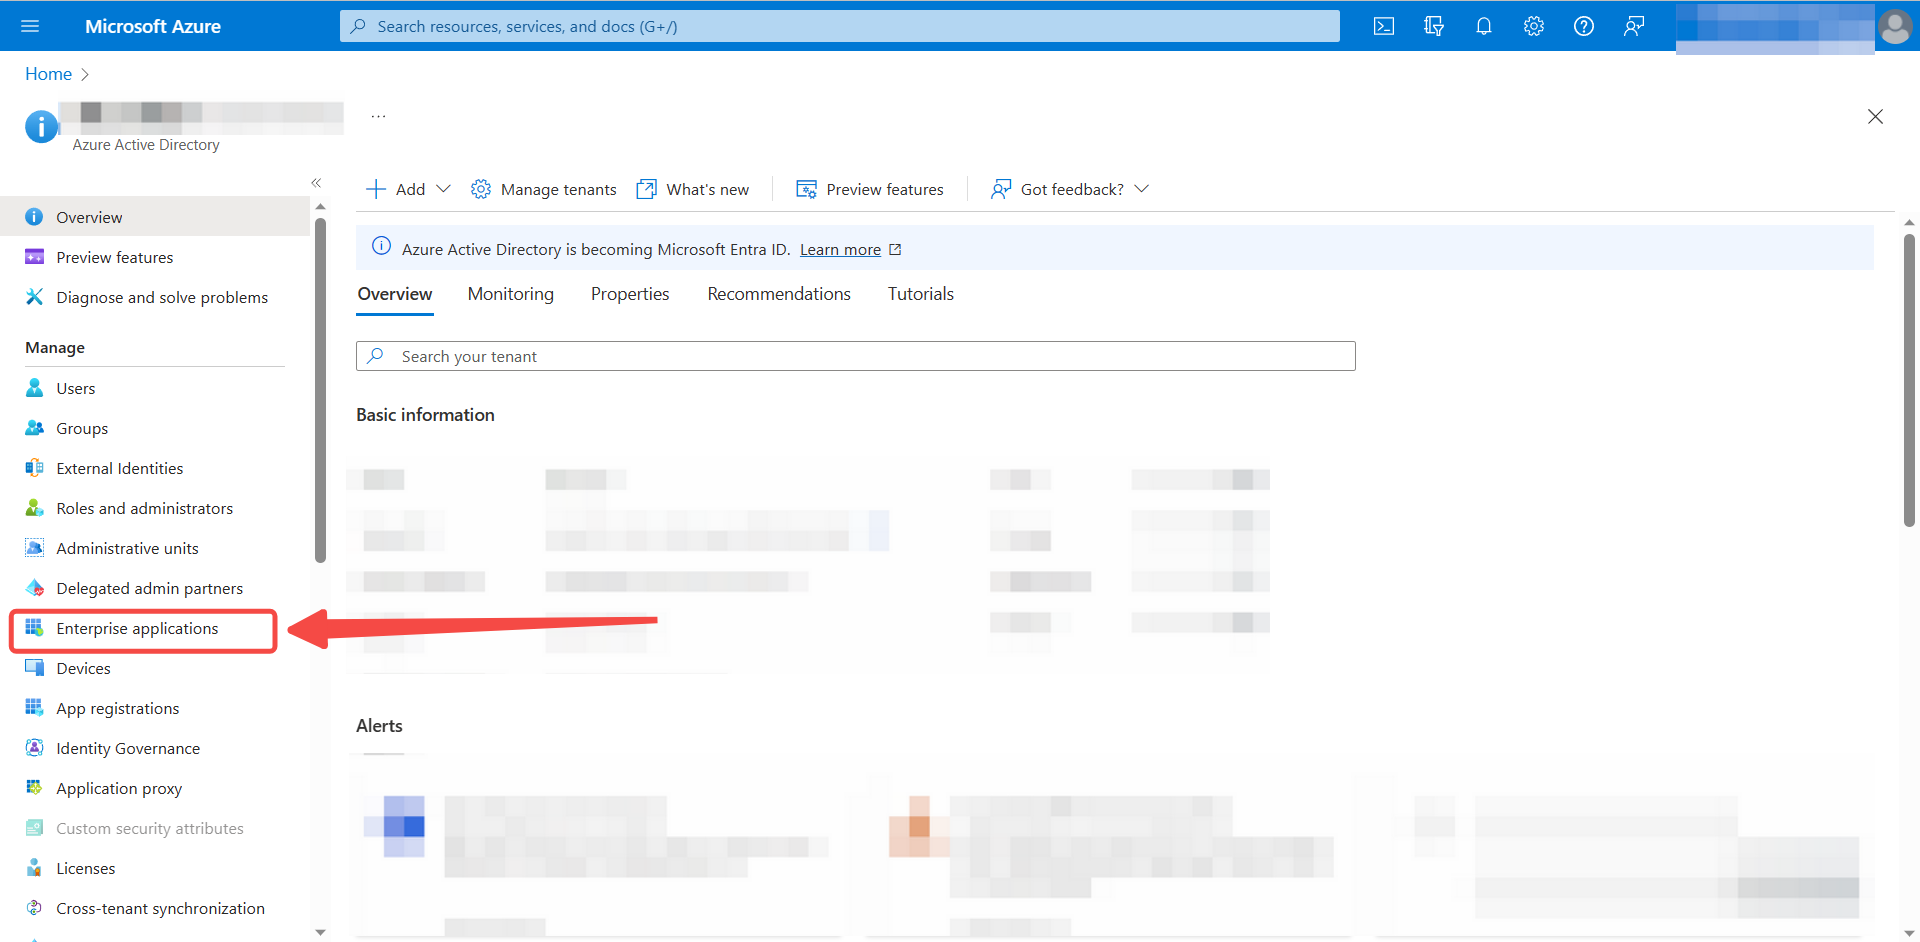
Click Enterprise Applications
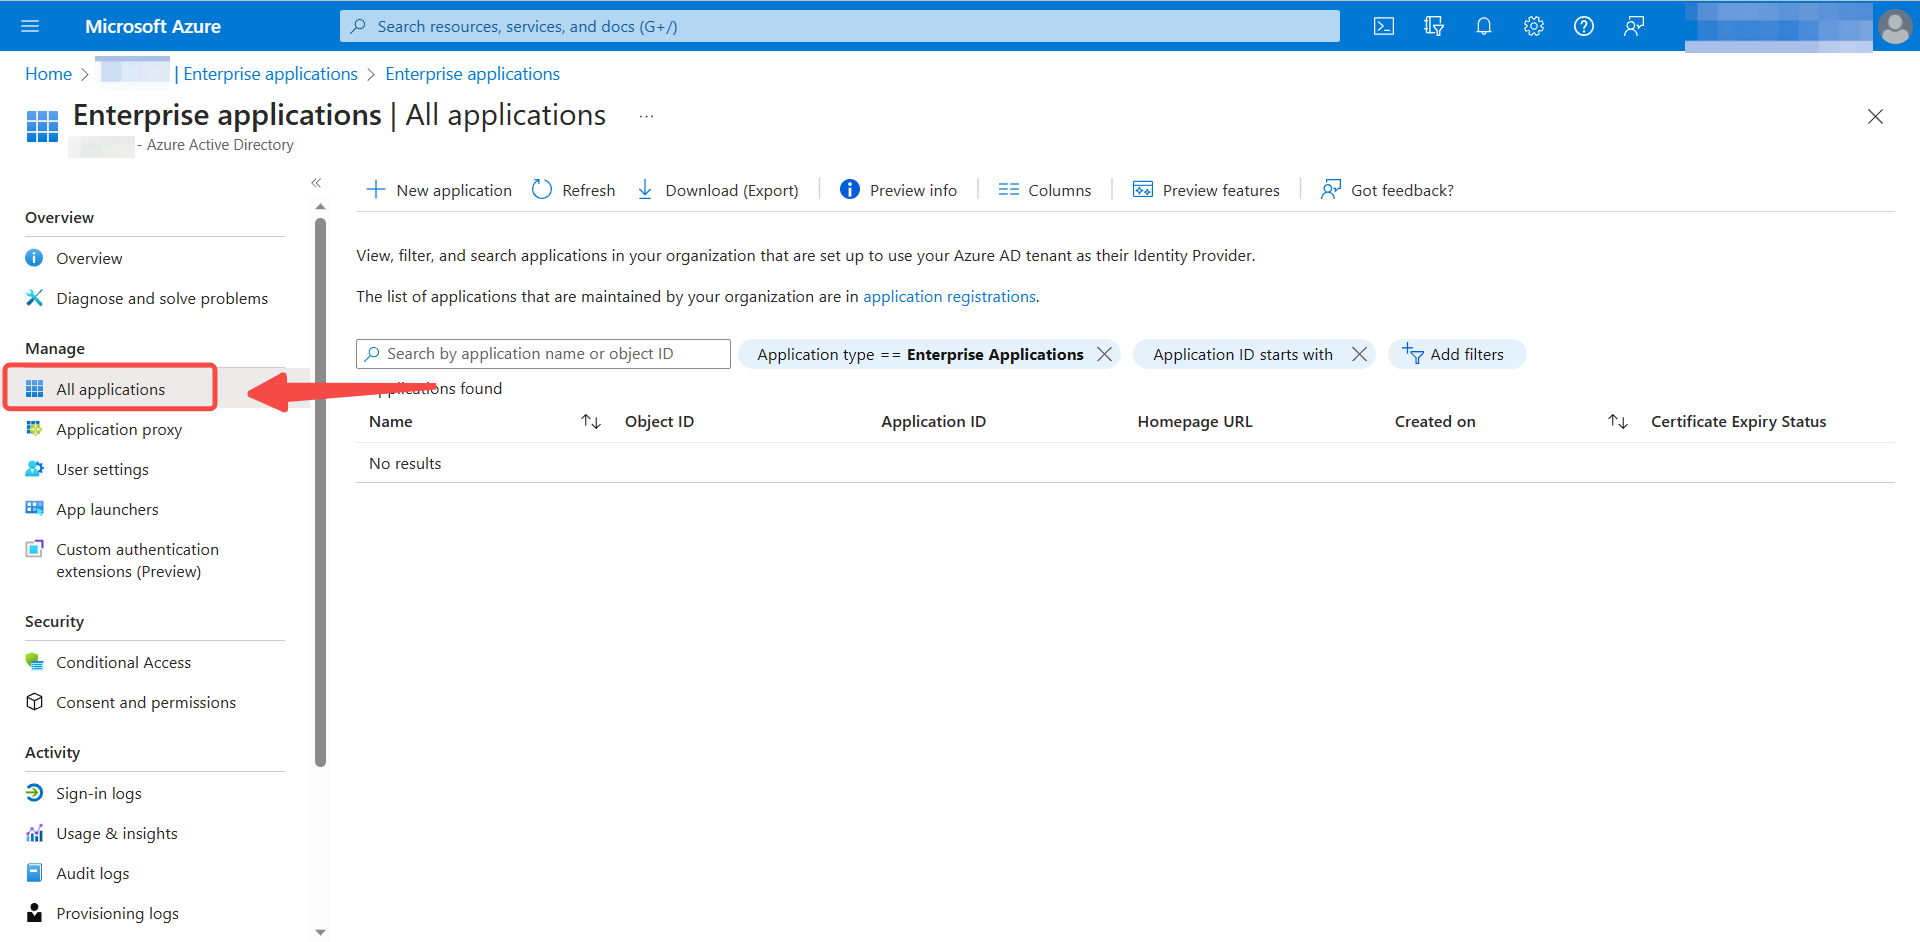
Click All Applications
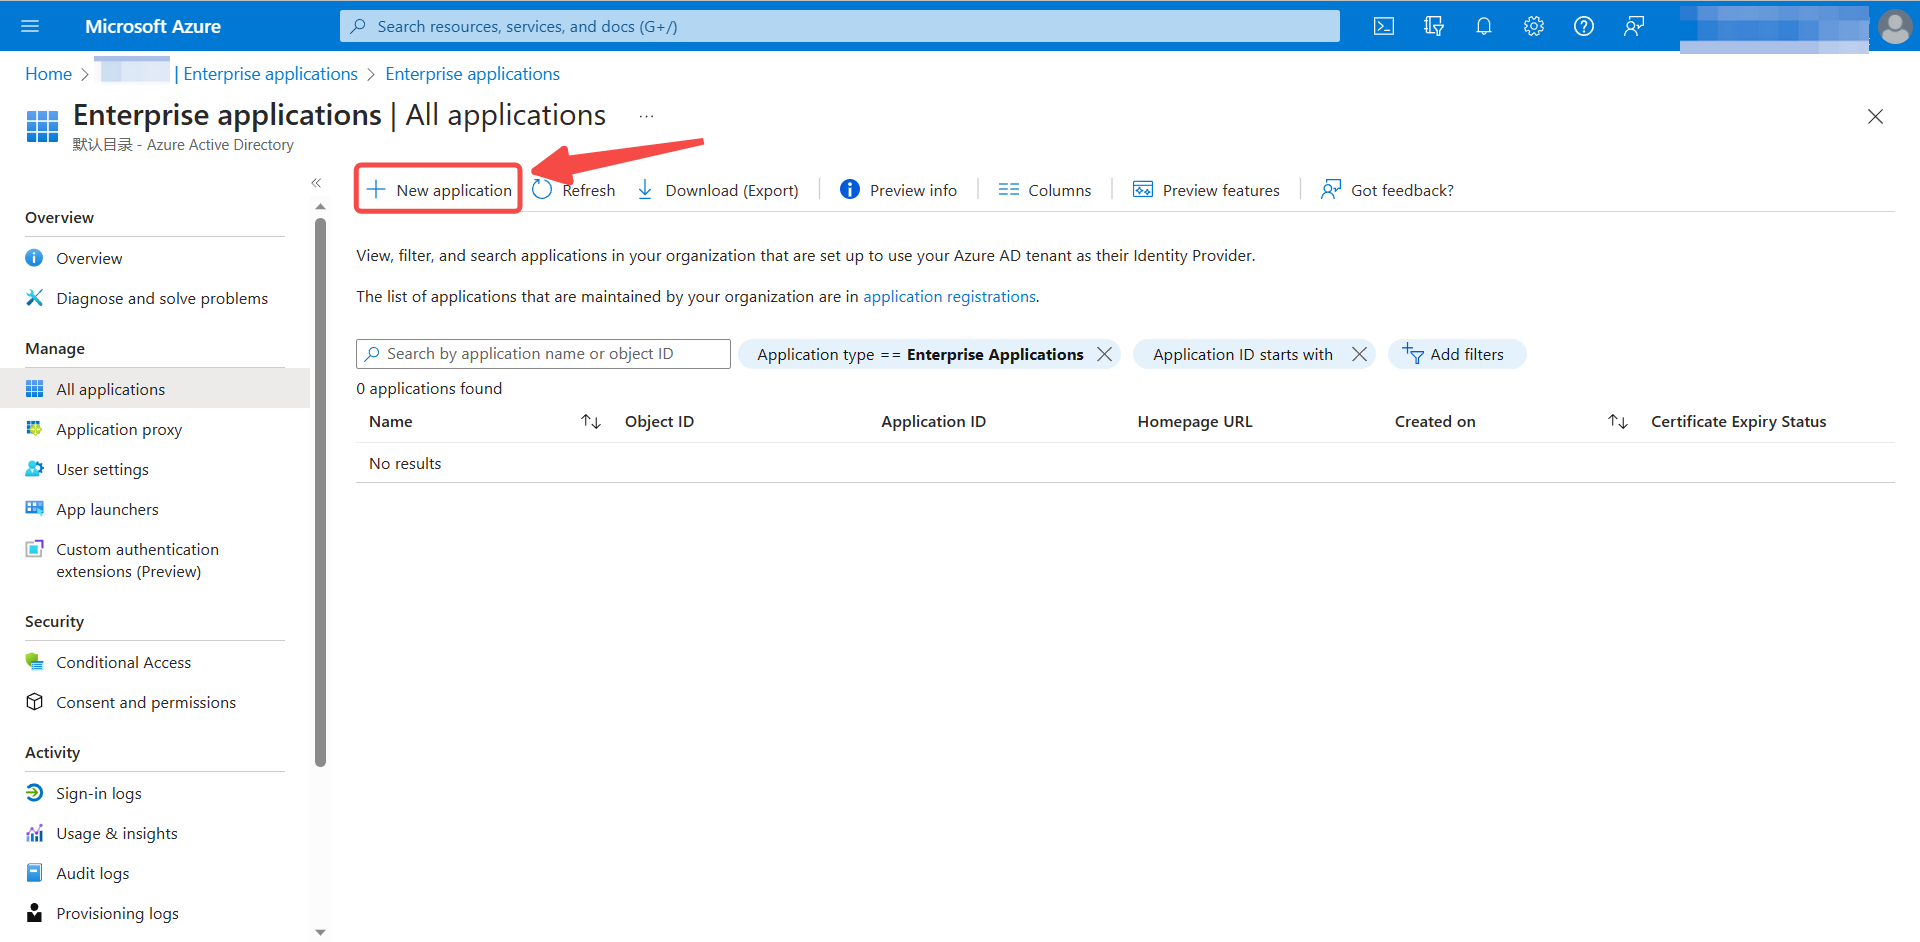
Click New Application at the top
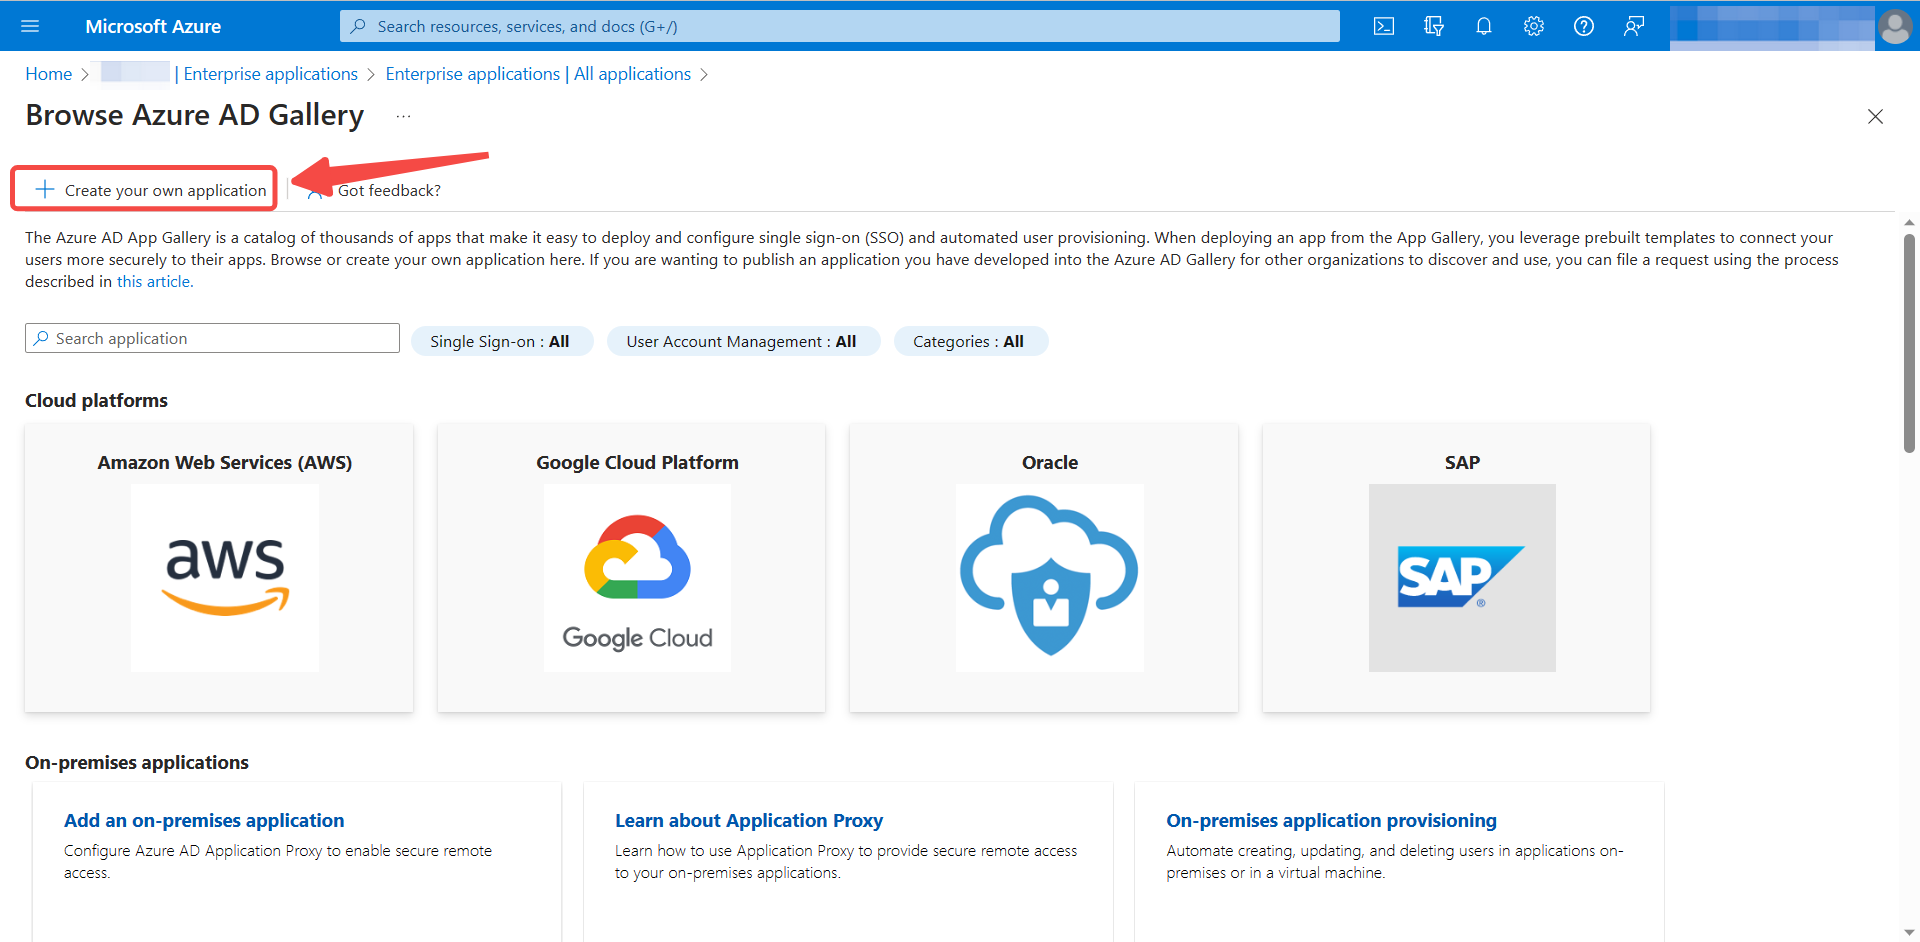
Click Create your own application at the top
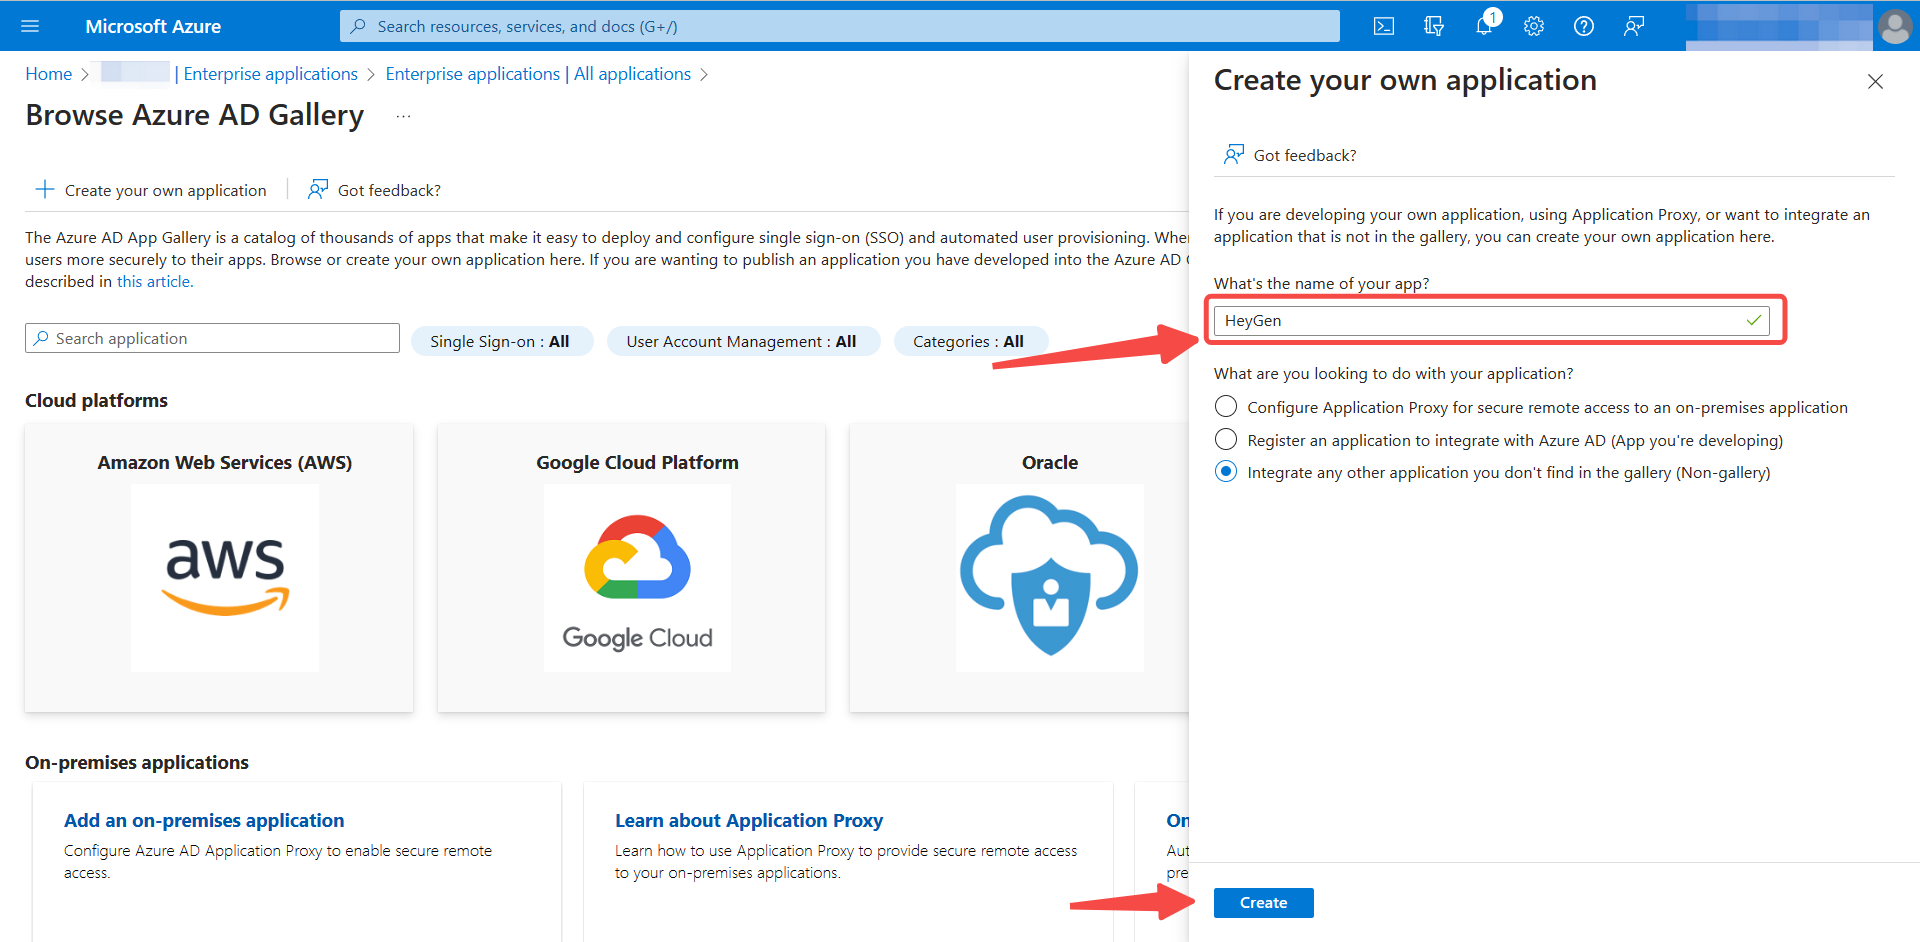
Input HeyGen as name and click create
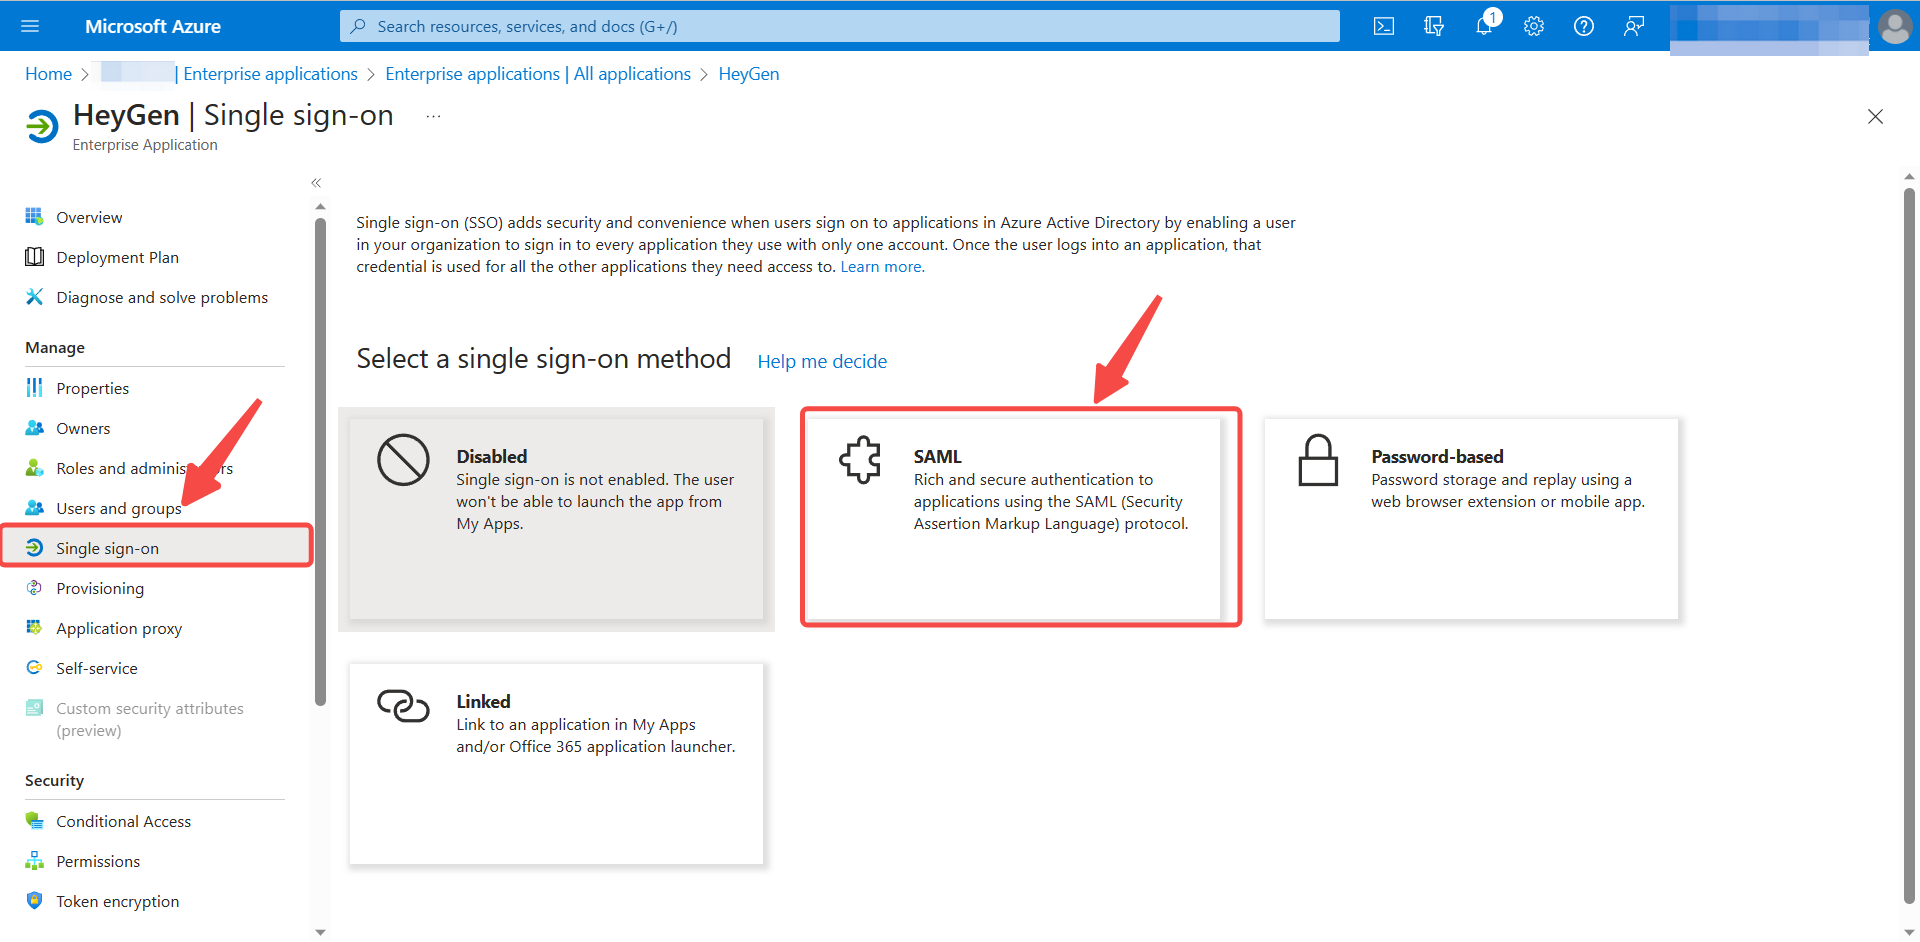
Click Single sign-on and SAML
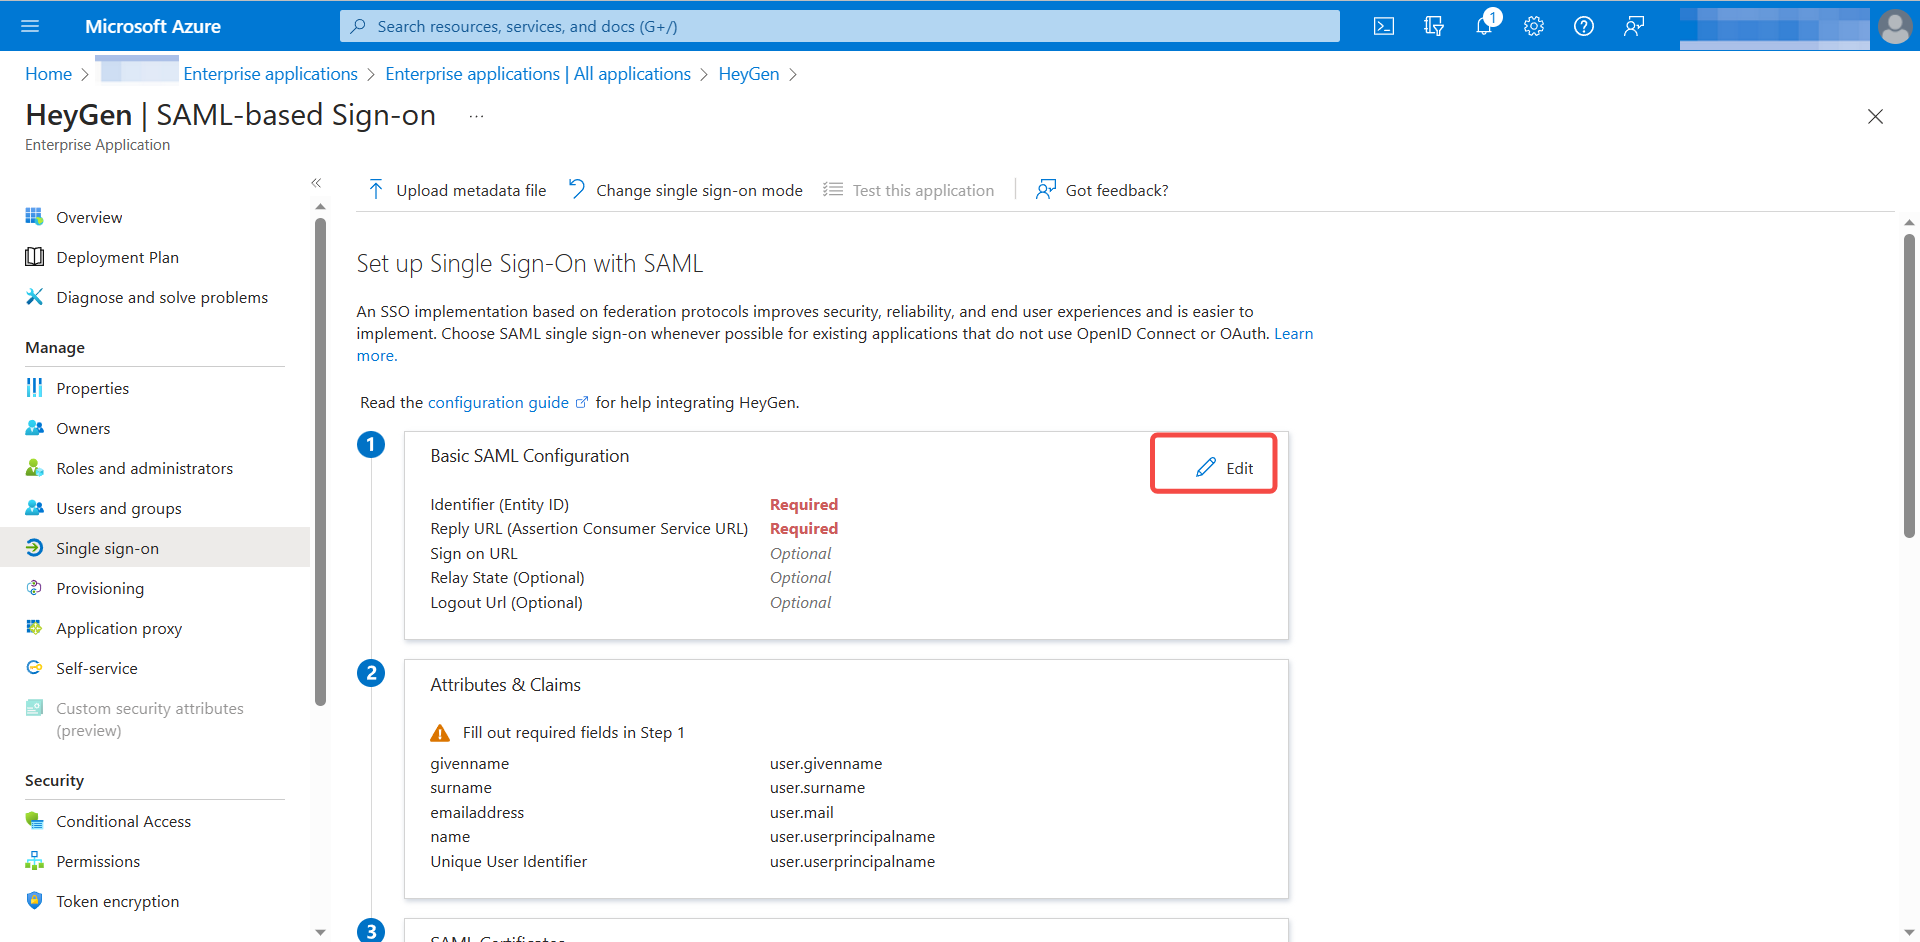
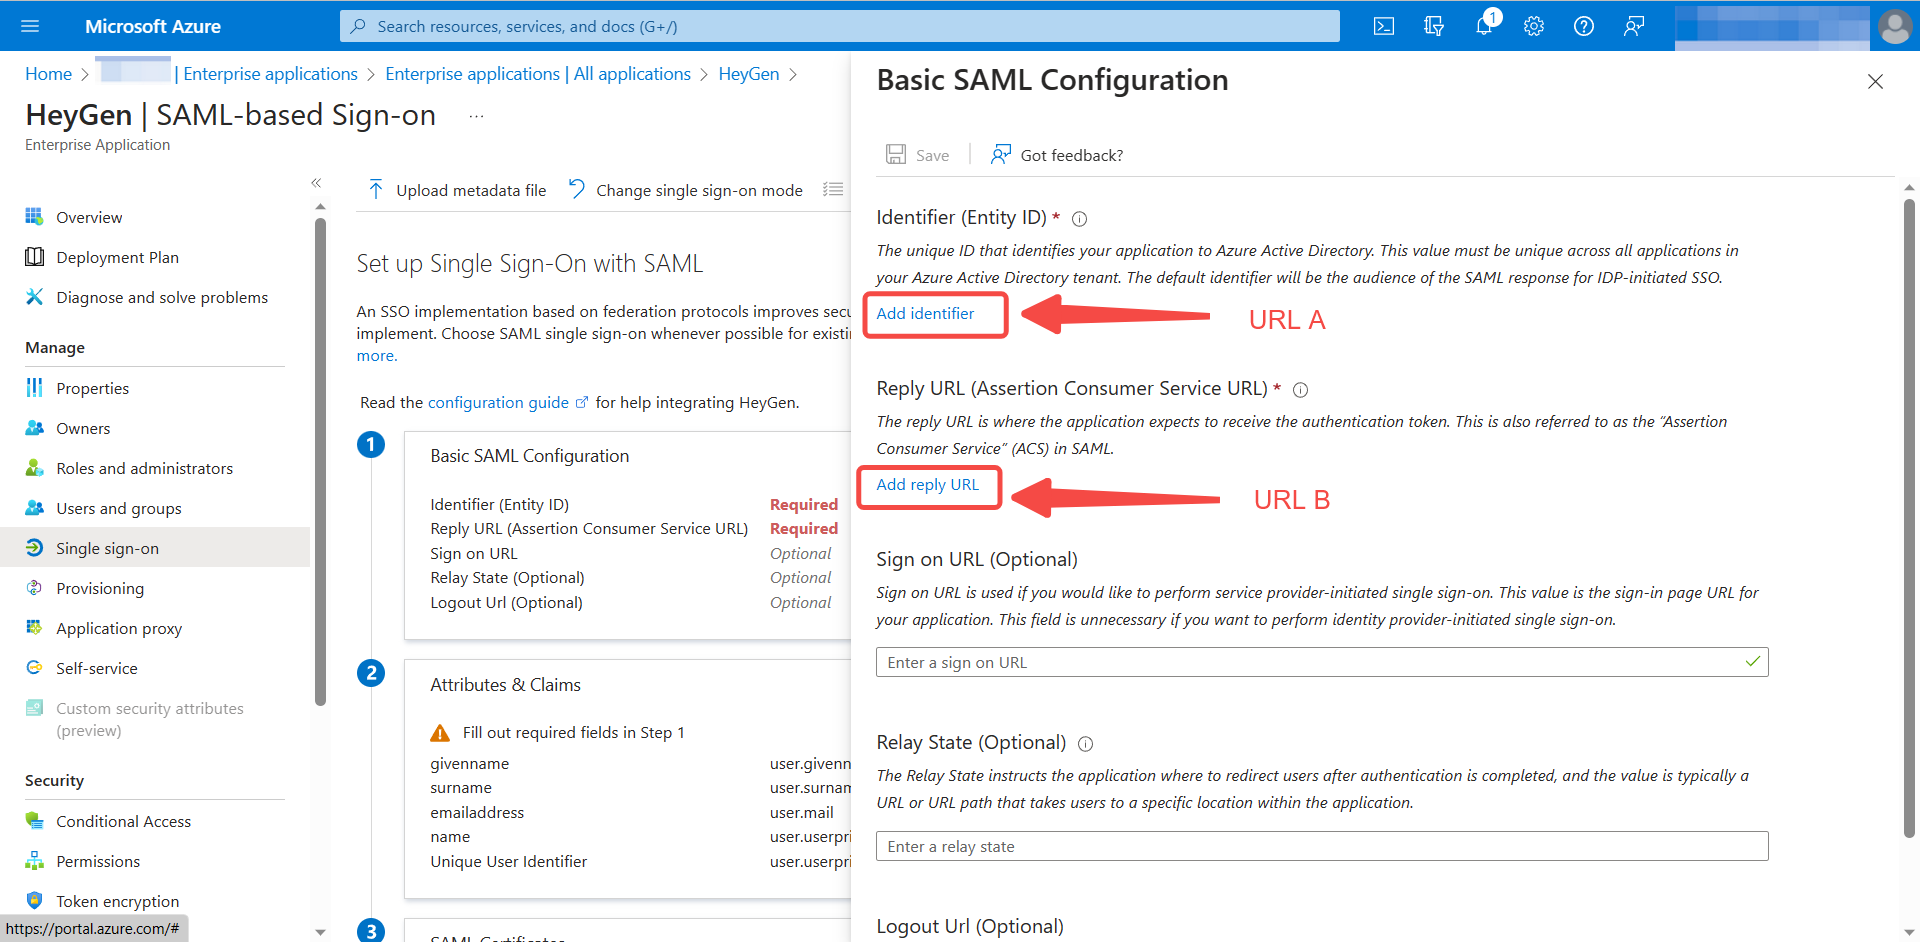
Click Edit
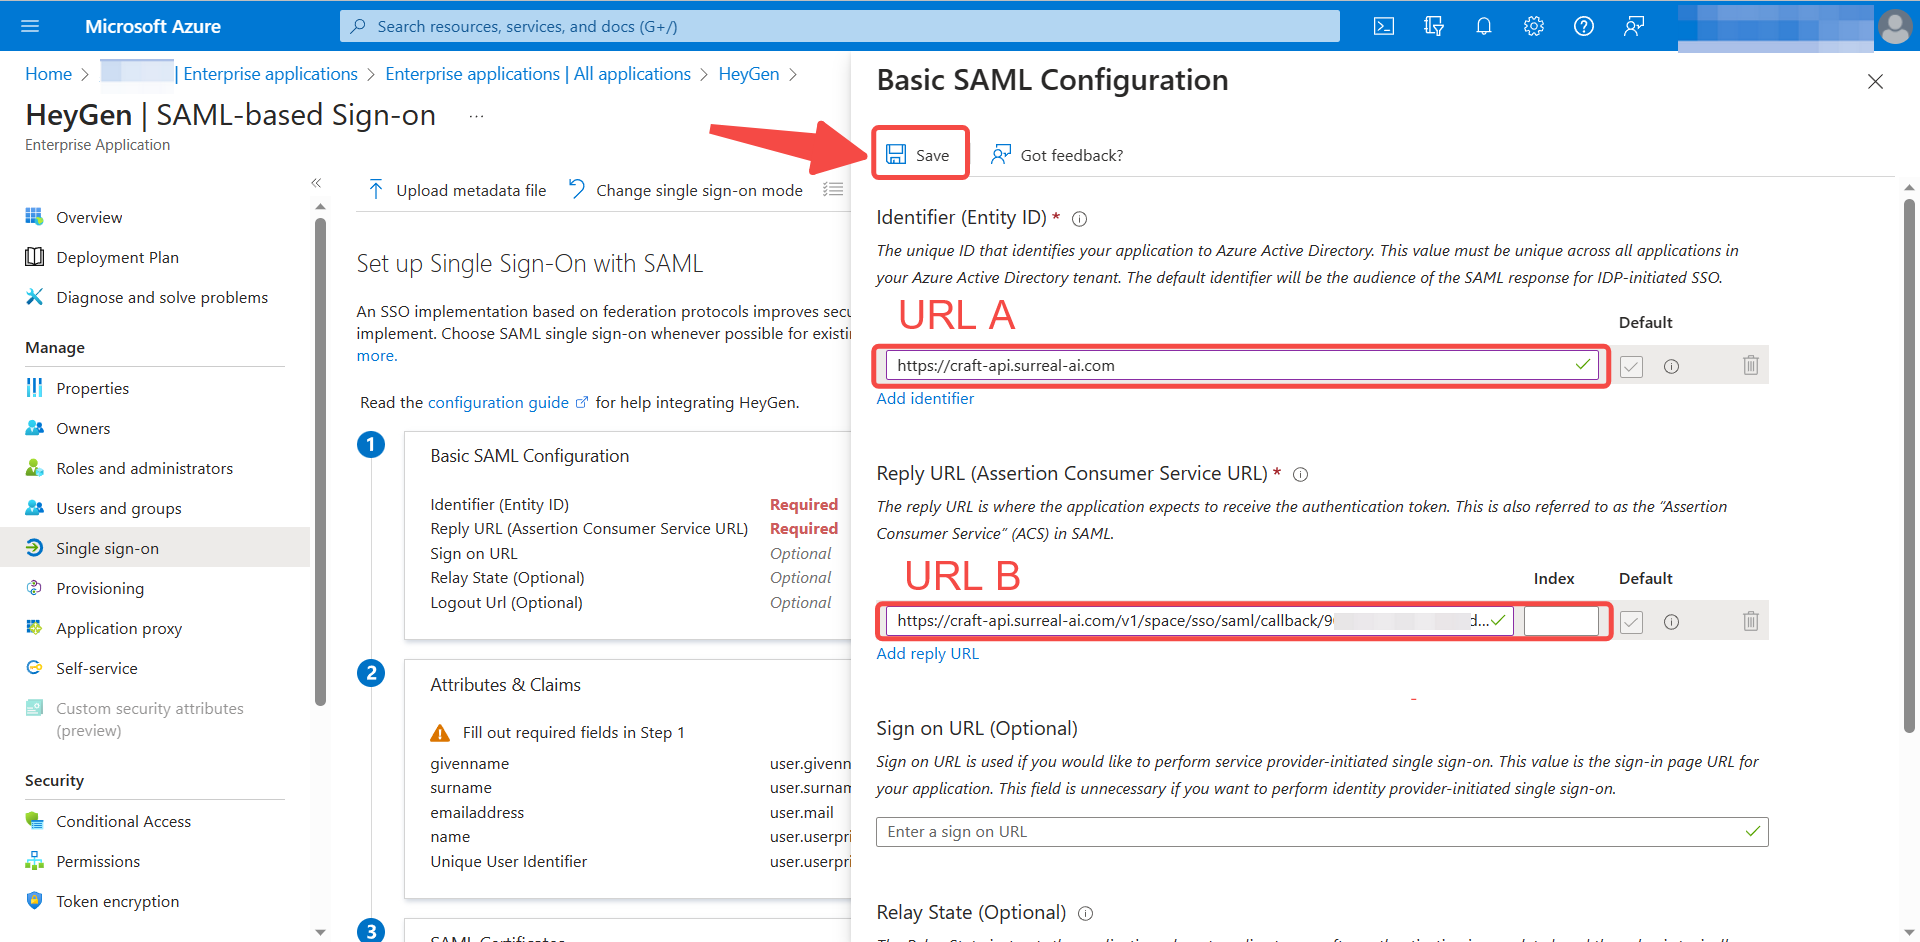
Input Identifier and Reply URL
For URL A: https://api2.heygen.com
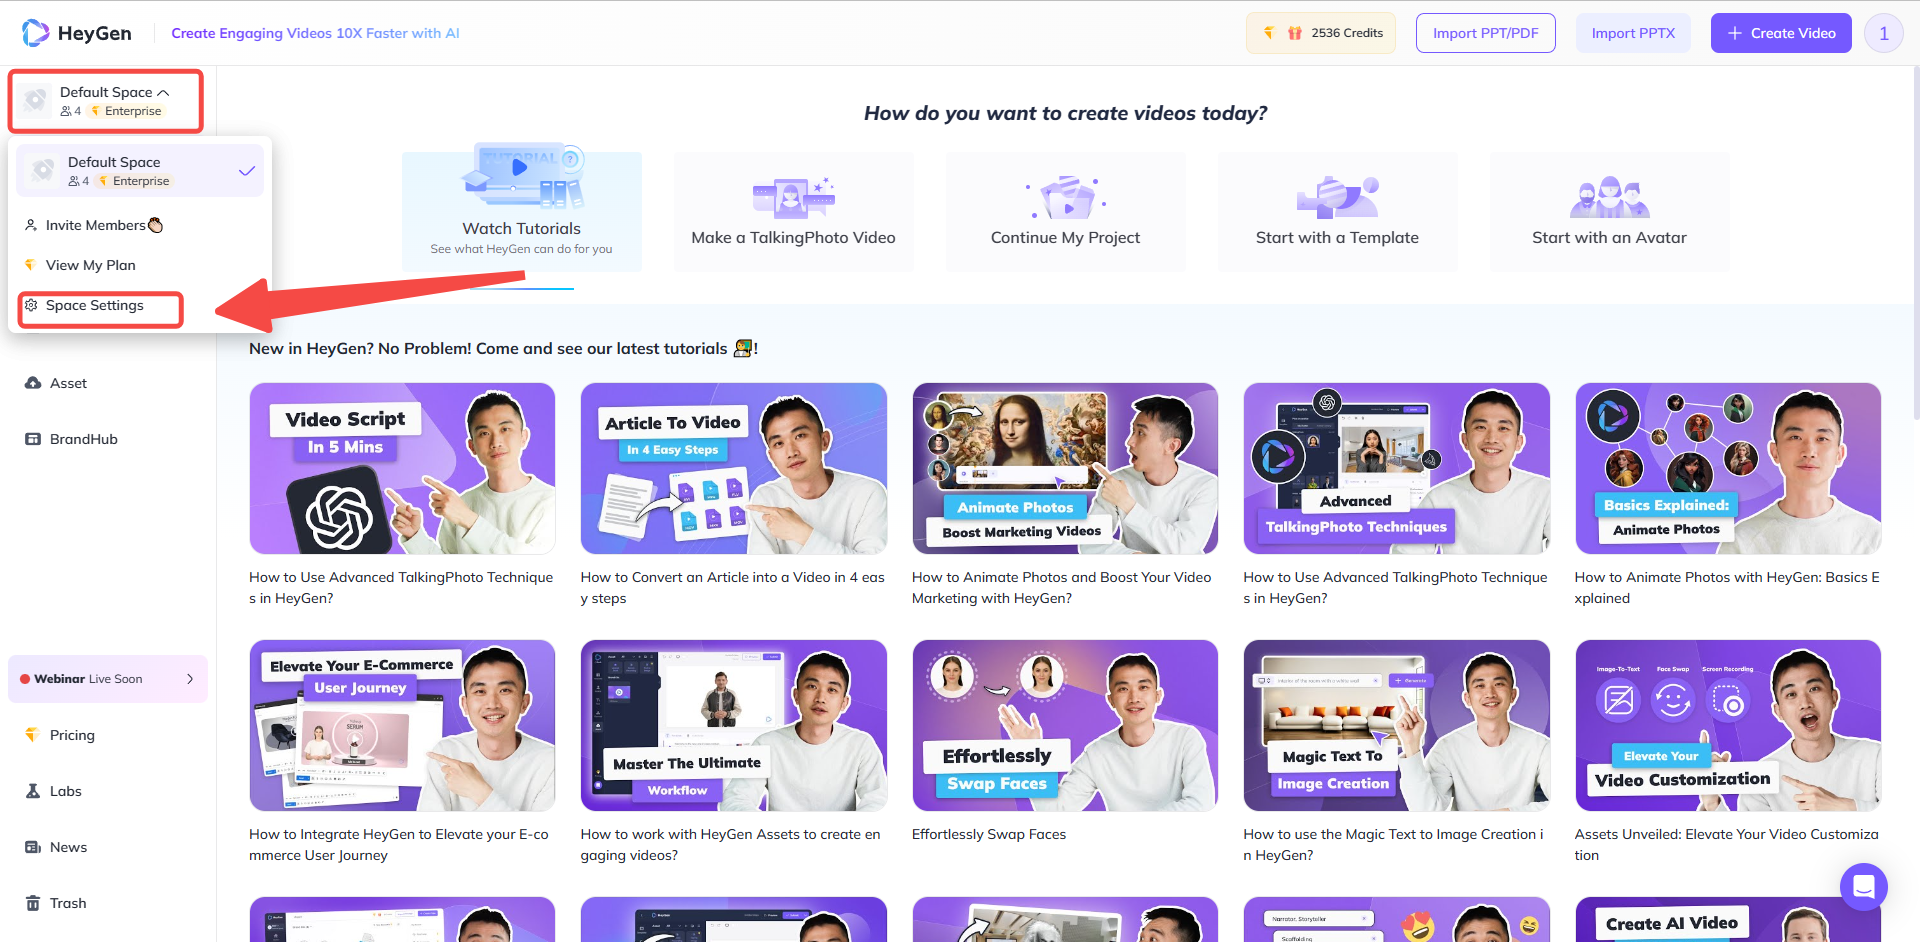
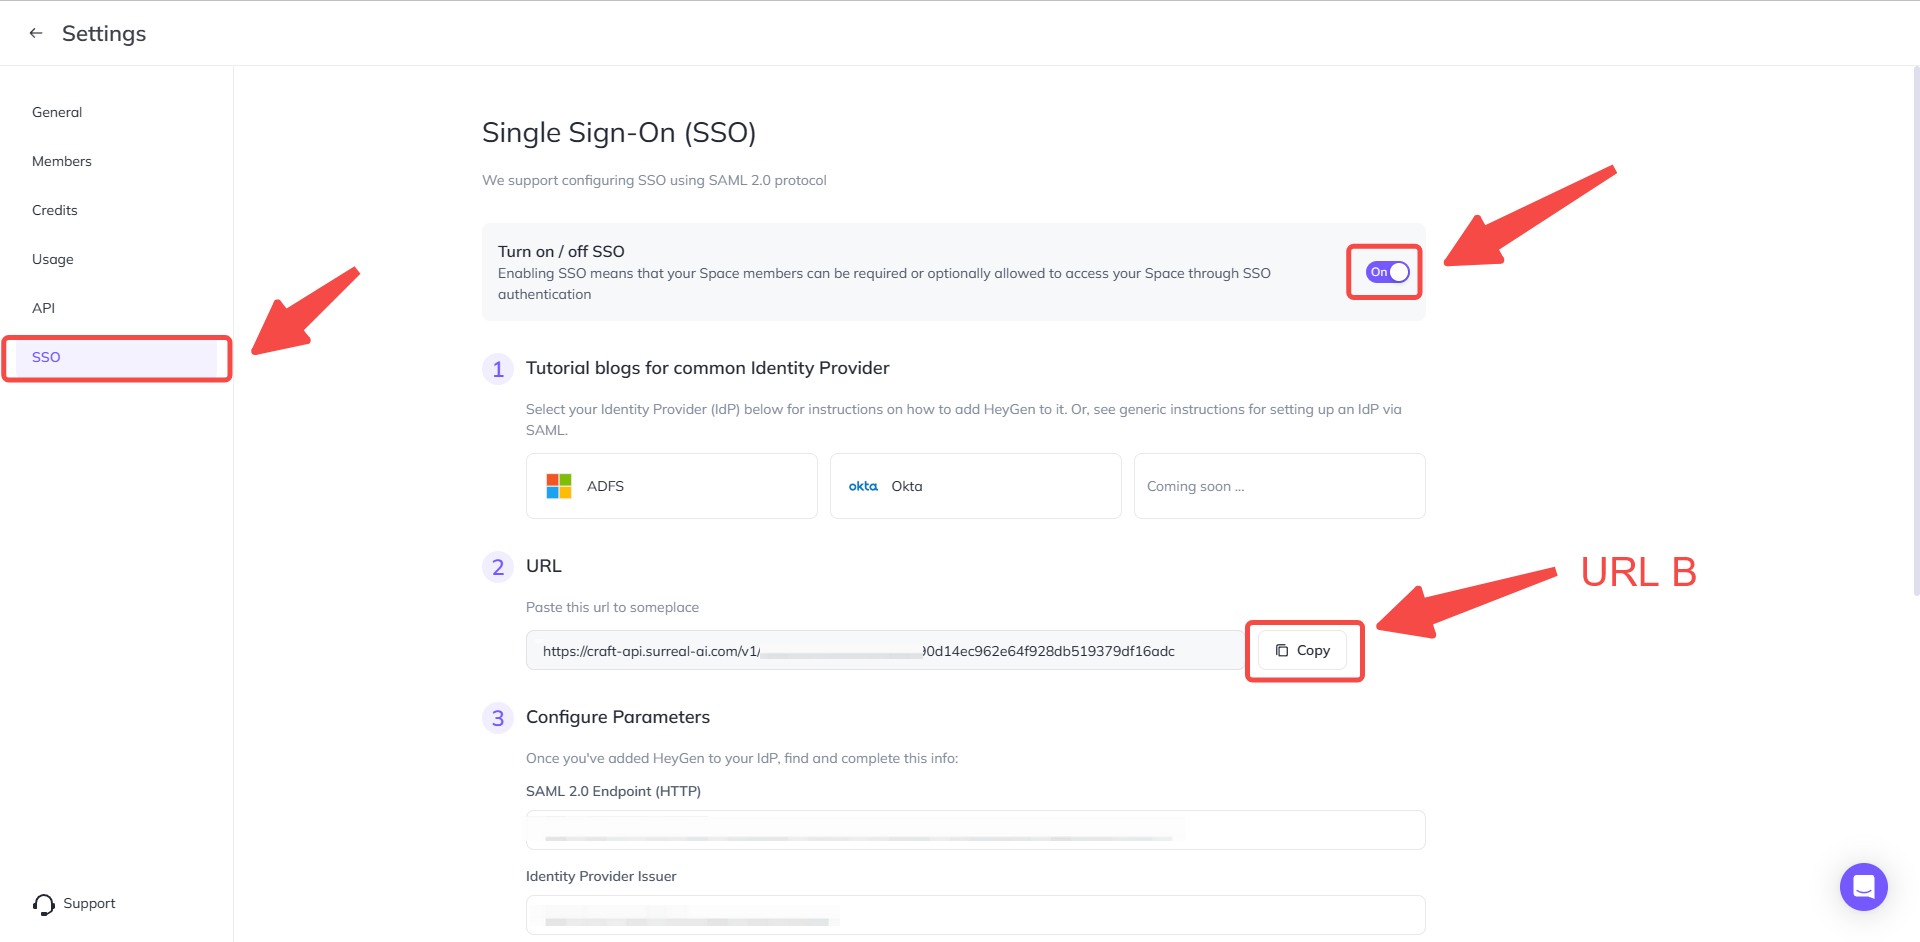
For URL B: You can find it on Heygen
Click SSO and Turn on SSO, then copy the URL and fill it in URL B
Fill in the 2 URLs and click Save
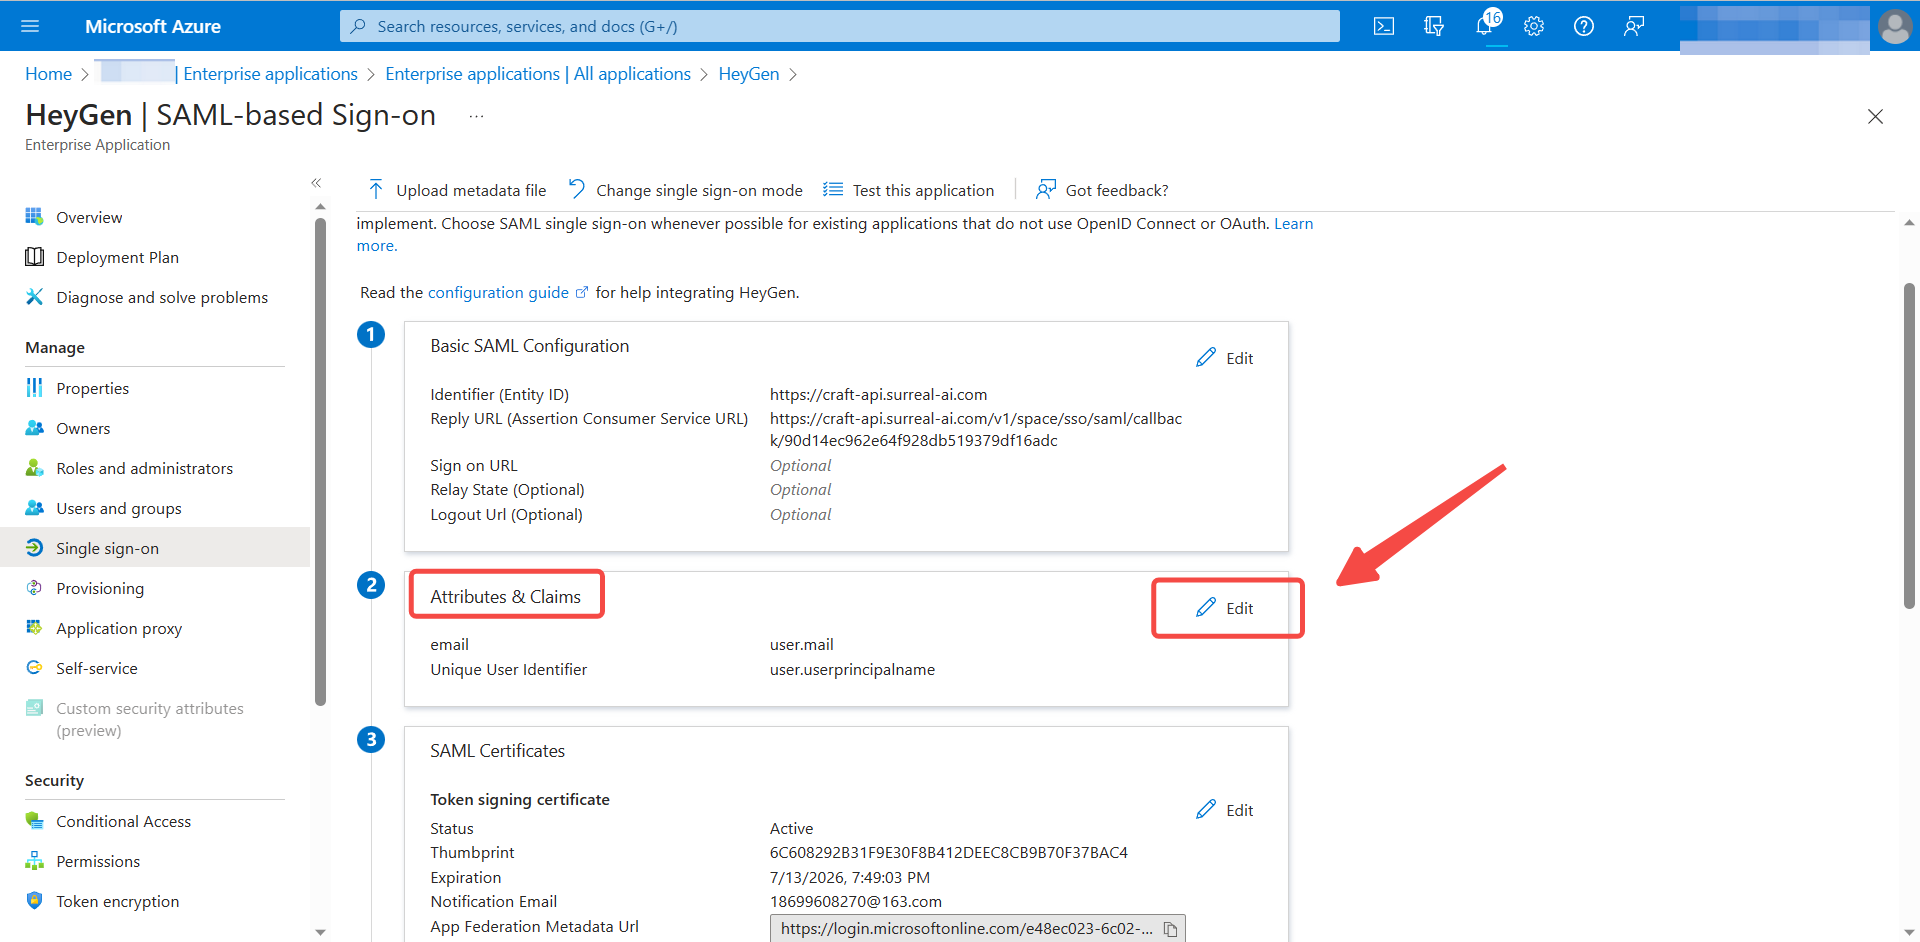
Find Attributes&Claims, then click Edit
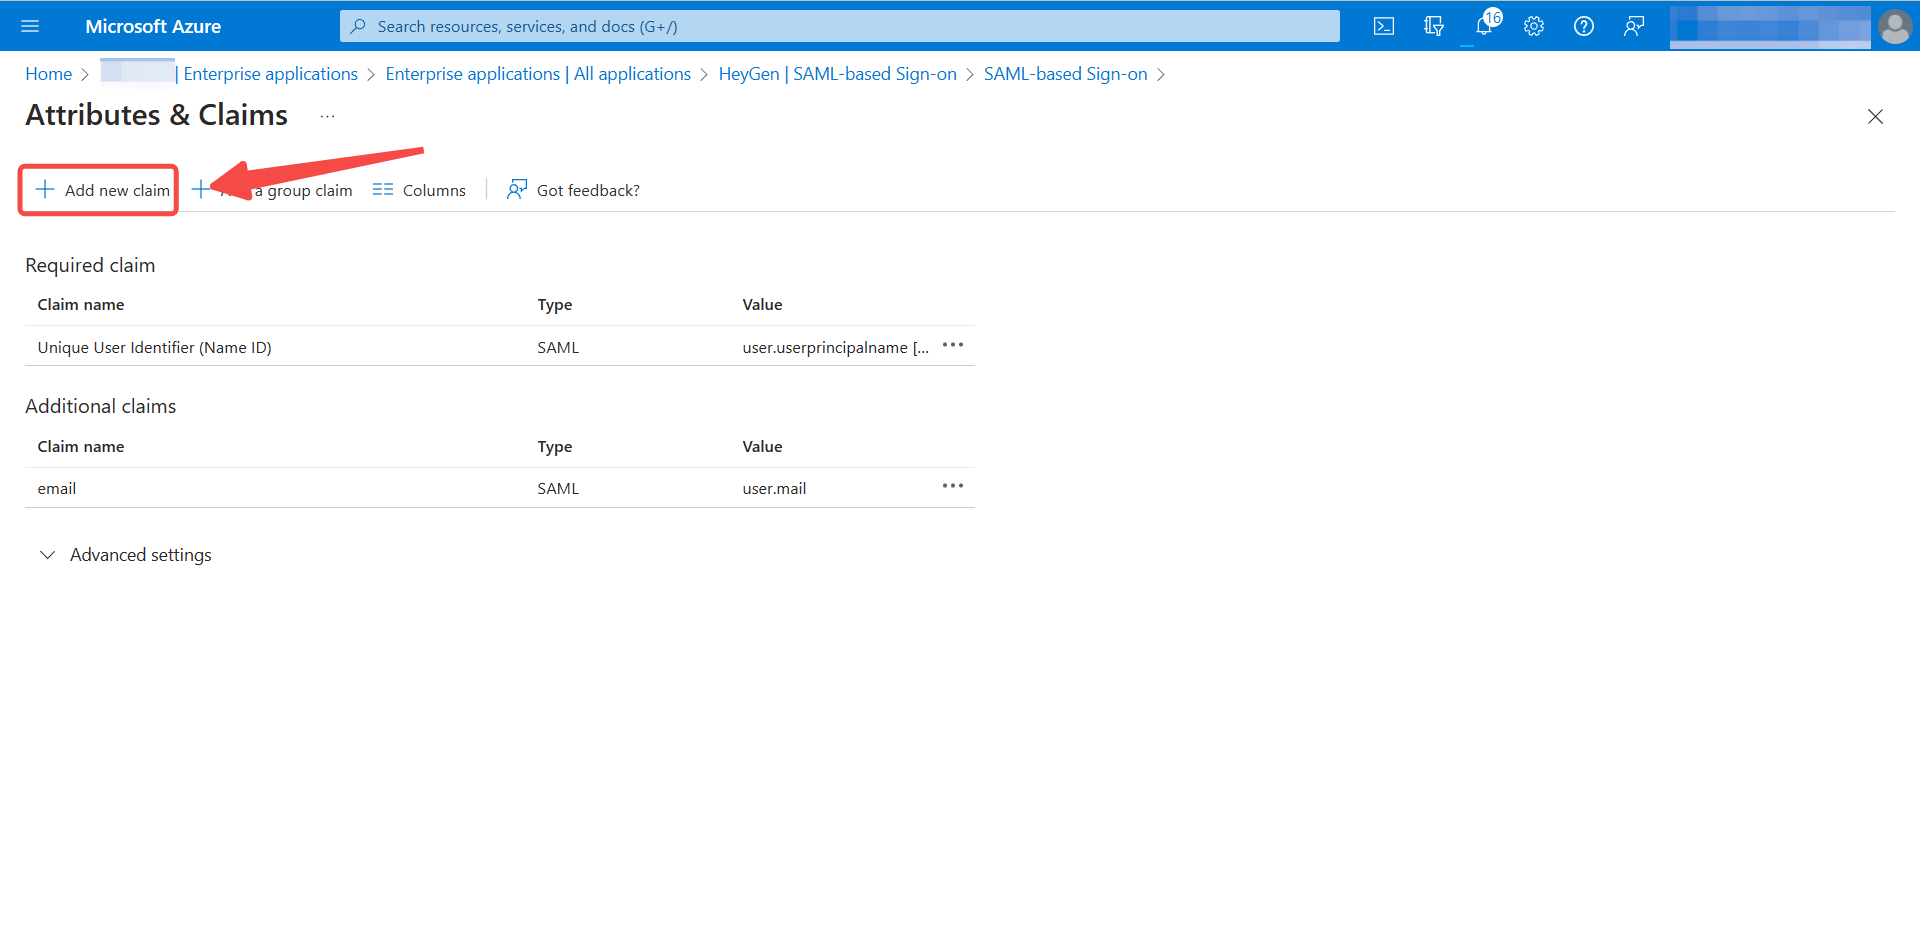
Click Add new claim
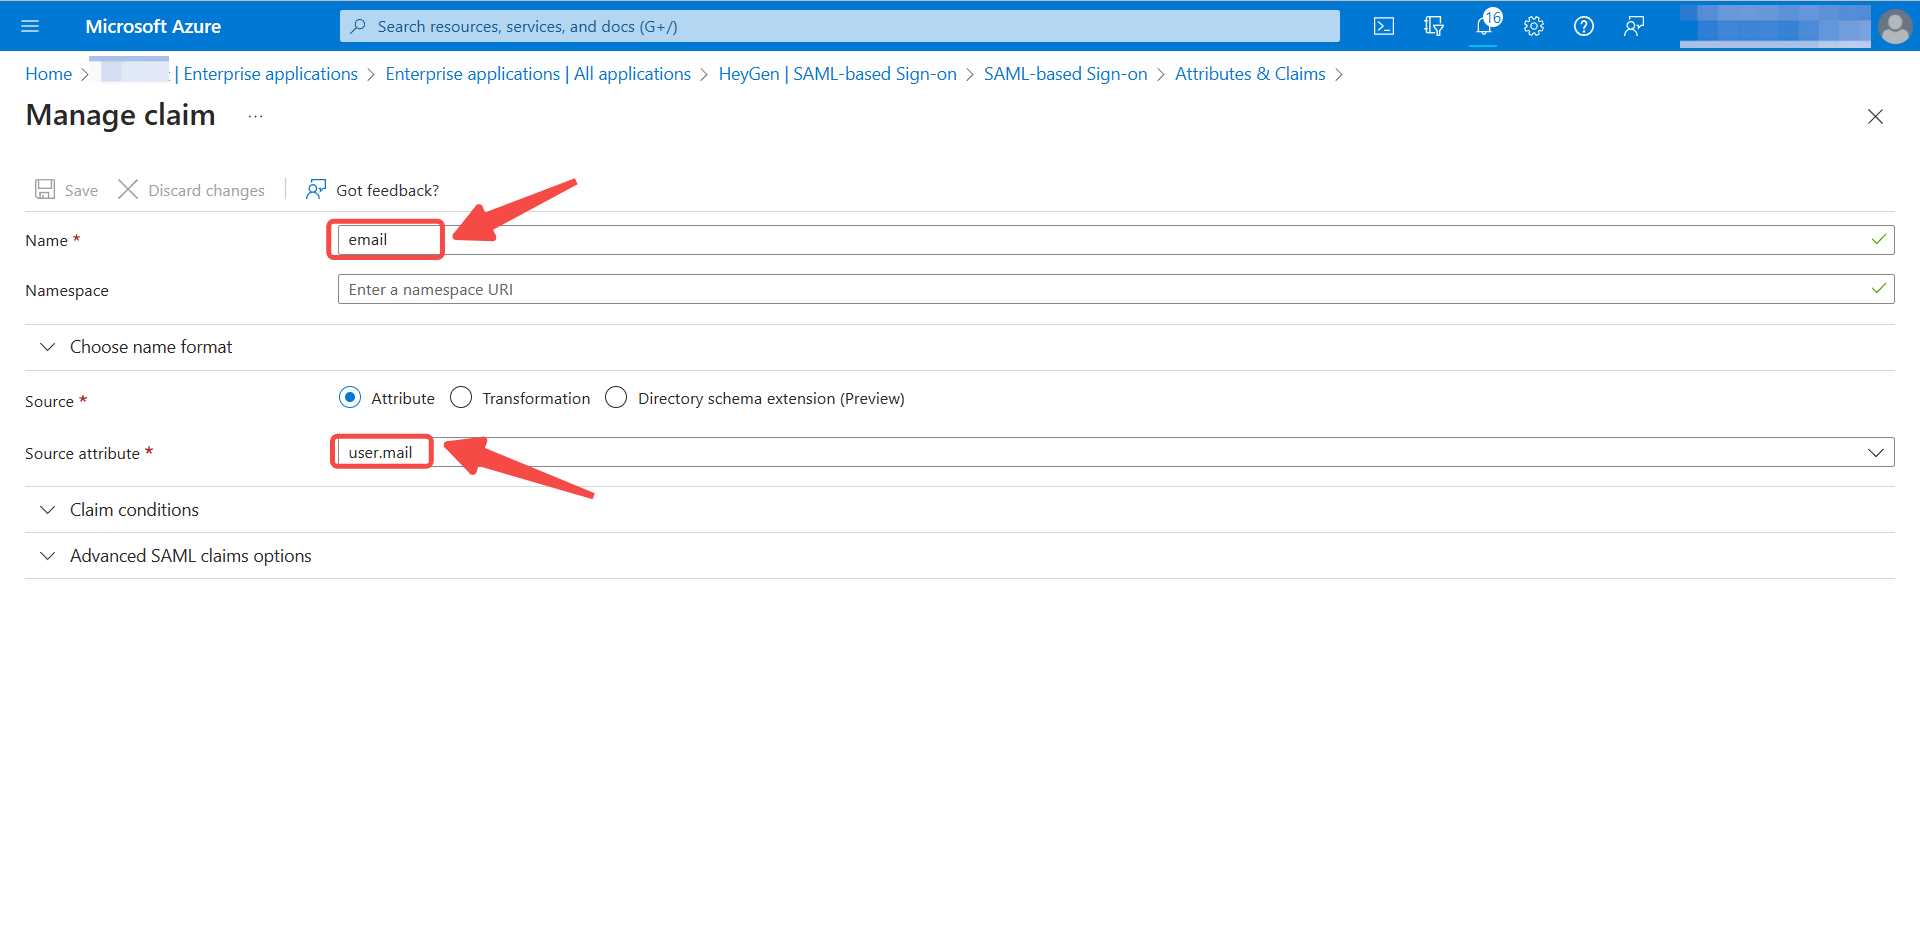
Fill in Name with email and Source attribute with user.mail, and then save
Step 2 - Assign Users
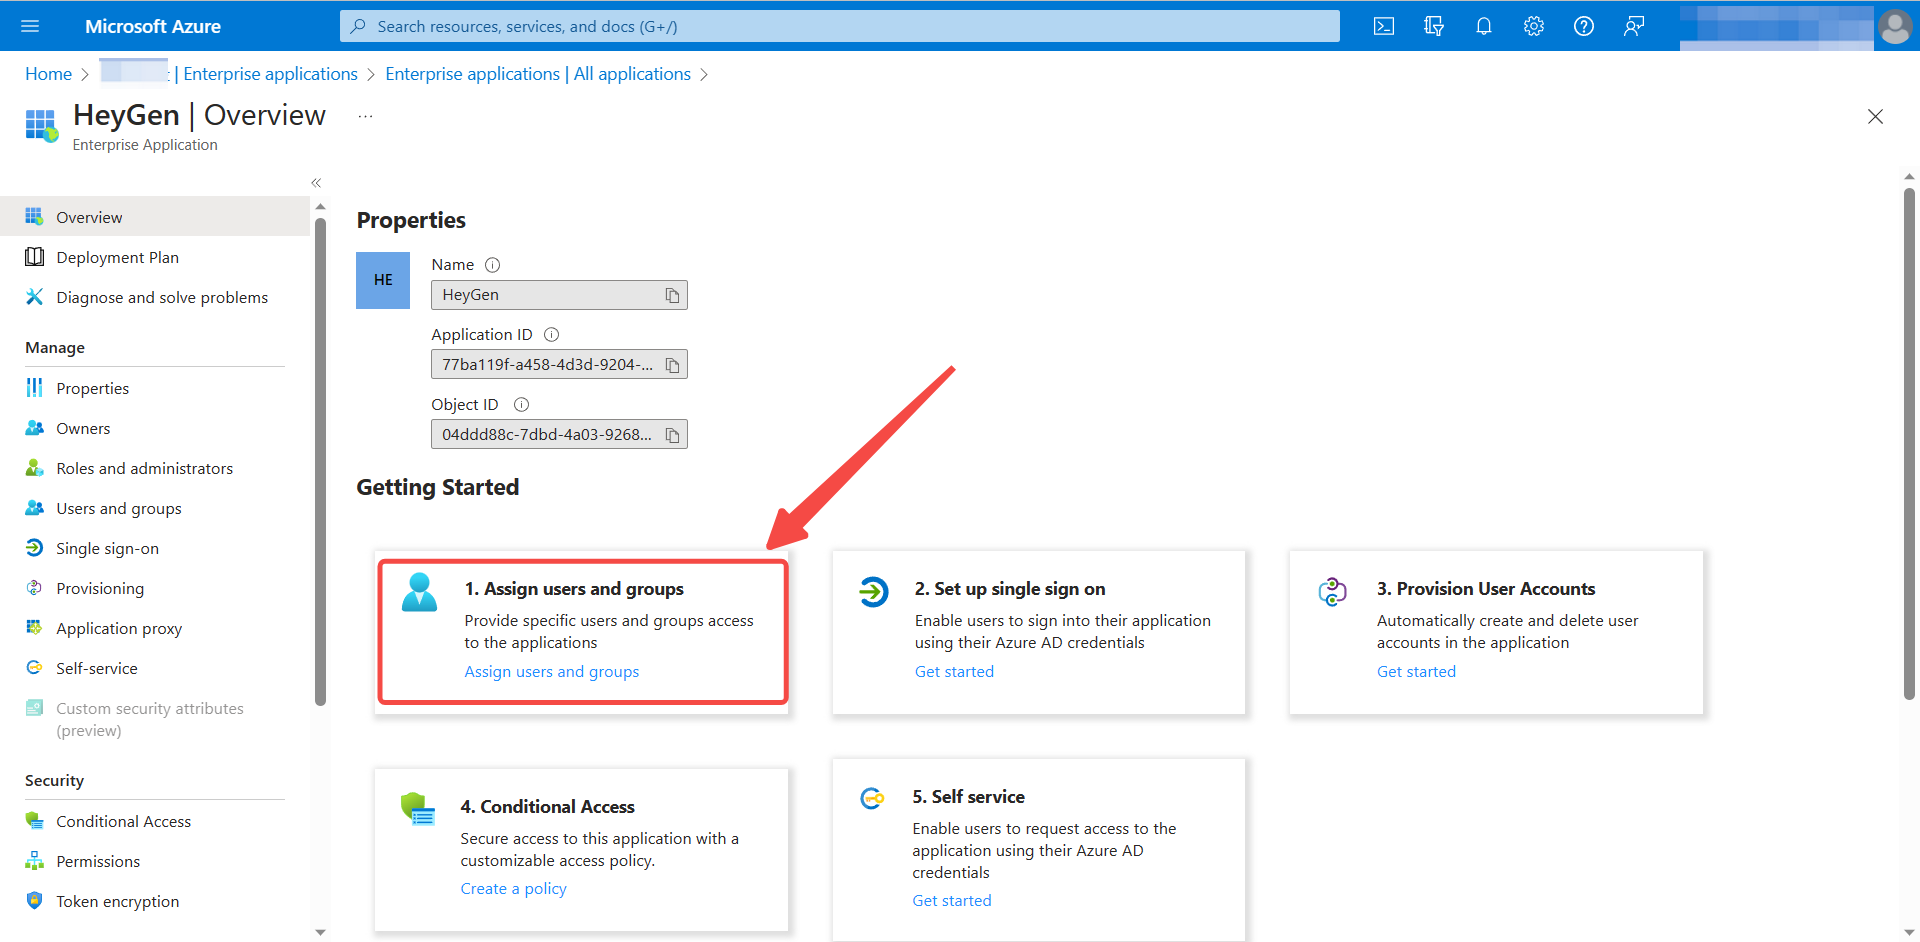
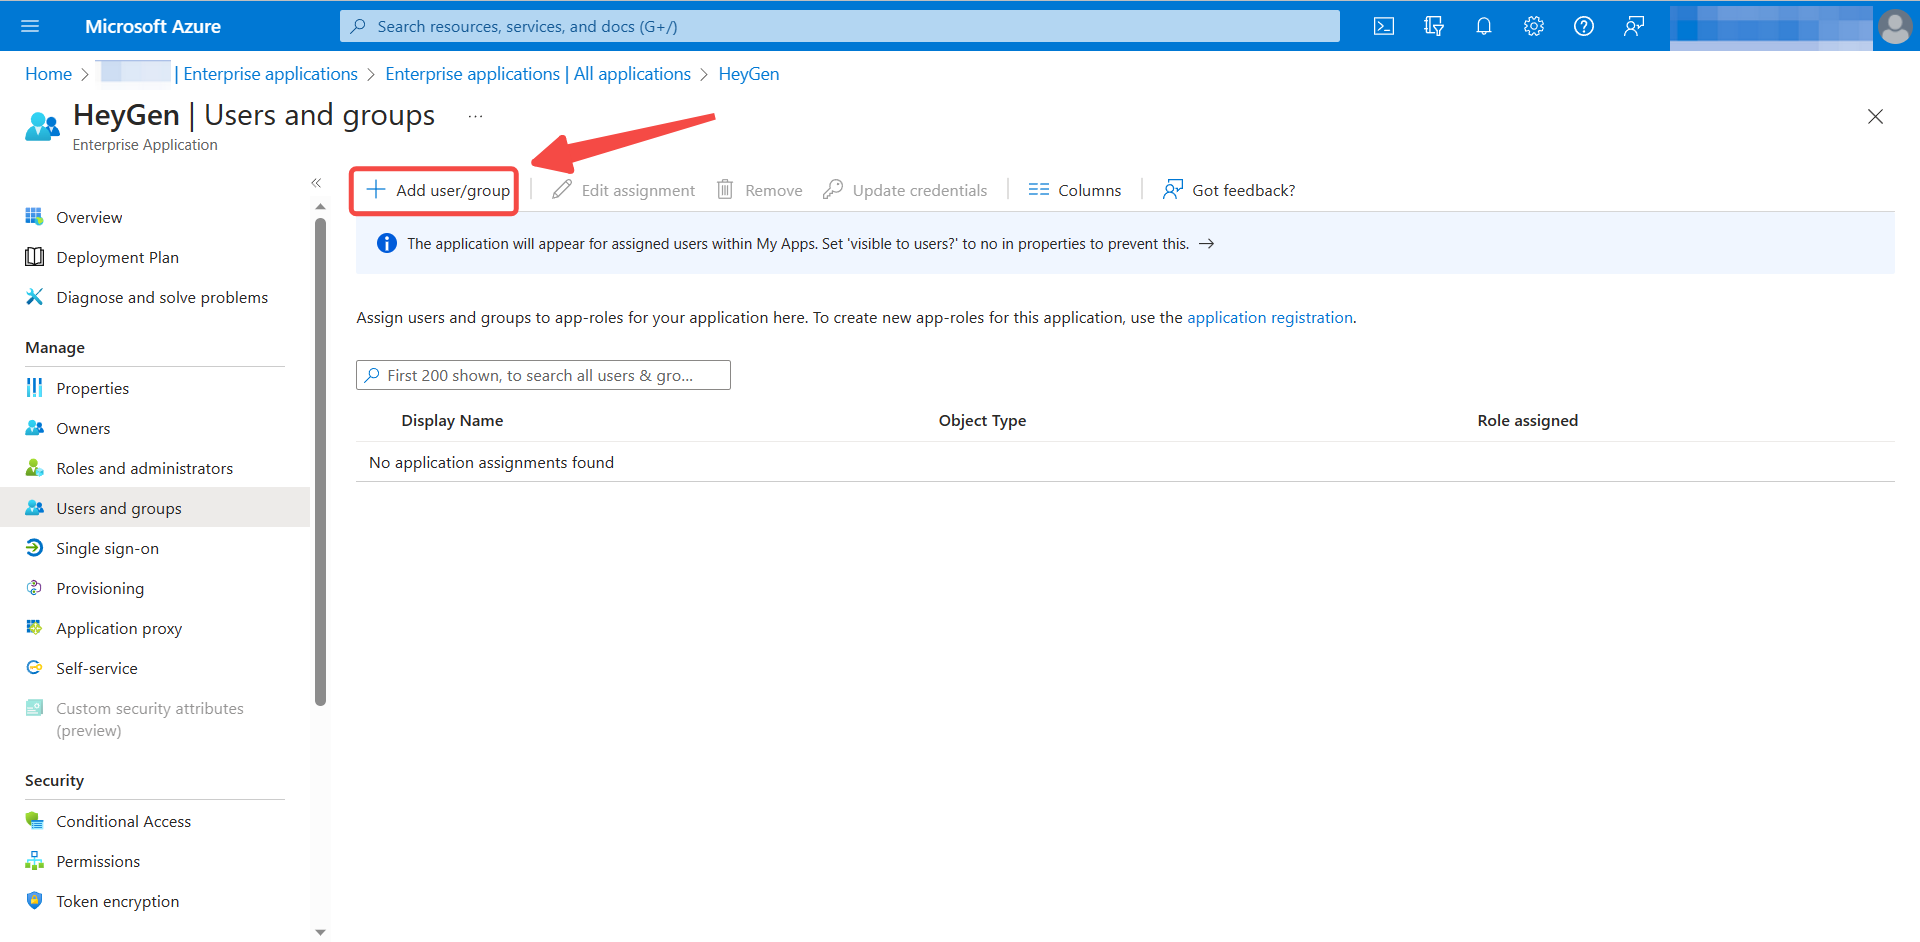
Click Assign users and groups
Click Add user/group
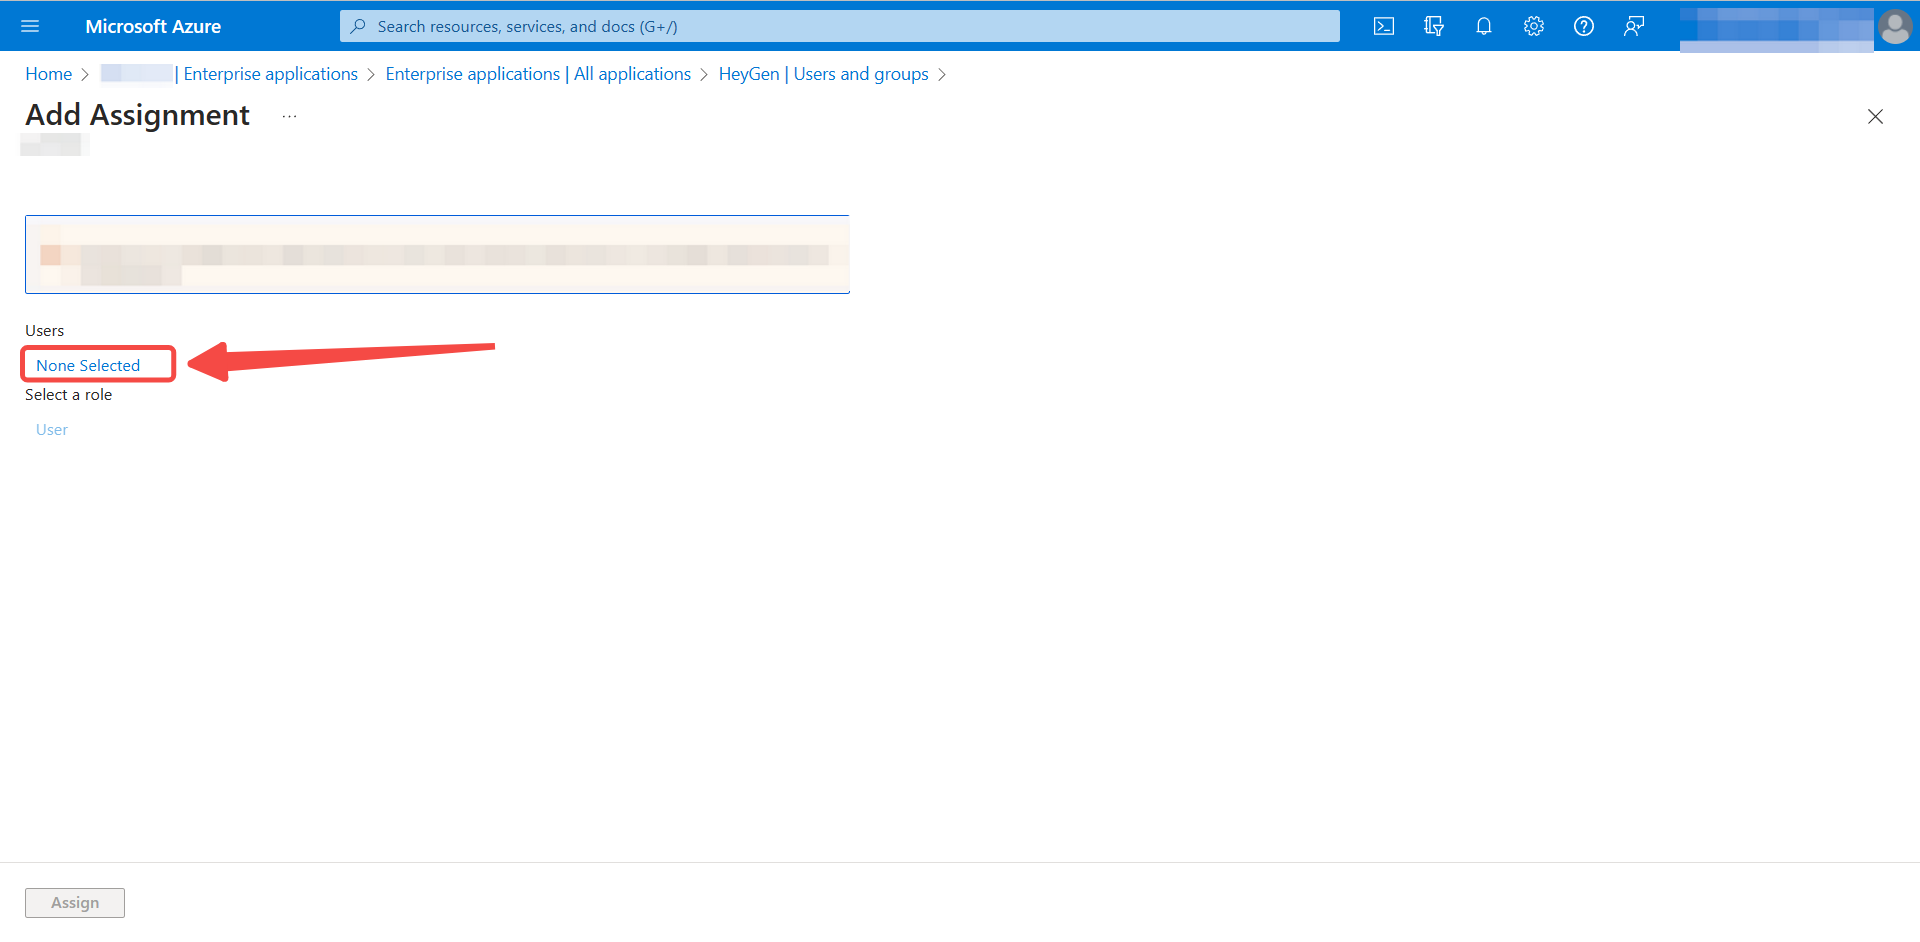
Click None Selected to add users
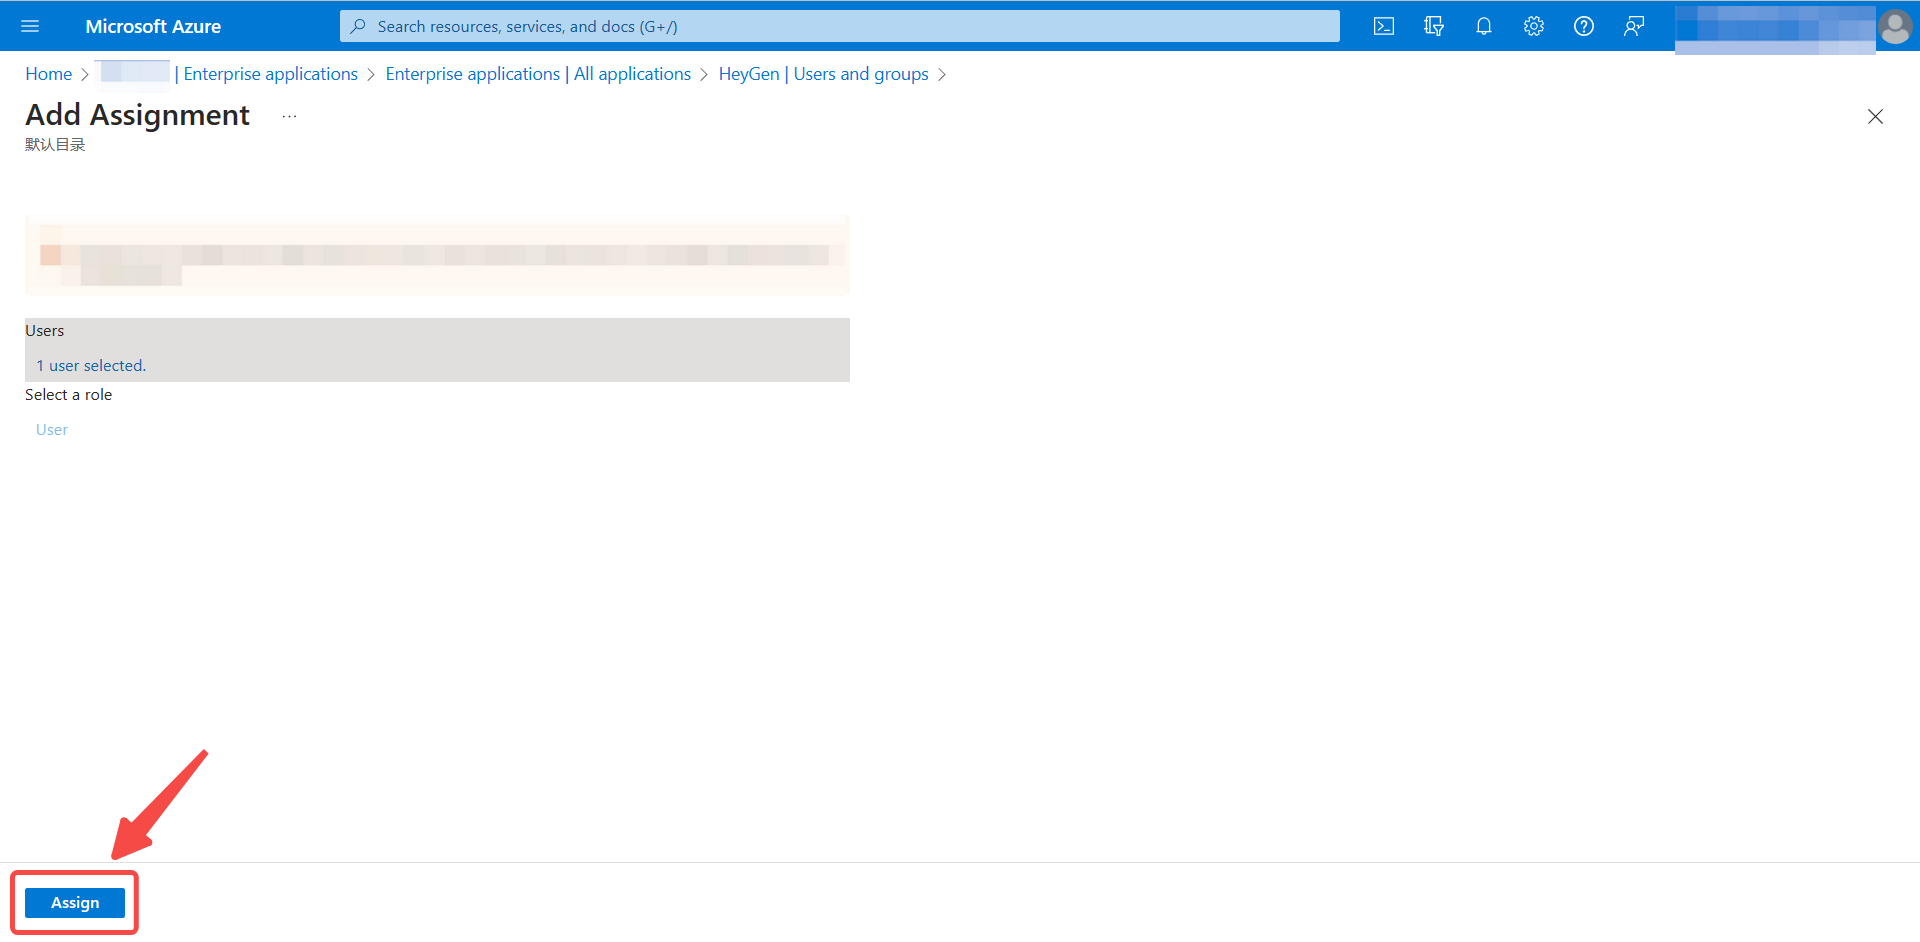
Click Assign
Step 3 - Get Setup Instructions
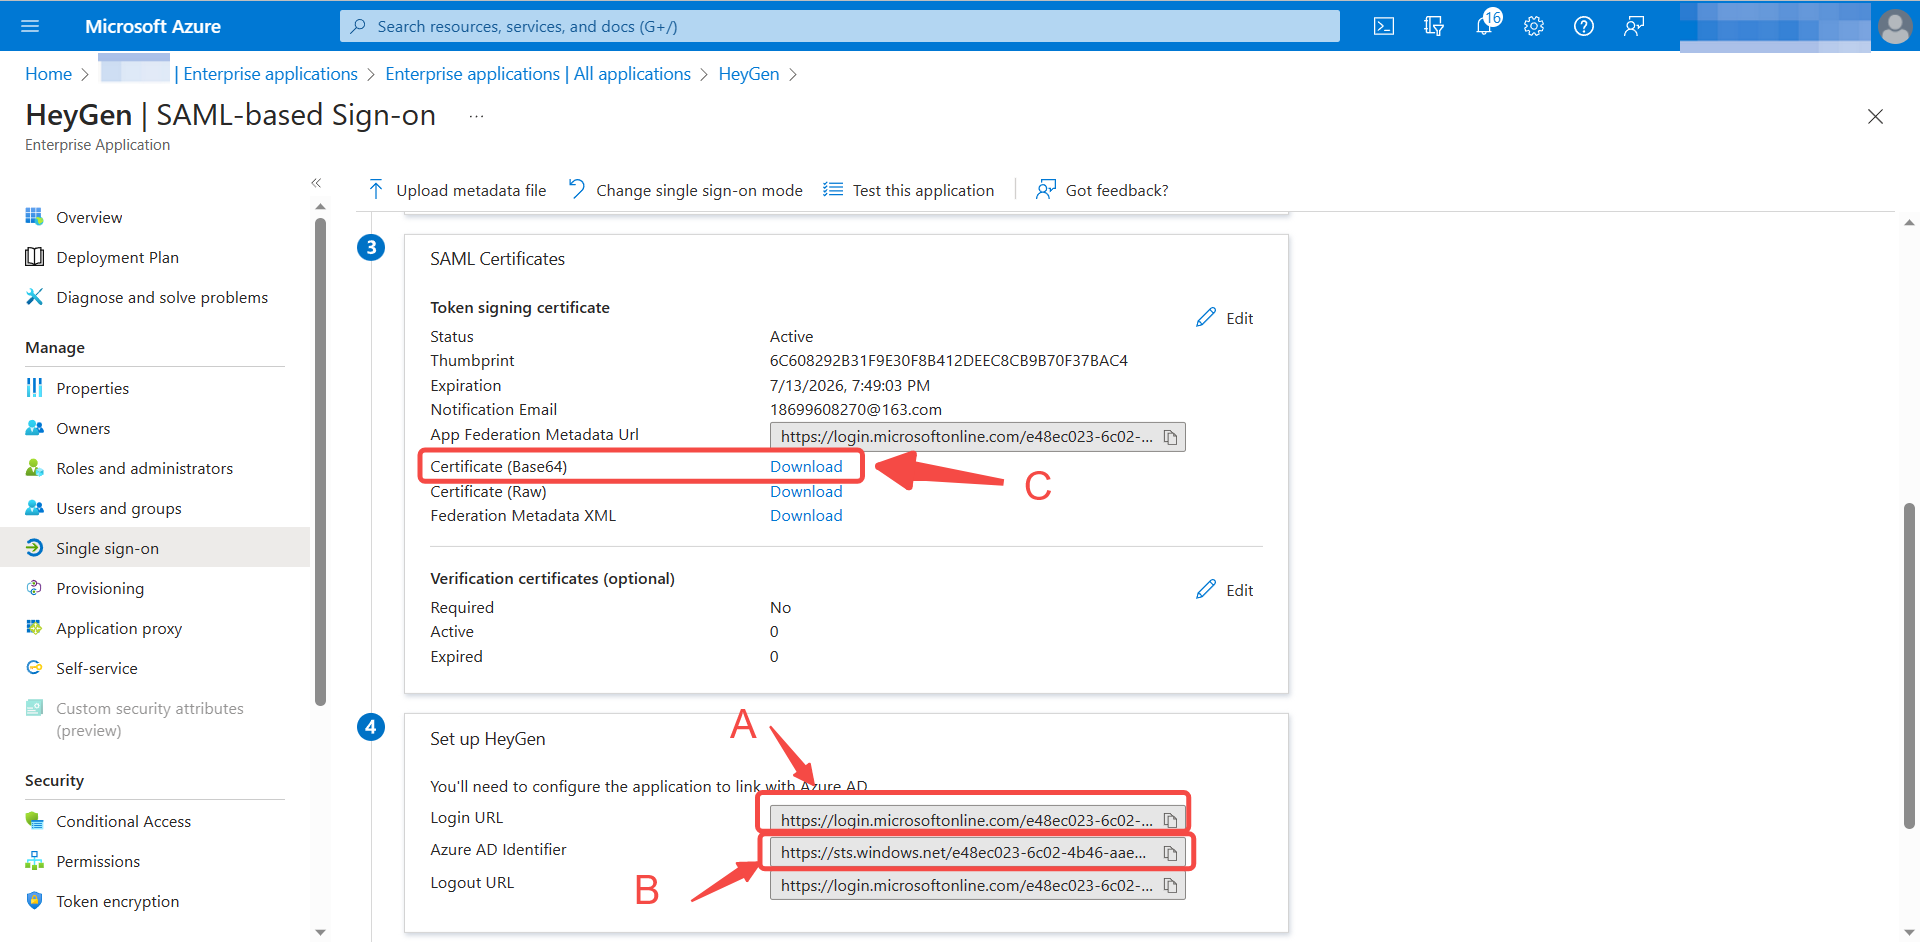
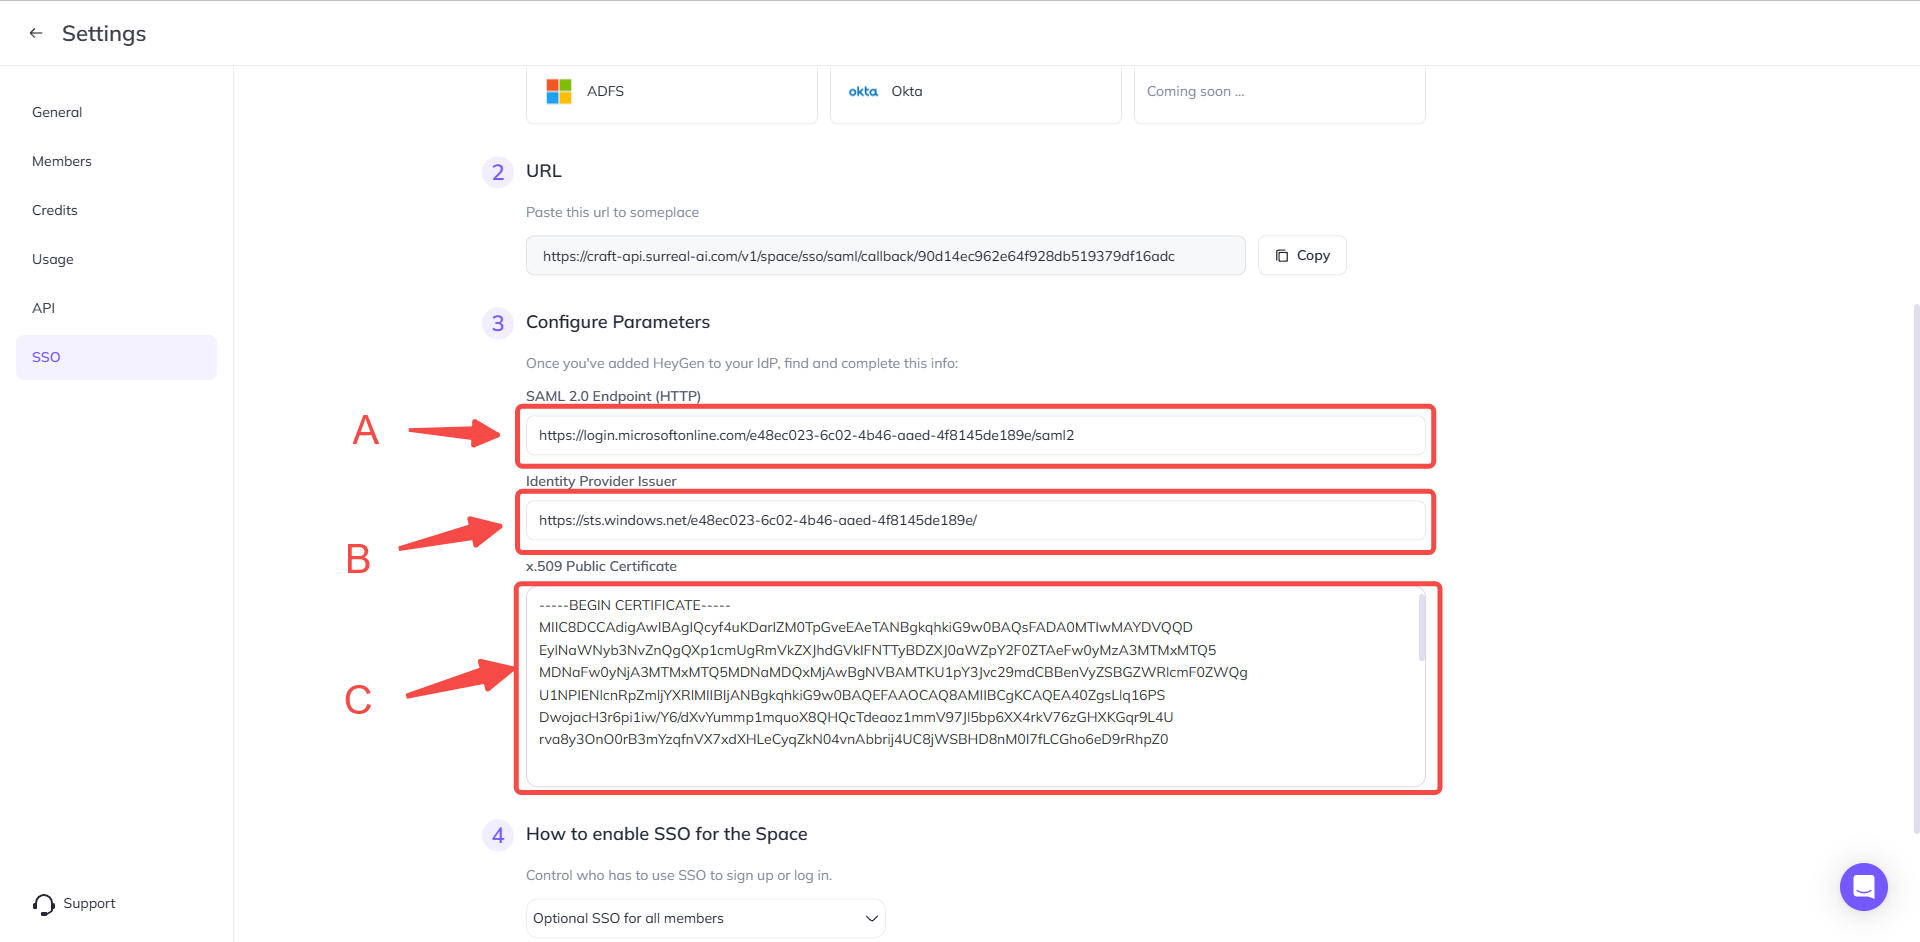
Find the following A/B/C in the Single sign-on Page. Then download and open C with notebook to get the content in C
Step 4 - Configure HeyGen SSO
On HeyGen SSO page,fill in the three parameter information obtained from Okta and click save
Step 5 - Sign in HeyGen using SSO
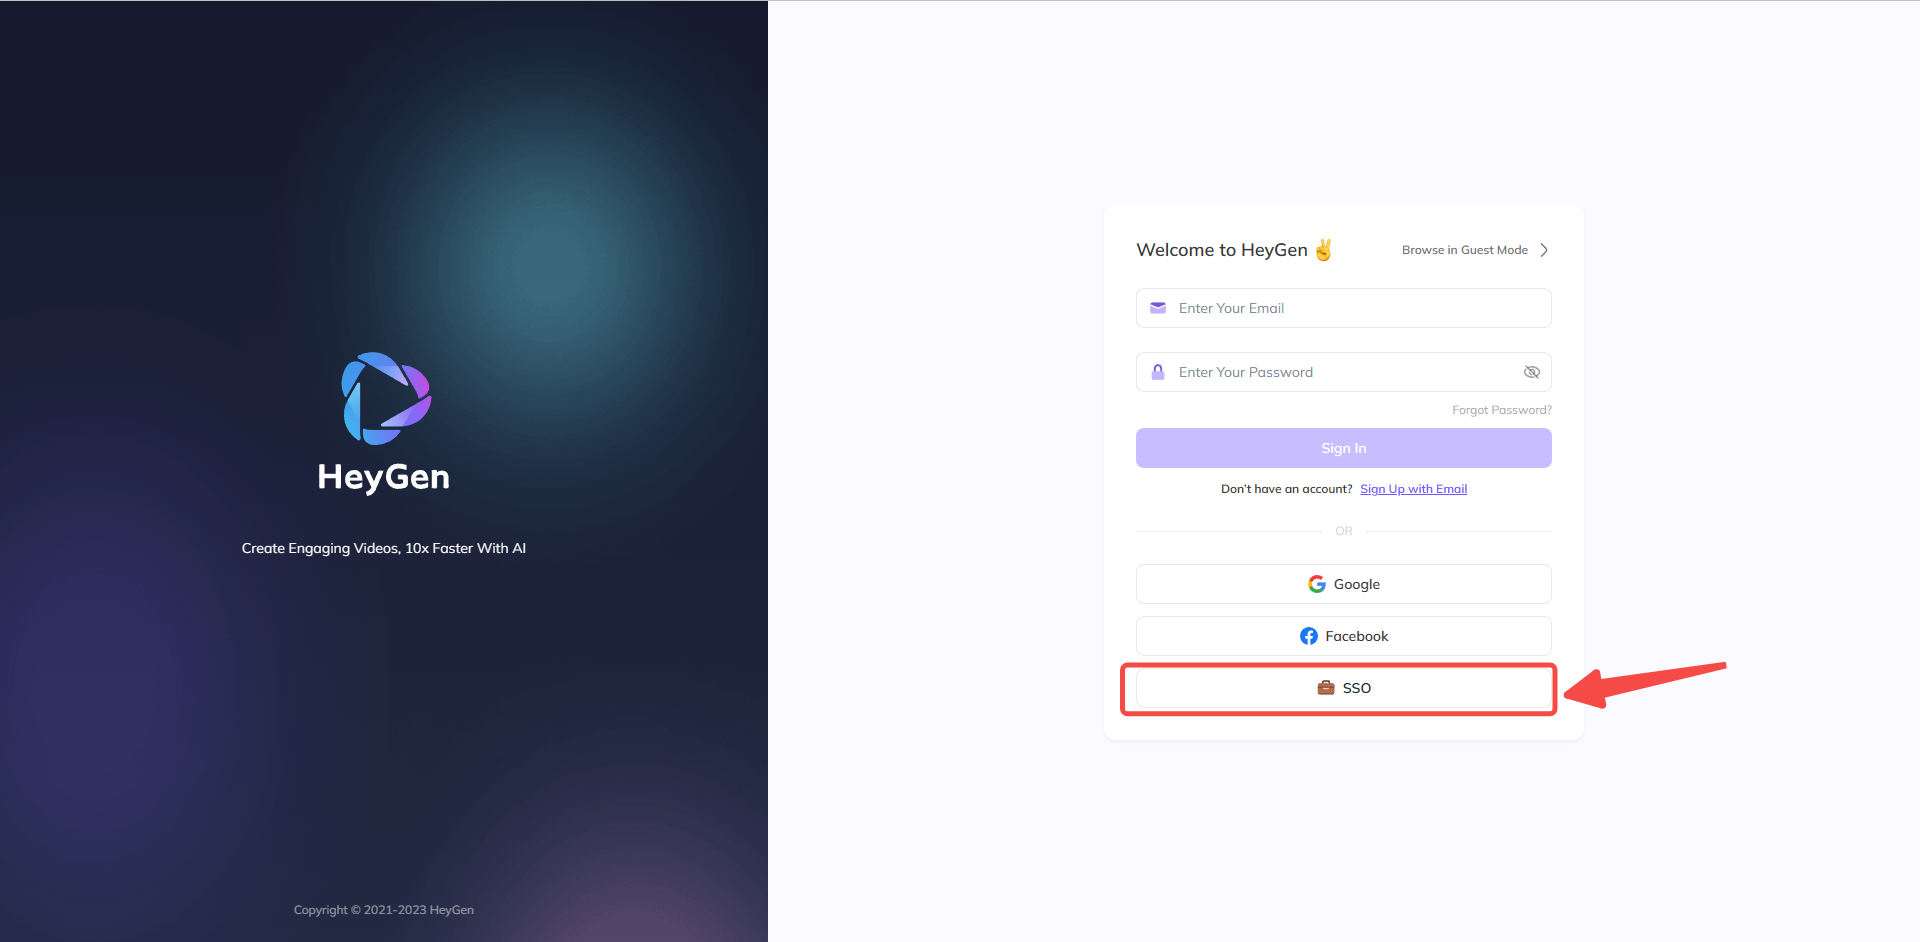
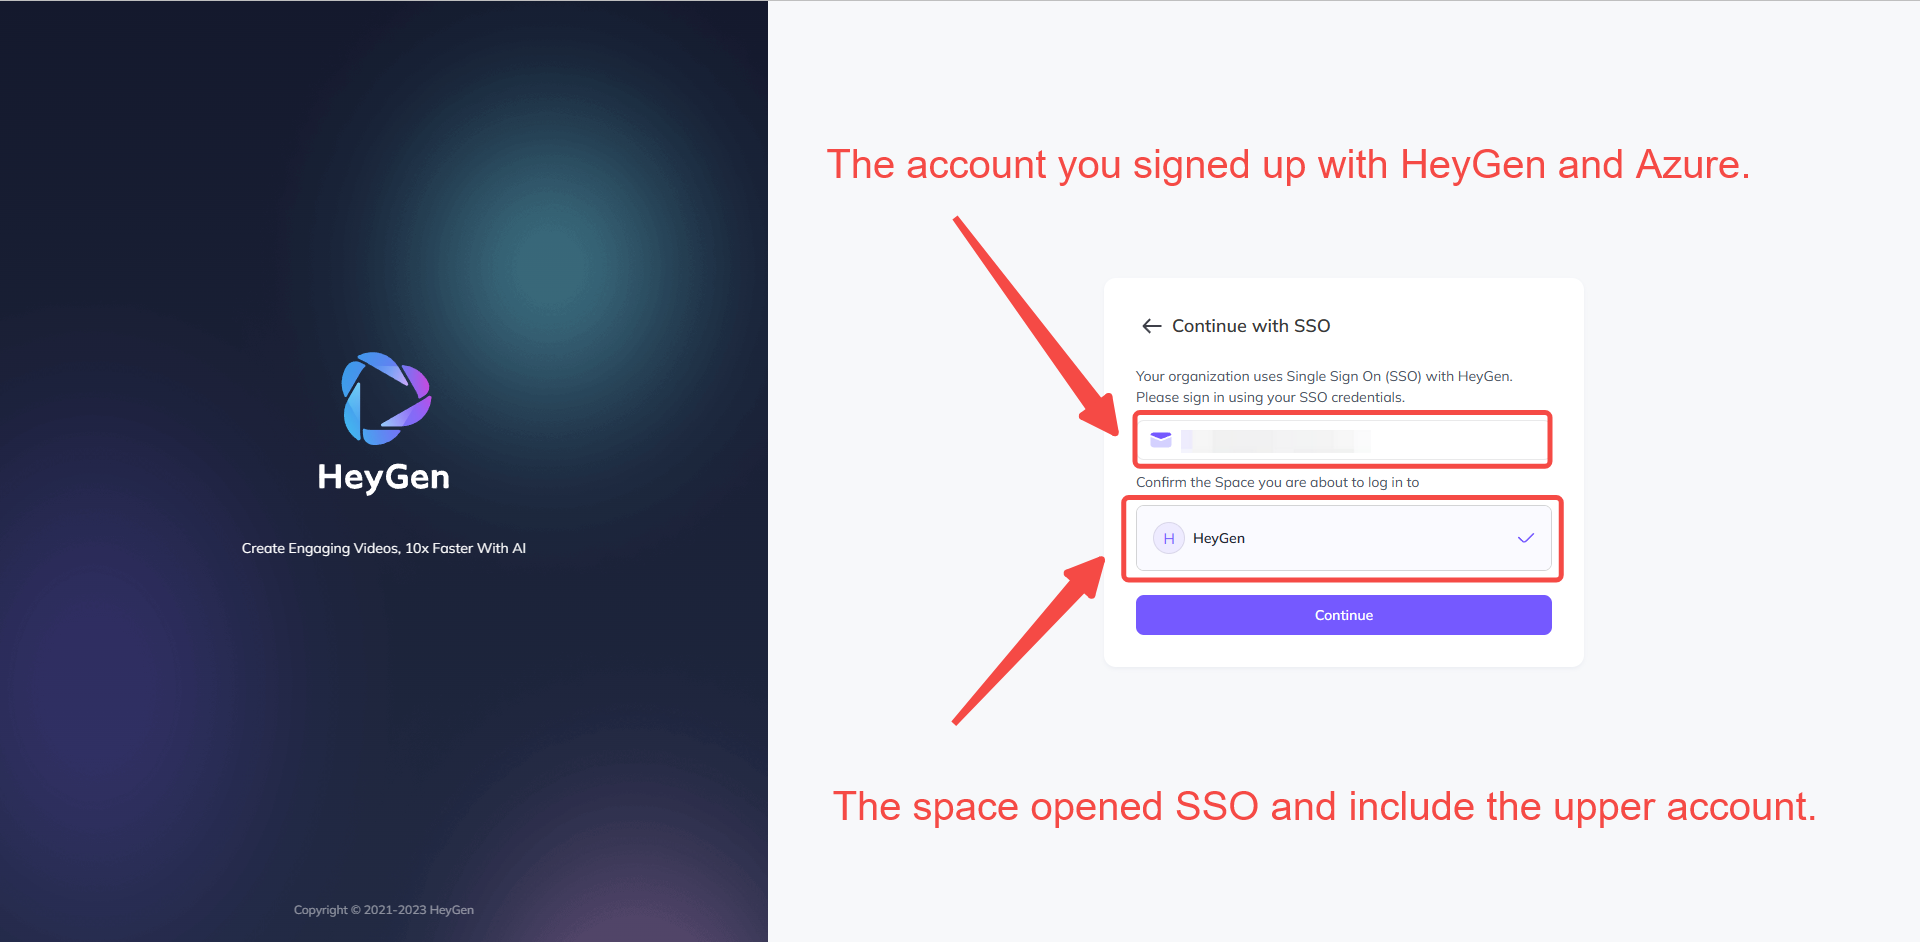
Click SSO in the login page


