Proposals with invoicing
Last updated March 26, 2024
With Cone, you can send proposals to your clients and create invoices automatically or manually once the proposal is signed. Below are the steps to create proposal, send to your client for e-signatures and manage invoices once proposal is accepted
Below are the steps to create a proposal, configure settings and manage invoicing
- Create a proposal for your client with the desired services
- Check that auto-invoicing option, when applicable, is configured for the services that have been used in the proposal
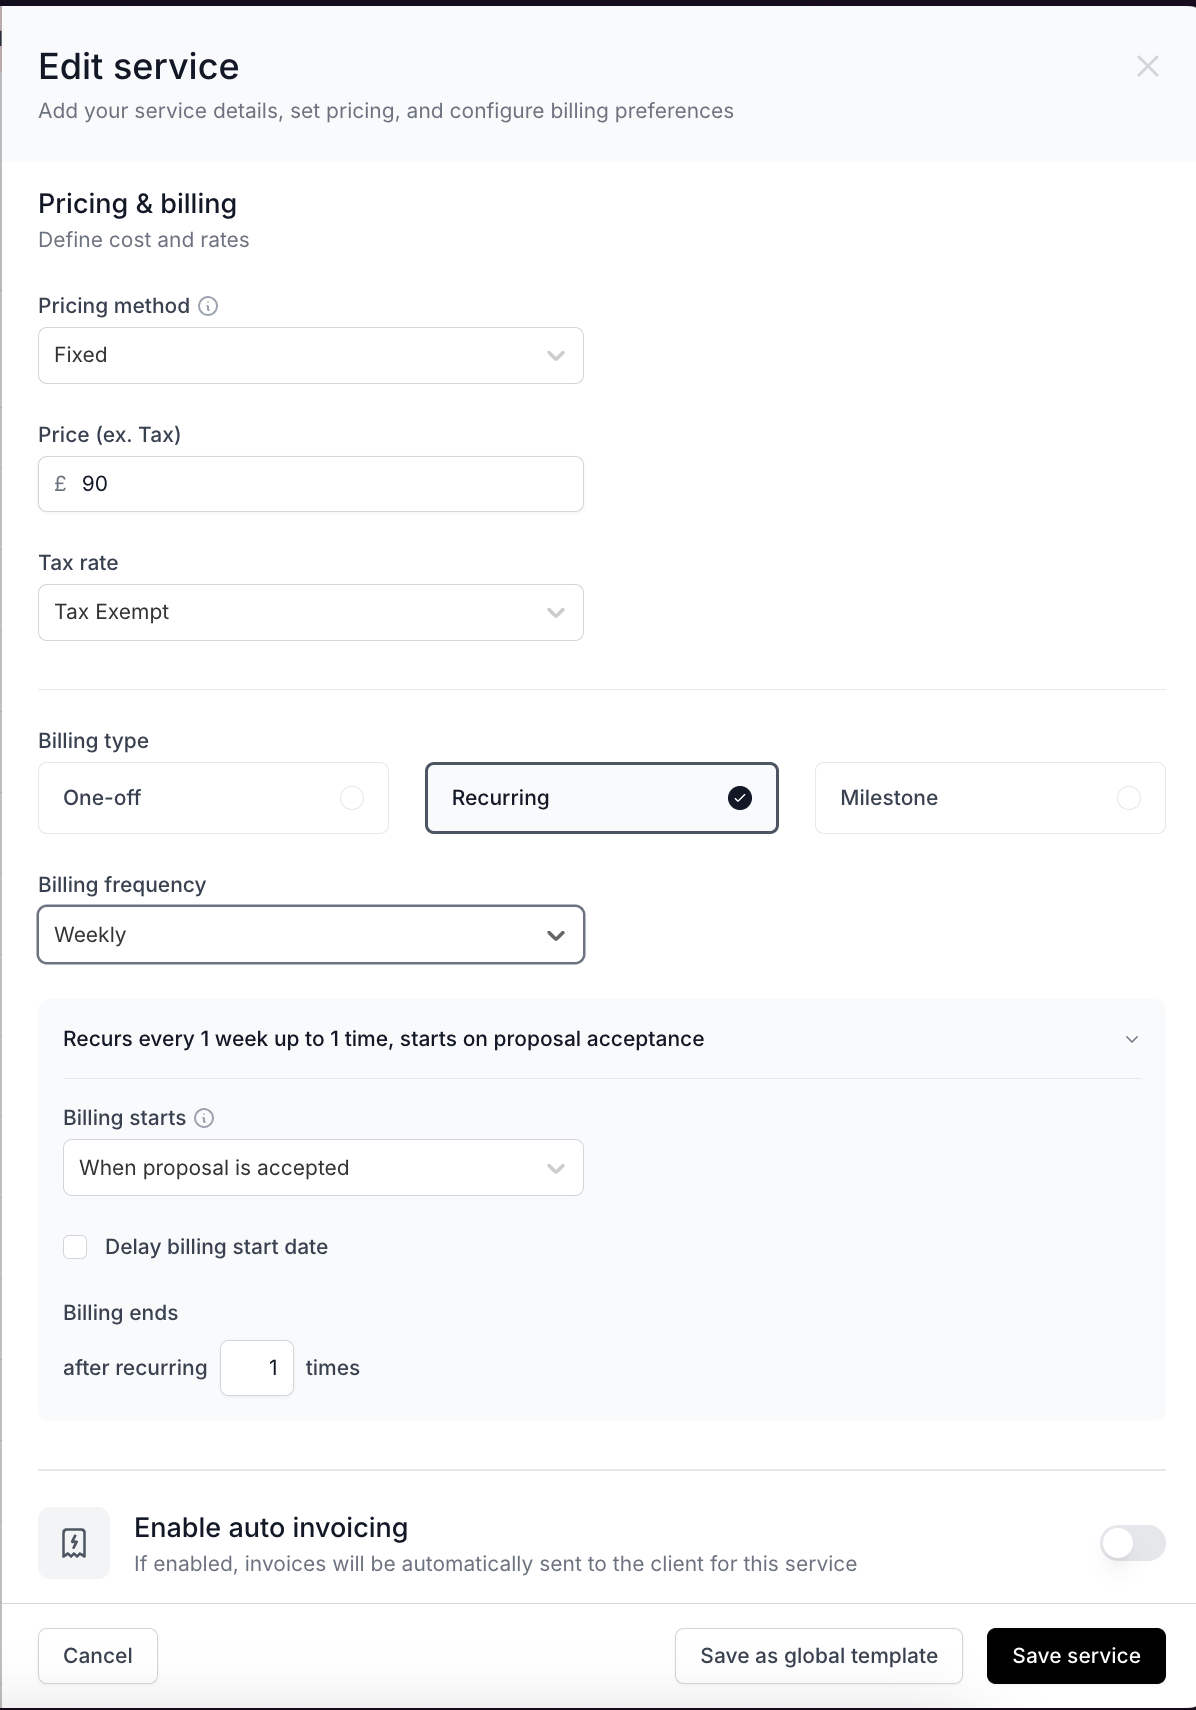
For auto-invoicing, you need to ensure that auto-invoicing flag is enabled in the service. You can enable this flag during the service creation or by editing an existing service. Without auto-invoicing enabled, invoices will not be automatically created and you have to manually invoice the services once proposal is accepted. You can learn more about auto-invoicing for services here
- Check that billing options are correctly configured for the services. This will impact when invoices will get generated
- If you want to collect payment details before a client signs the proposal, ensure it's enabled in the settings as described here
This option can be configured only when a payments account is created with Cone. You can create one as described here
- Once a proposal is accepted, if there were services with
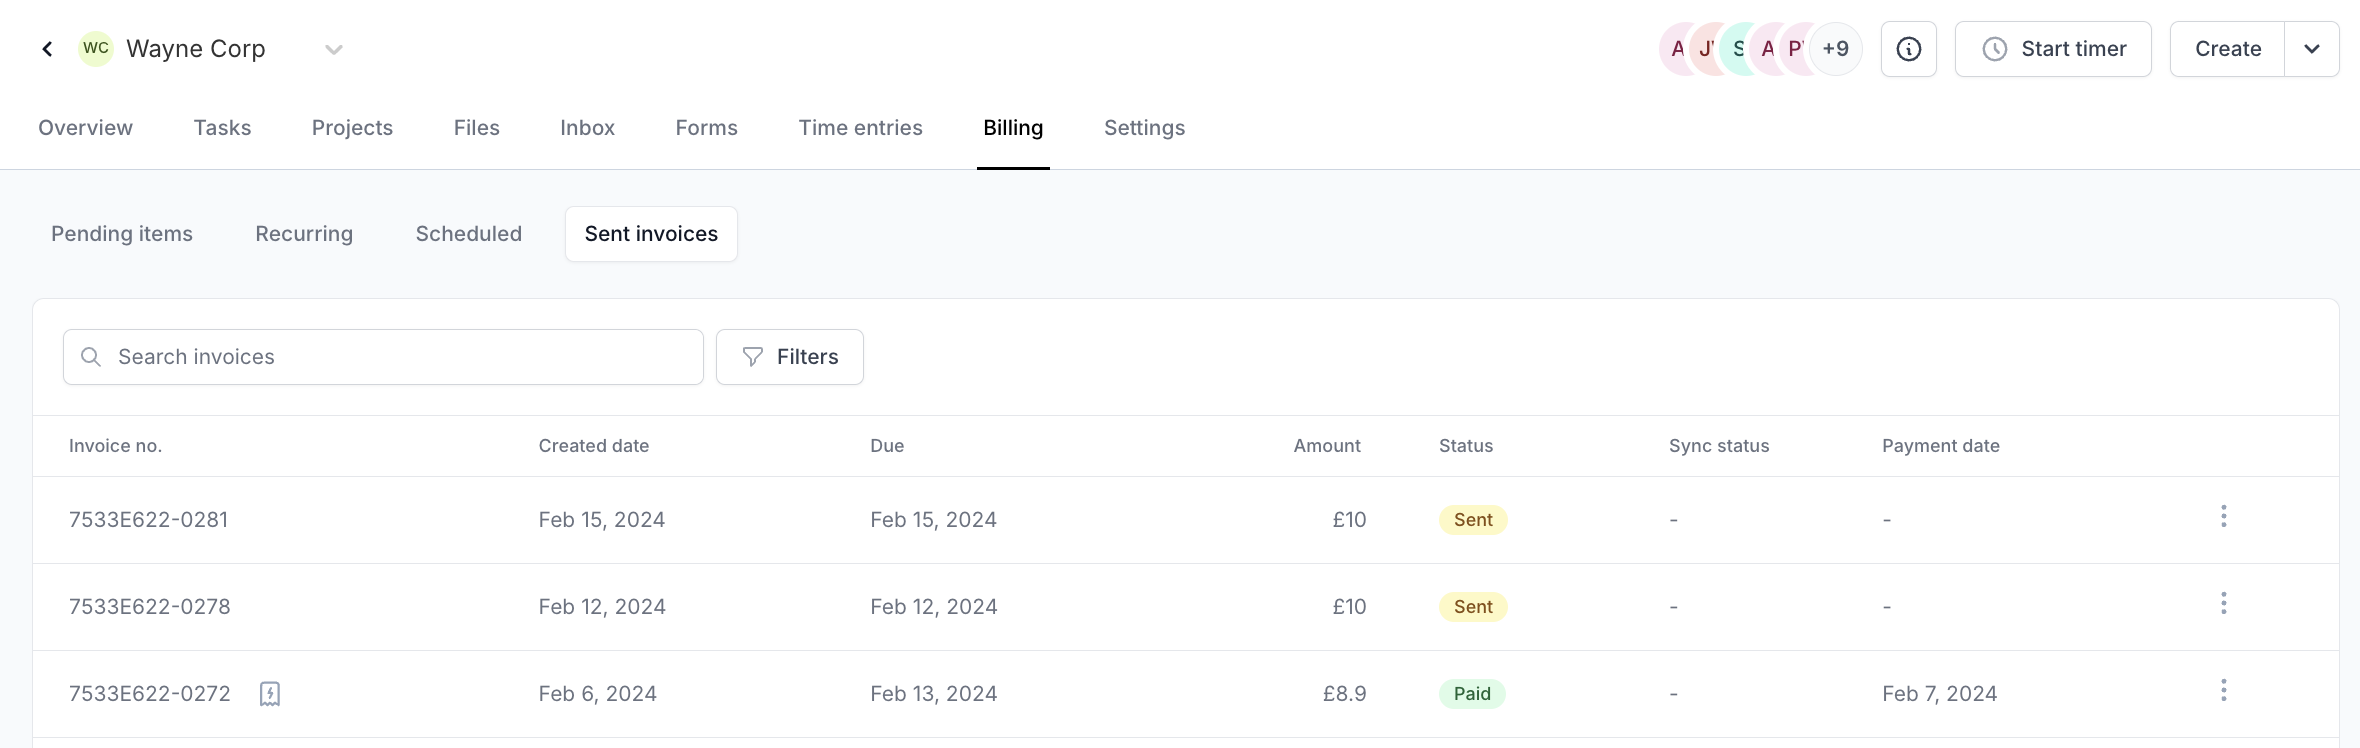
auto-invoiceenabled, an invoice will be created with those and sent to the client for payment. For the services withauto-invoicedisabled, billable service items will be added underPending ItemsinBillingunder a client's workspace. You can manually invoice these as described here - Sent invoices will be shown under
Sent InvoicesinBillingunder a client's workspace. You will be able to see the status of the payment as well there. More about sent invoices can be found here